PHOENIXWAN Replace with new panel 20220420
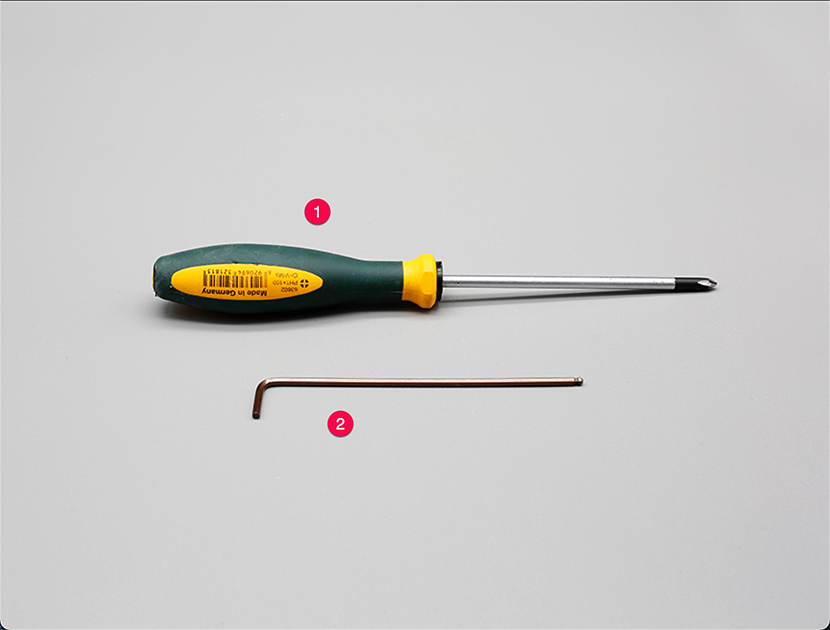
Prepare tools
①Phillips screwdriver;②2.5mm Hexagon screwdriver (wrench).
Panel film is double-sided
The panel film is double-sided, please note that both sides need to be torn.

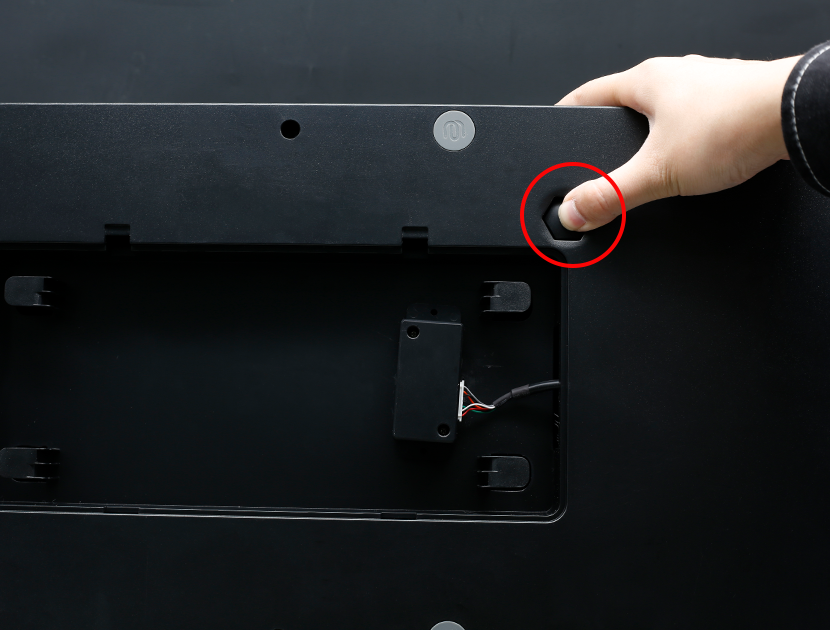
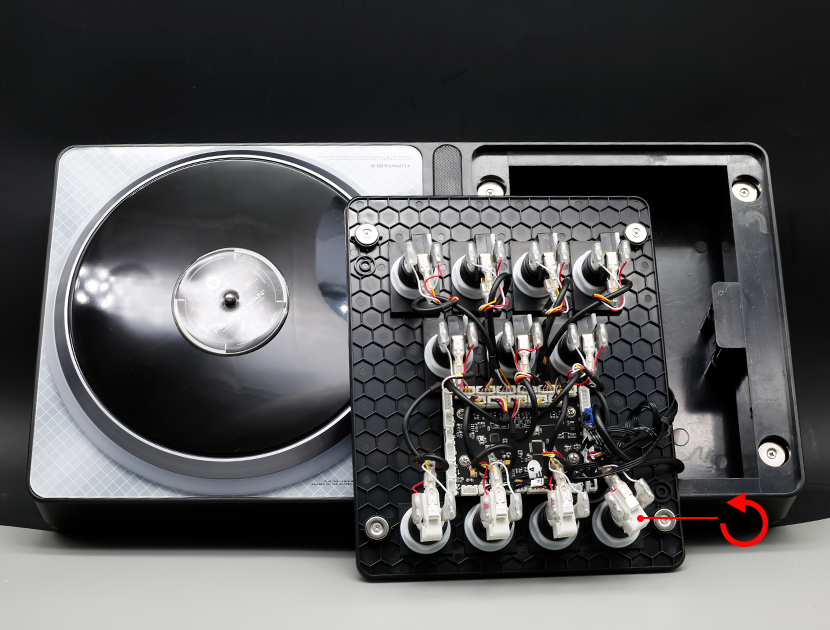
Replace the button part panel
Replace the button part panel, press the position of the hexagonal ejector column on the back of the controller.
Take out the ejected button panel
Take out the ejected button panel.
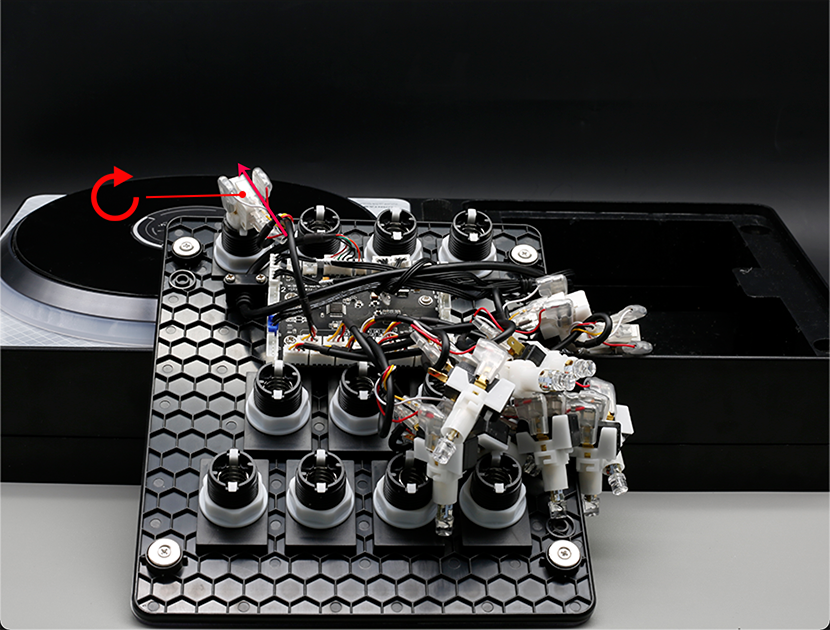
Remove the micro switch and LED part
Rotate counterclockwise to remove the micro switch and LED part. (Please pinch the micro switch for the sanwa button, and pull it out while shaking it left and right.)
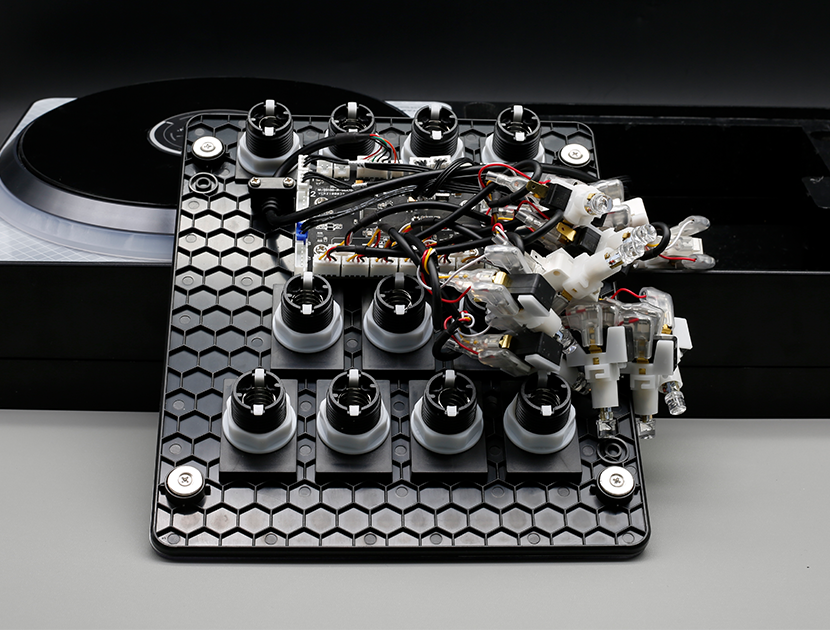
After removing all key microswitches
After removing all key microswitches.

Remove the white nut and button
Remove the white nut and remove the button.

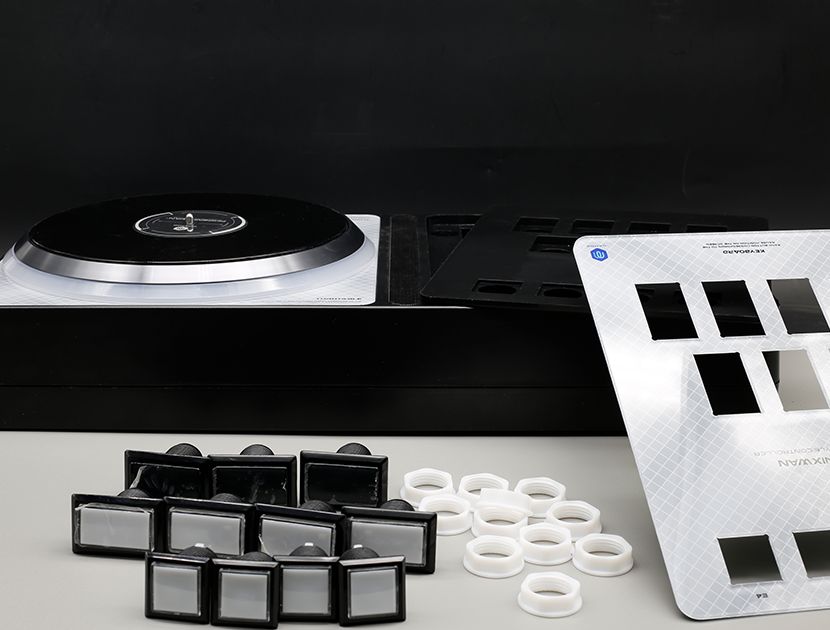
After removing all buttons
After removing all buttons.
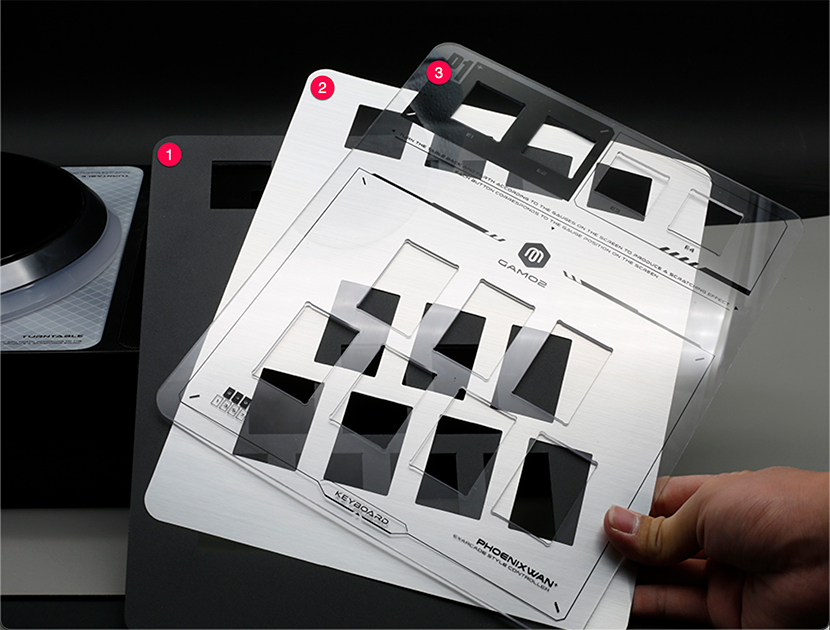
Arrange new panels neatly in order
Arrange new panels neatly in order. (If you like black background, please remove ③ silver cardboard.)
Put the 4 corner buttons first
Put the 4 corner buttons first to fix the panel position.

Secure the four buttons with white nuts
Use the white nuts to secure the four buttons and install all the buttons back in place.
Put the micro switch back in its original position
Put the micro switch back in its original position. (The ordinary button is placed in the button according to the angle of the red line and then rotated clockwise. The sanwa button is shaken left and right and pressed down.)
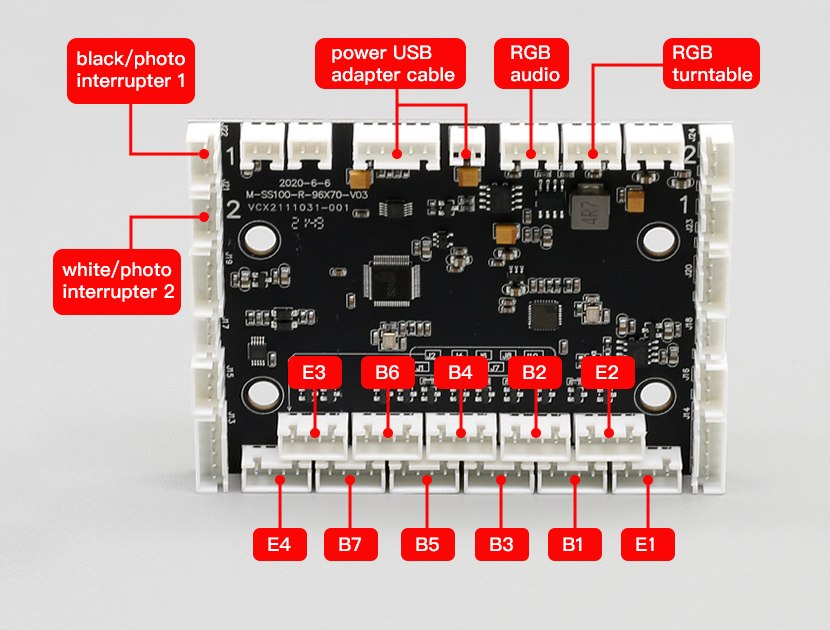
The corresponding position of the button on the PCB — New PCB:
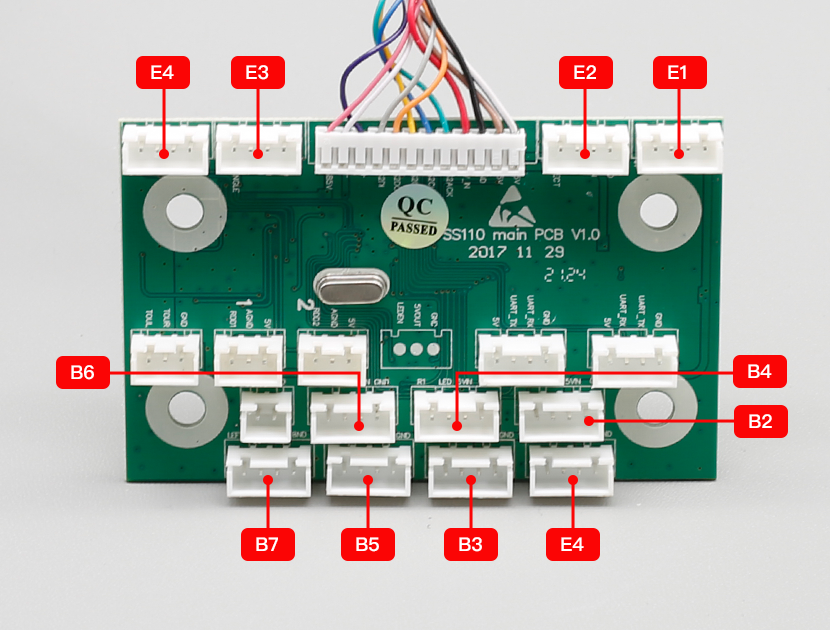
Old PCB:
Put the button panel back on the controller
Put the button panel back on the controller.
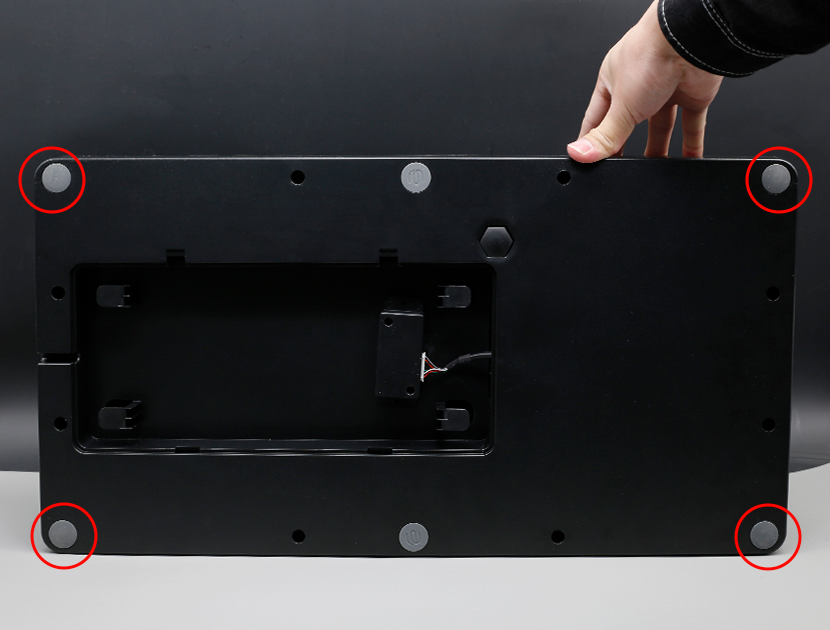
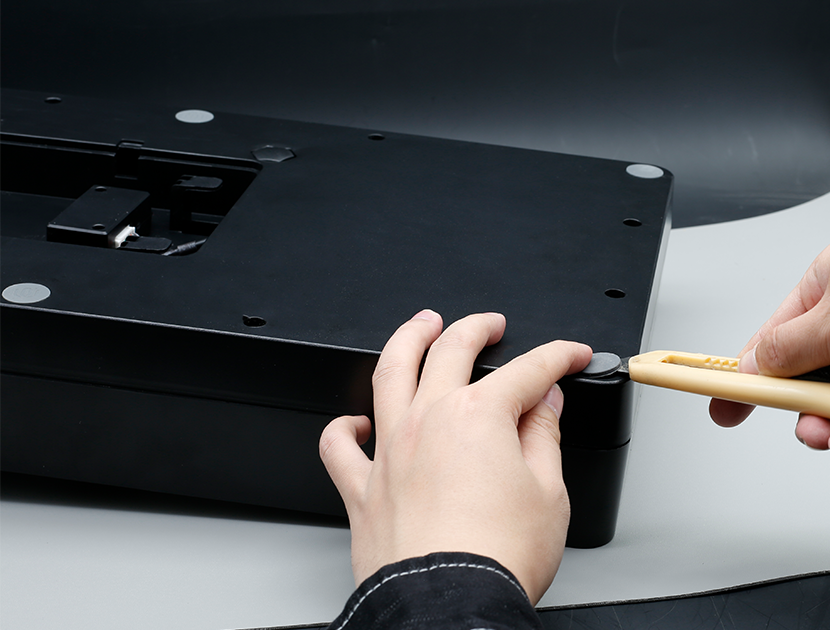
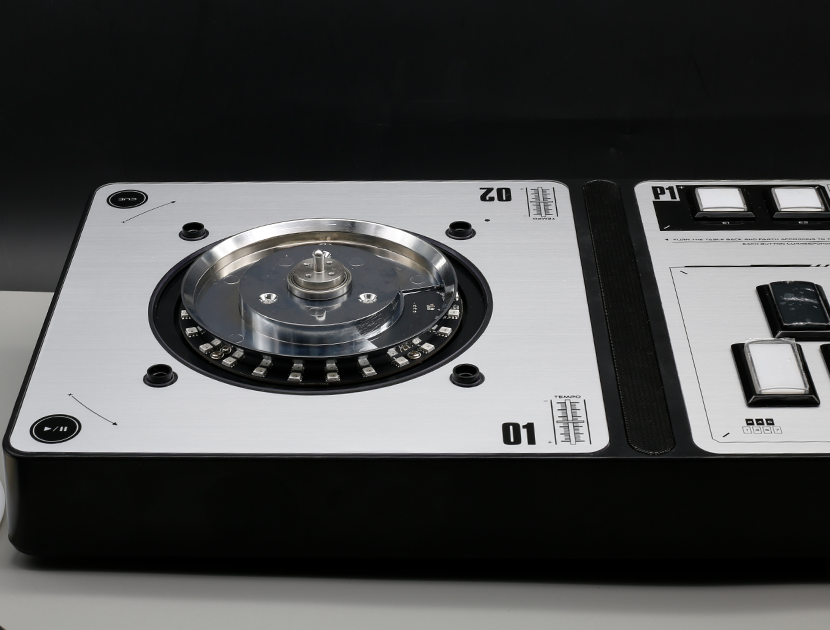
Replace the turntable panel — pry off the four corner pads
Replace the turntable panel, pry off the four corner pads.

Pry off the four corner pads
Pry off the four corner pads.
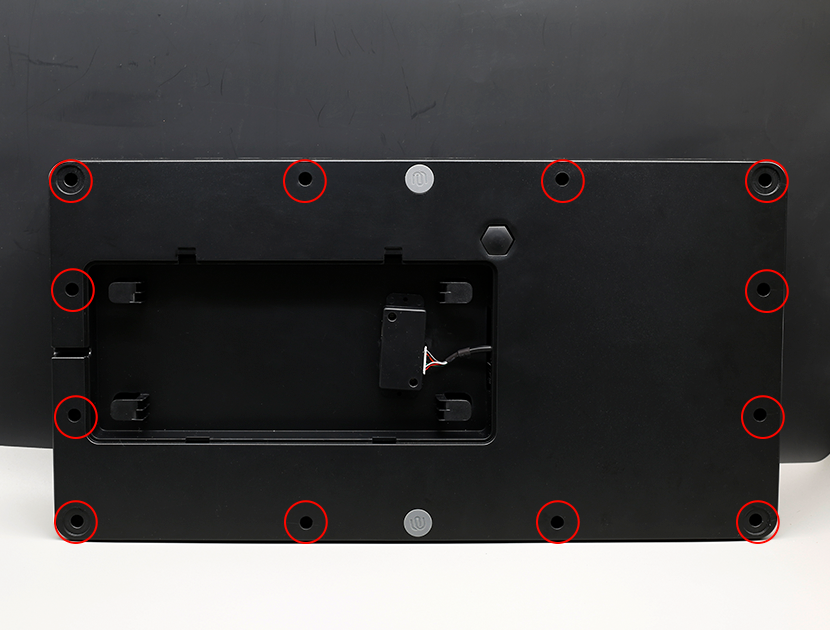
Remove the screws securing the housing
Remove the screws securing the housing.
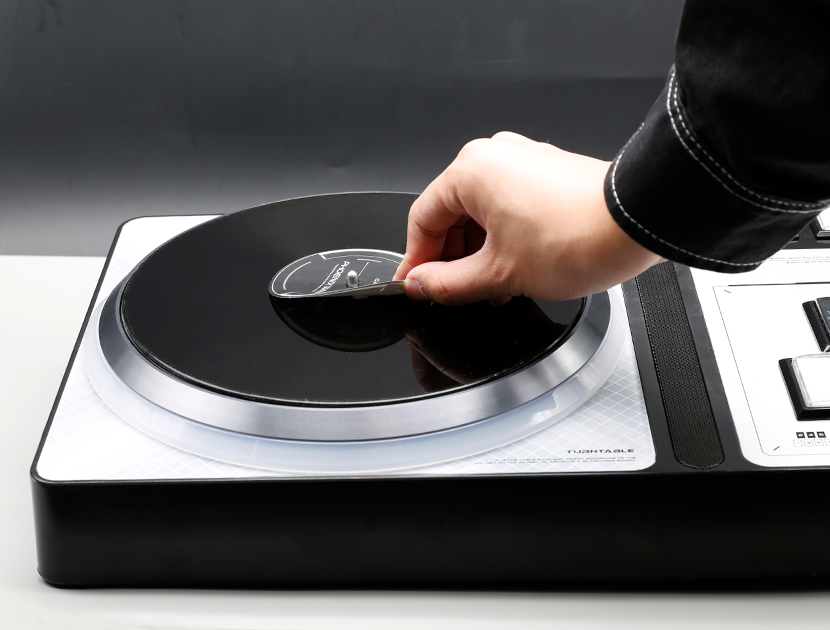
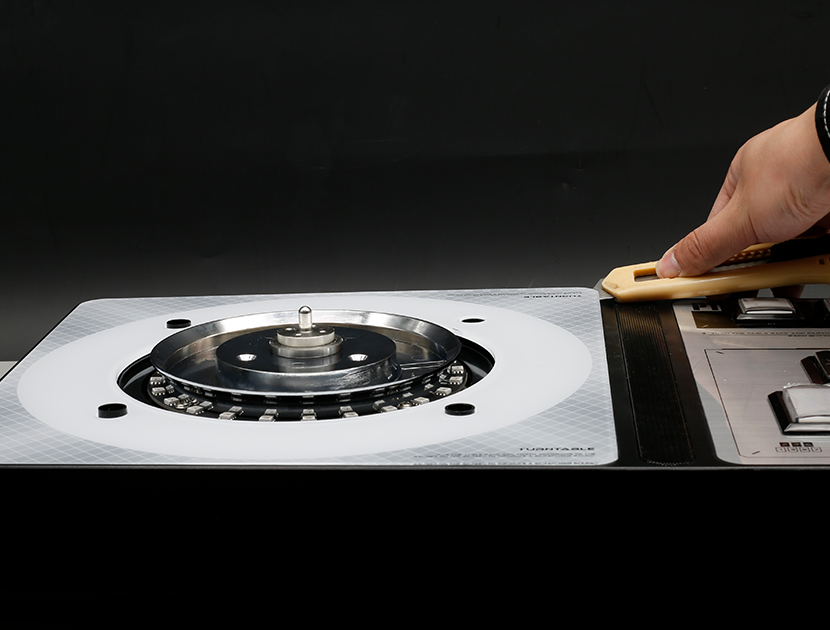
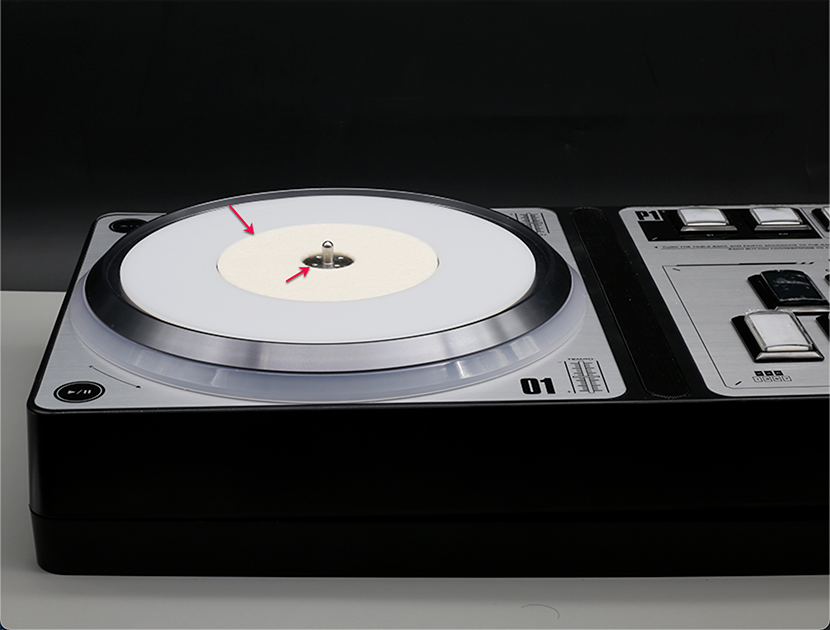
Peel off the turntable sticker
Peel off the turntable sticker.
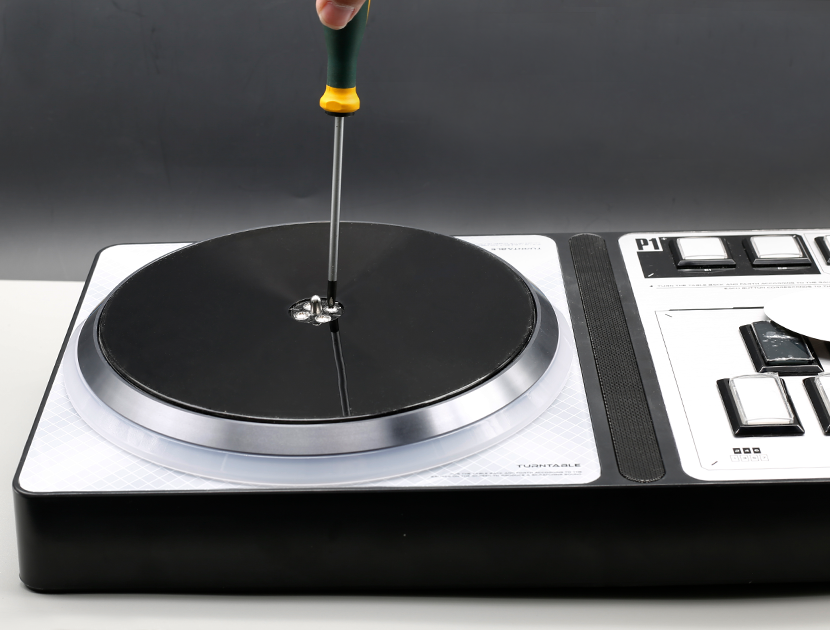
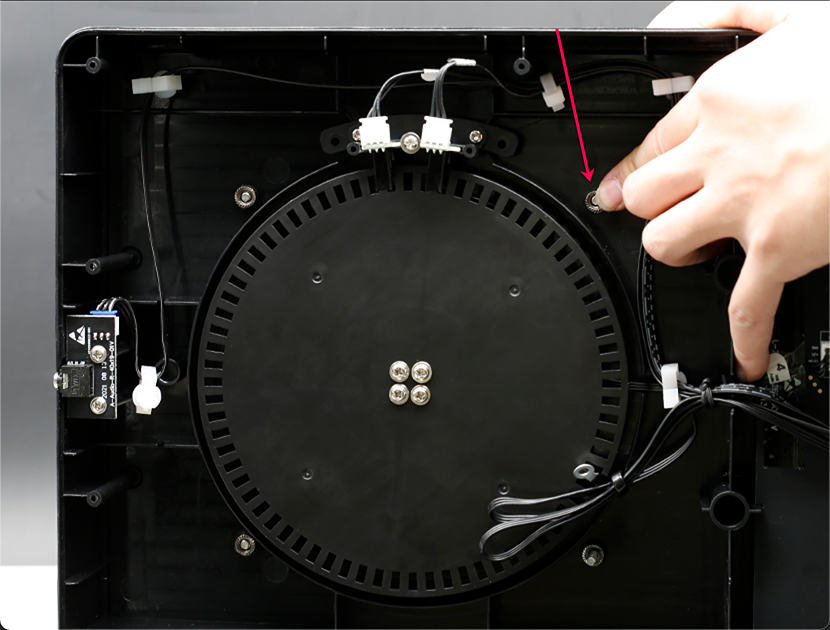
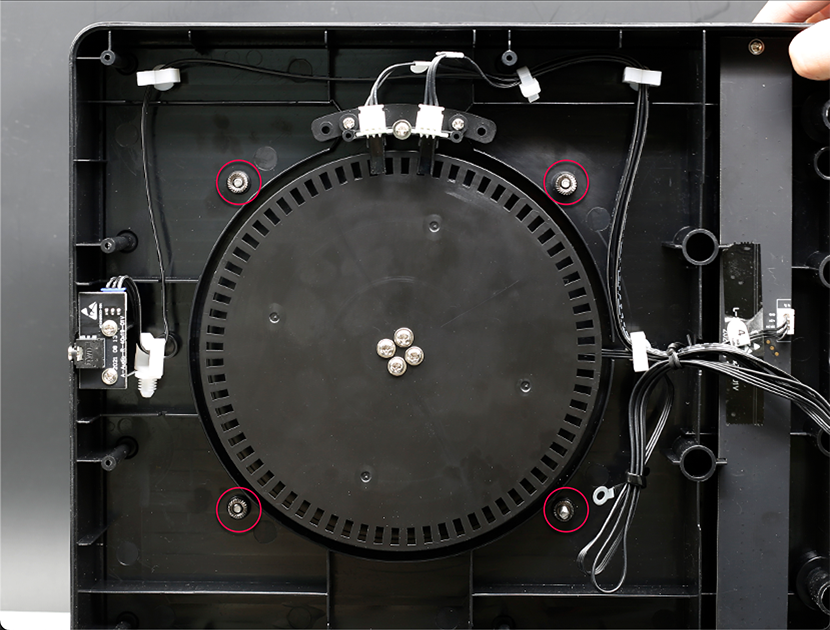
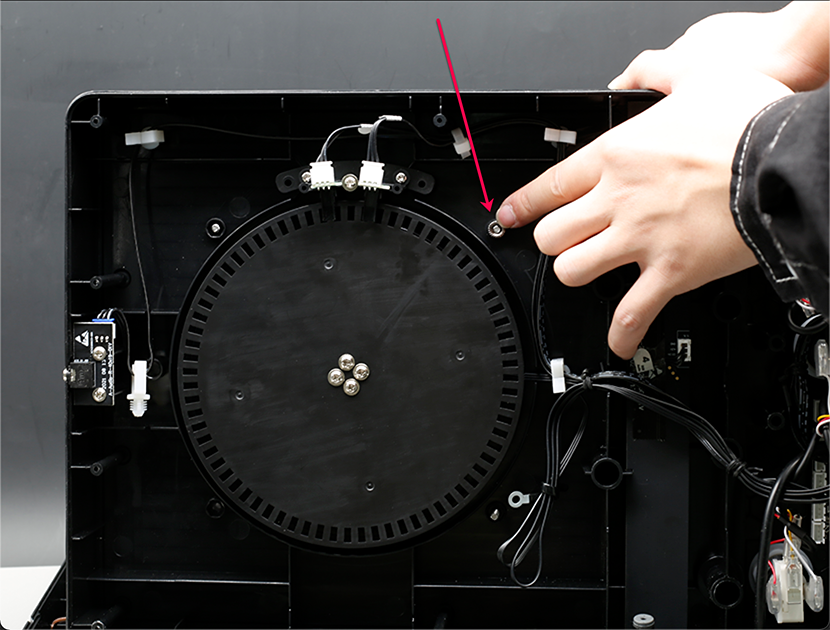
Remove the screws securing the turntable
Remove the screws securing the turntable.
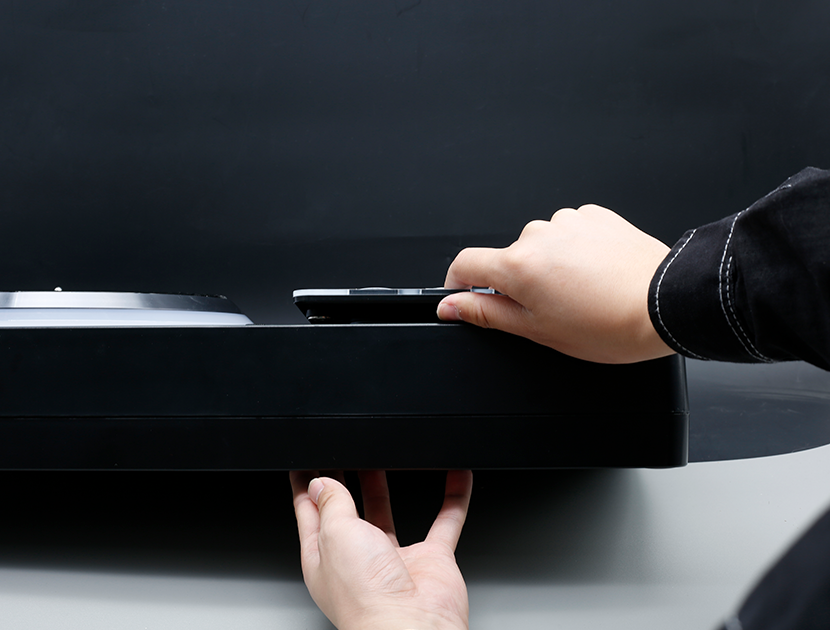
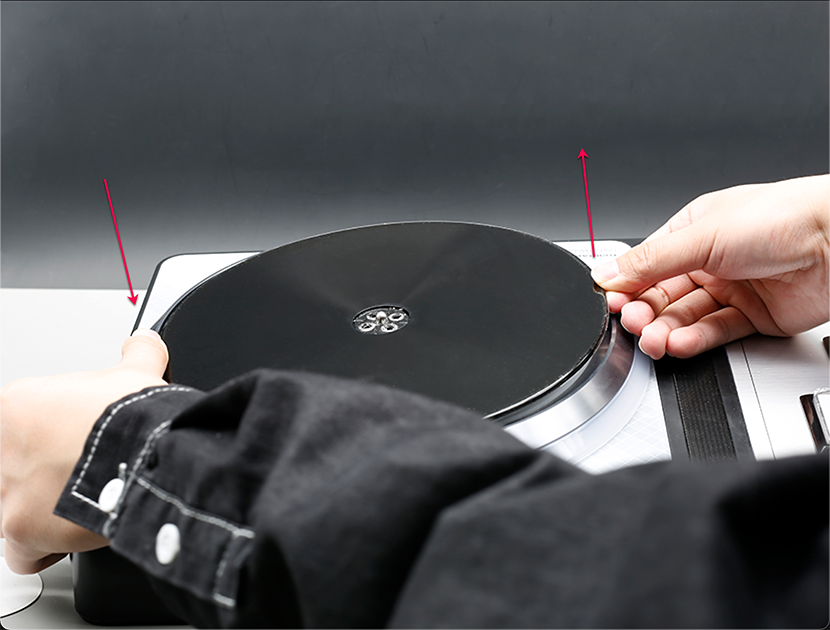
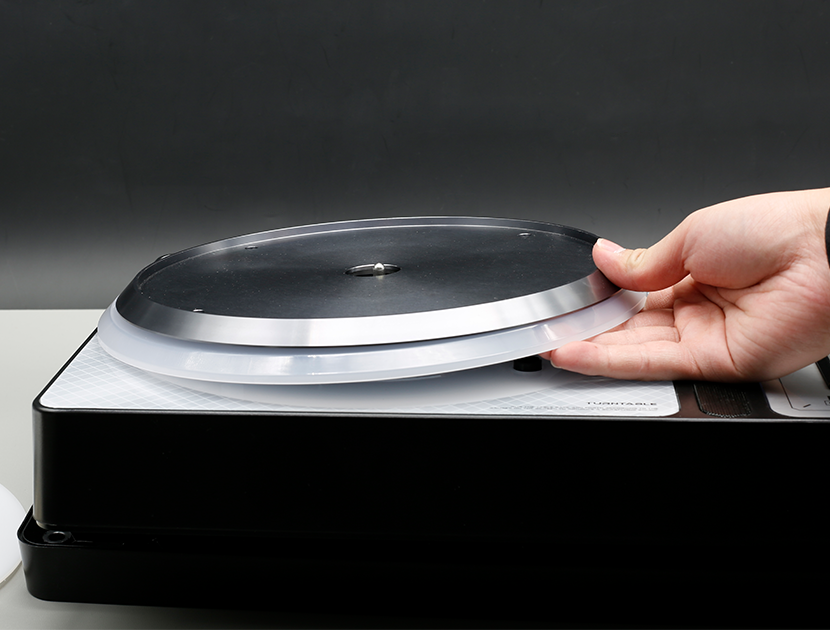
Lift the turntable out
Press down on one side of the turntable with one hand to lift the other side, while the other hand lifts the turntable out of the raised part.
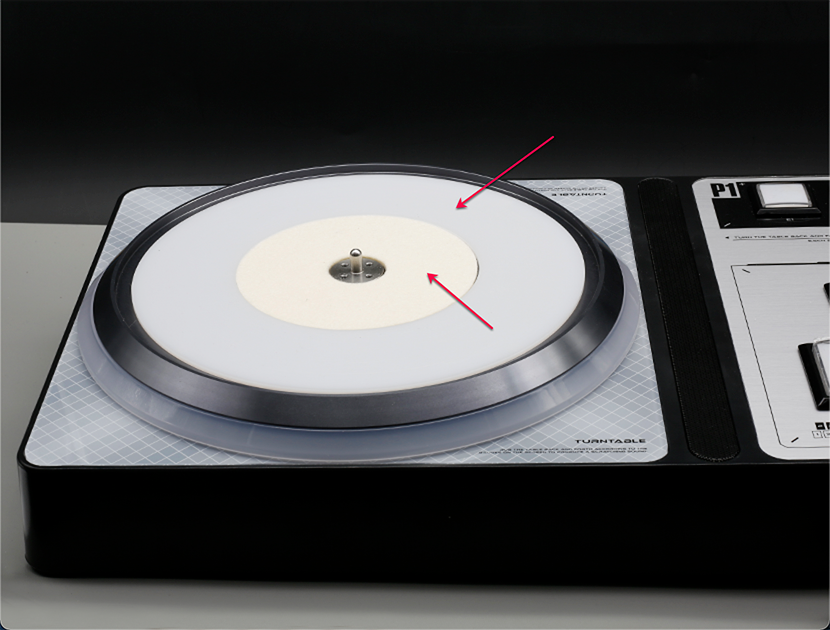
Take out the felt and washer
Take out the felt and washer.
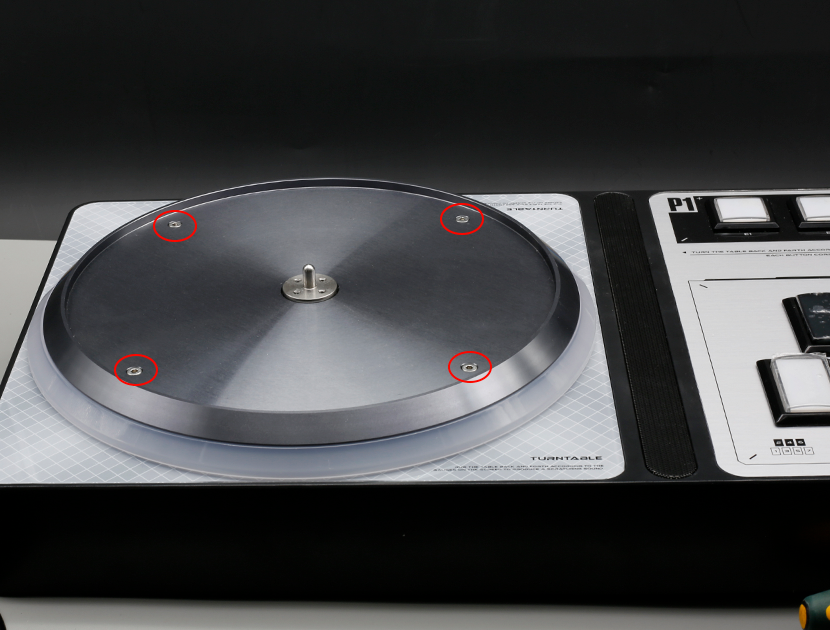
Remove the screw fixing the aluminum plate
Use a 2.5mm hexagon wrench to remove the screw fixing the aluminum plate. Please pay attention to the nut with the fixing screw inside. When removing, please hold down the nut to prevent loss.
Use a hex wrench
Use a hex wrench.
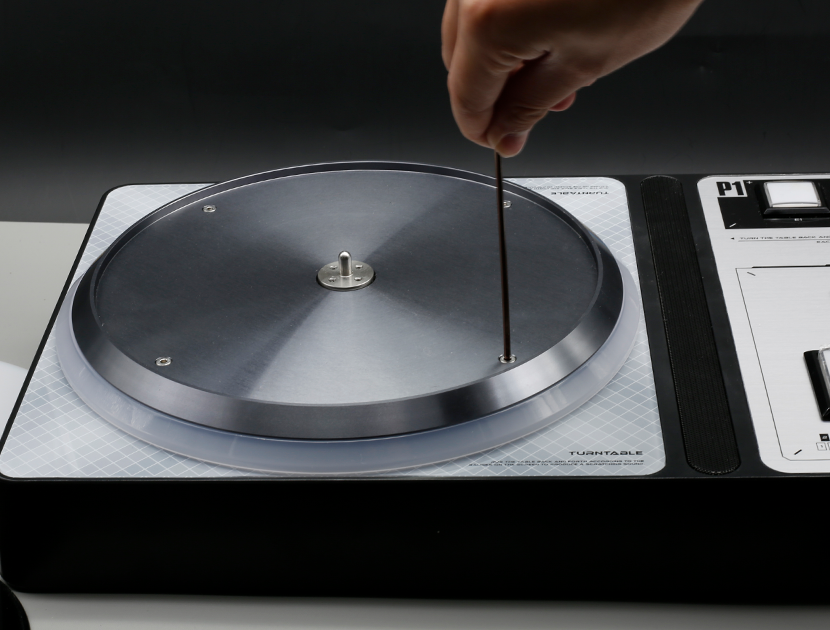
Hold down the fixed nut
Hold down the fixed nut.
Remove the turntable part in its entirety
The turntable part can be removed in its entirety after removing the bolts and nuts.
Remove the turntable part
Remove the turntable part.
Take out the panel
Take out the panel.
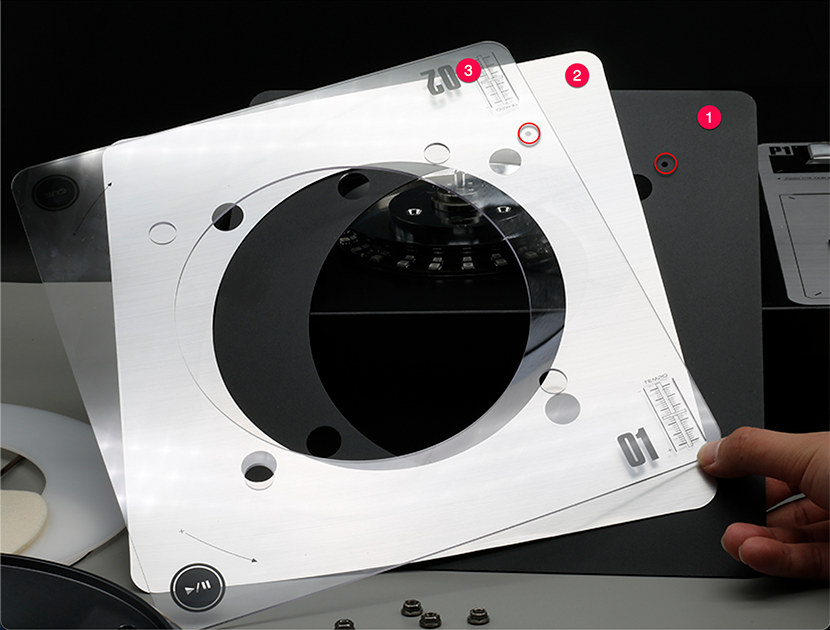
Arrange the new panels in order
Arrange the new panels in order. (If you like the black background, please remove ② the silver cardboard, and note that the black hole is on the upper right.)
Neatly arranged
Neatly arranged.
Put the light guide ring and aluminum plate back in place
Put the light guide ring and aluminum plate back in place.

Tighten the bolts and nuts that fix the aluminum plate
Tighten the bolts and nuts that fix the aluminum plate. (After inserting the nut into the fixed position, hold down the nut and tighten the screw.)
Put the felt and washer back in place
Put the felt and washer back in place, being careful not to overlap.
Put the turntable back in place and tighten the screws
Put the turntable back in place and tighten the screws.
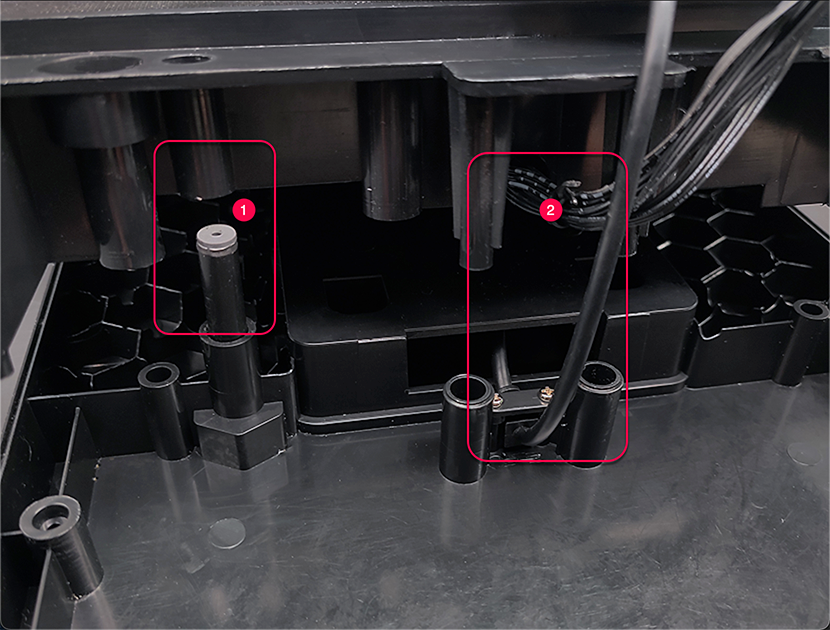
Fit the upper and lower shells together
First remove the button panel, align the ① and confirm that the wire at ② will not be stuck, and then fit the upper and lower shells together.
Replace the retaining screws and attach the pads
Replace the retaining screws on the back and attach the pads to the four corners.