How to Replace the Encoder
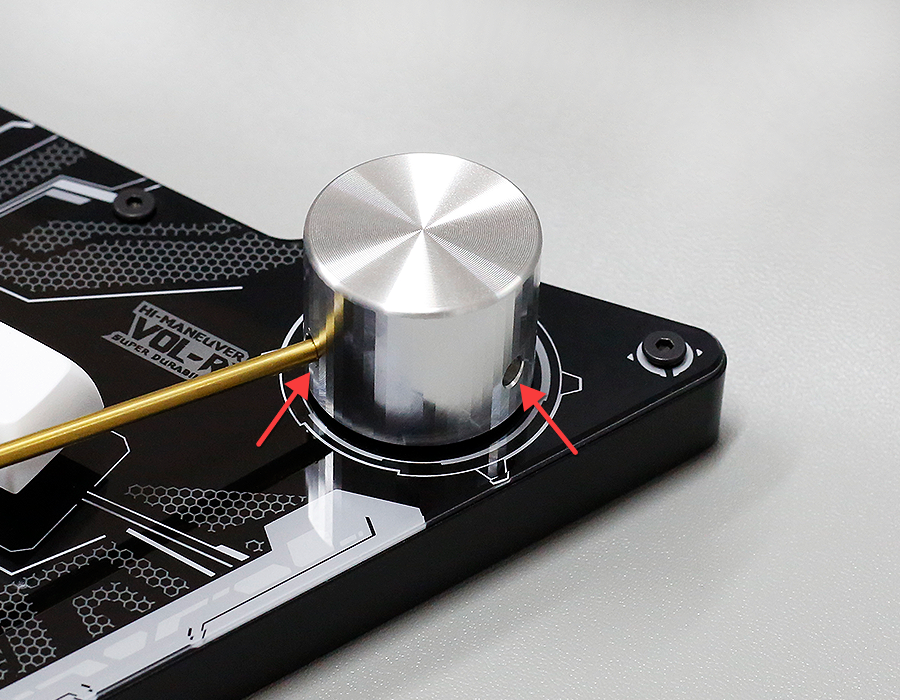
Disassemble the Knob
Use a 2.0mm hex wrench (or screwdriver) to disassemble the knob. Note that each knob has two screws that need to be loosened.
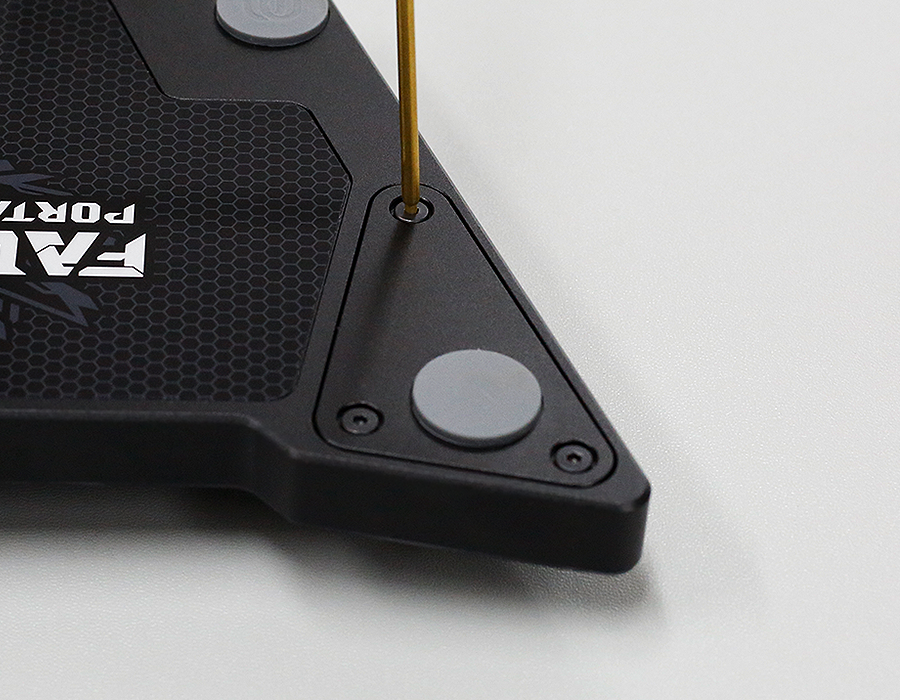
Remove the Transparent Gasket
Note that there is 1 transparent gasket on the encoder — be careful to remove it.

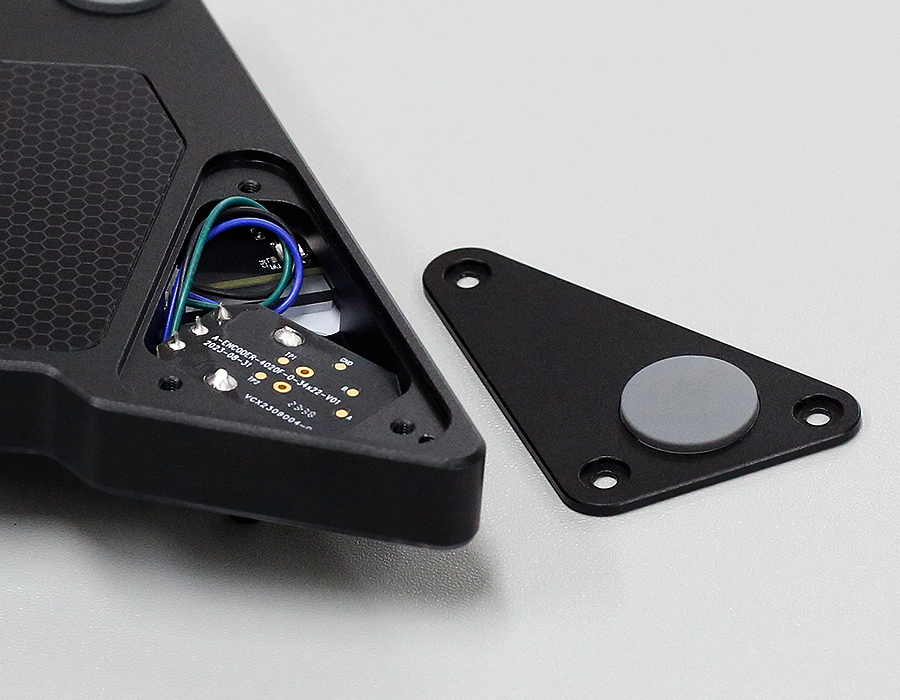
Remove the 3 Screws on the Back
Remove the 3 screws on the bottom and take off the cover plate.
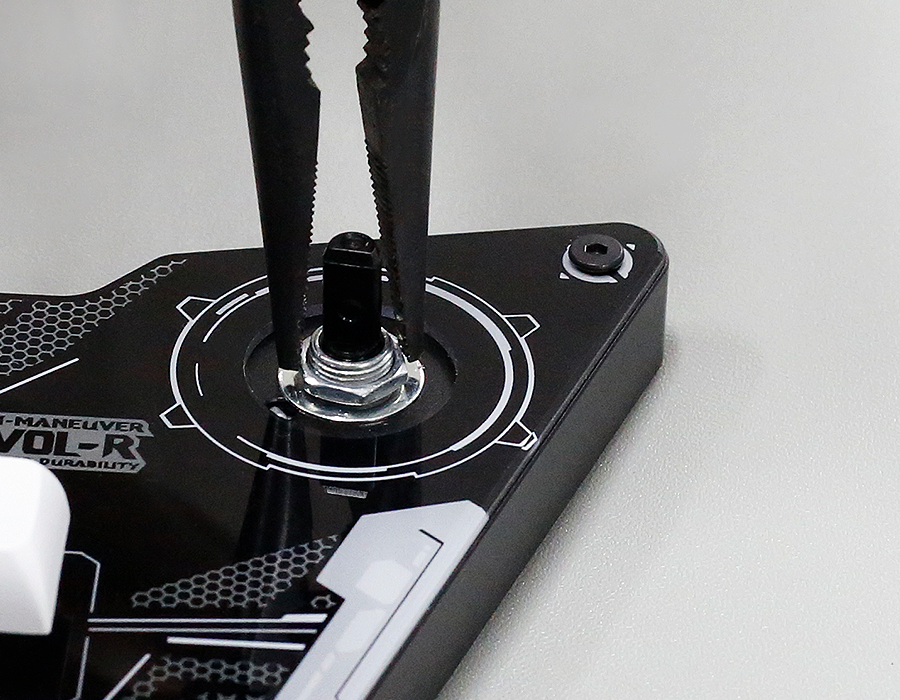
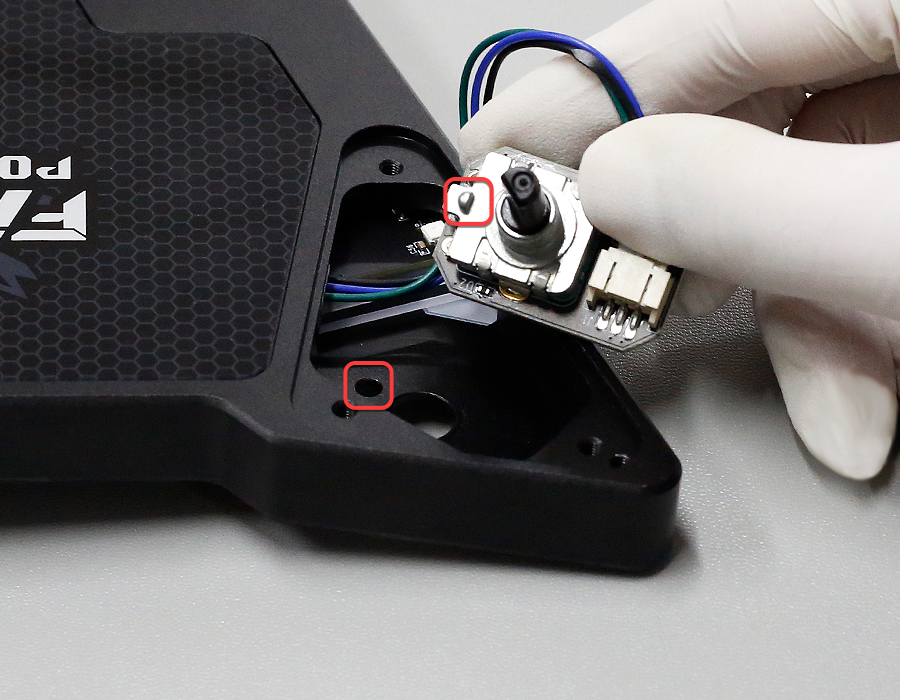
Loosen the Nut and Remove the Metal Washer
Use pliers to loosen the nut and remove the metal washer.
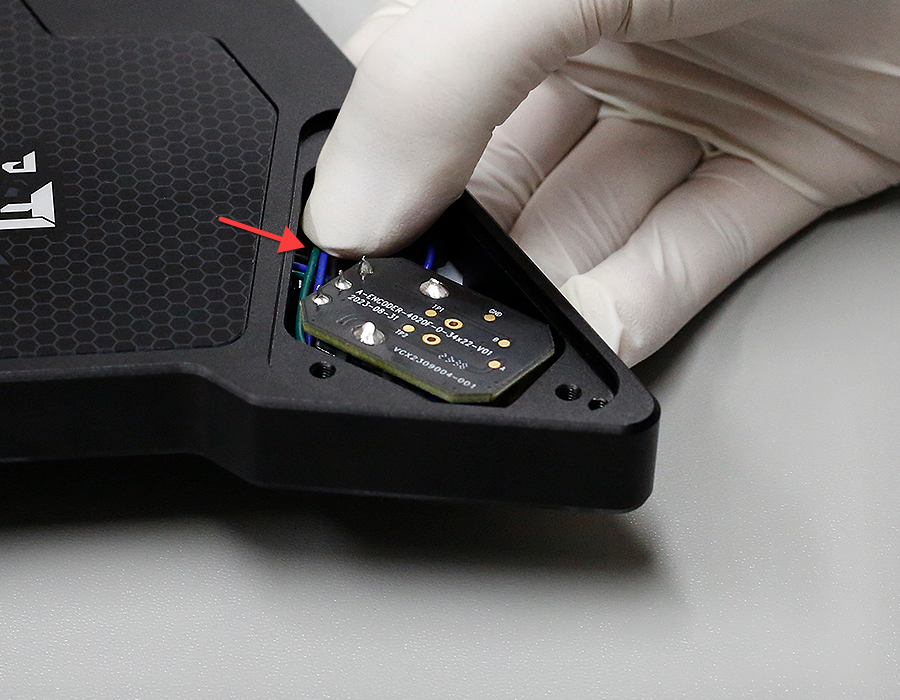
Replace the Encoder
Remove the 3PIN cable and connect it to the new encoder.

Reinstall the Encoder
When reinstalling the encoder, be sure to place the wiring under the circuit board, and align the limit point on the encoder with the opening on the controller.
Reinstall the Metal Washer and Nut
Use the metal washer and nut to reinstall the encoder, placing the transparent gasket at the top.
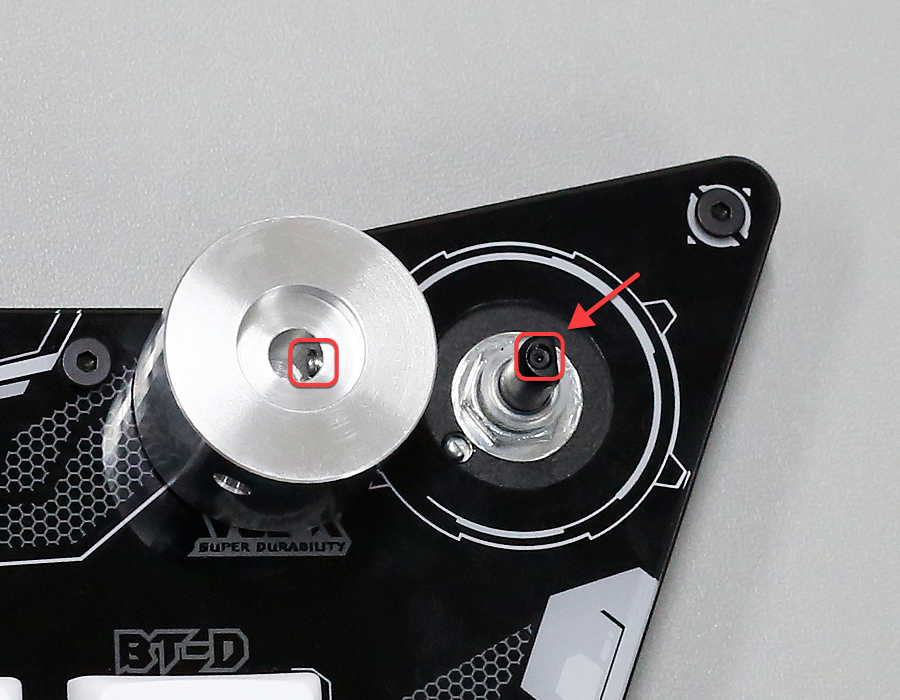
Align the Knob Screw
There is a top screw inside the knob — align it with the flat (D-shaped) side of the encoder shaft for ease of installation.
When tightening the knob screw, if you feel it being pushed, just tighten it 1/4 turn. Otherwise, the plastic shaft of the encoder will be damaged.