NOSTROLLER Options Software Tutorial
Caution
Do not hold FN button while plugging in USB Type-B, this will cause the product to malfunction.
Solution: Unplug USB Type-B, do not touch FN, then plug in USB Type-B again.
What settings will be reset after factory reset.
Solution: All settings will be restored to default, and recalibration is required. Do not use this function unless necessary.
Software Download
1. How to Update Firmware?
Open software and connect device
- Open NOSTROLLER options.exe
- Connect NOSTROLLER controller to computer
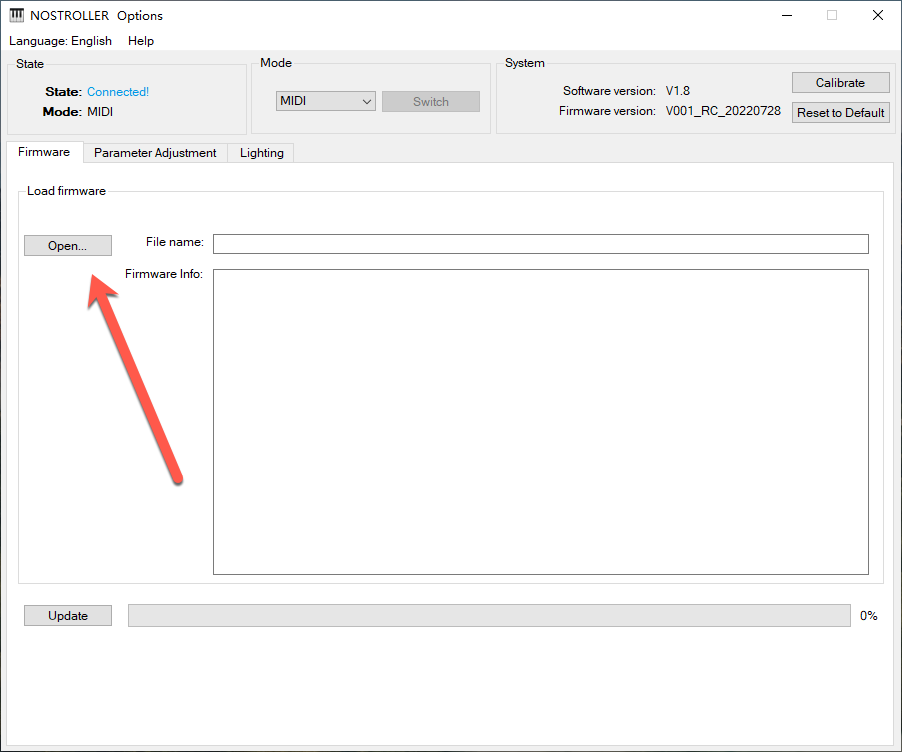
Drag firmware file
Drag XXX.skystar file to the "Firmware Update" area.
Start upgrade
Click "Upgrade" button and wait for completion.
Done
After firmware update completes, the product will take effect automatically without re-plugging USB.
2. How to Adjust Light Color?
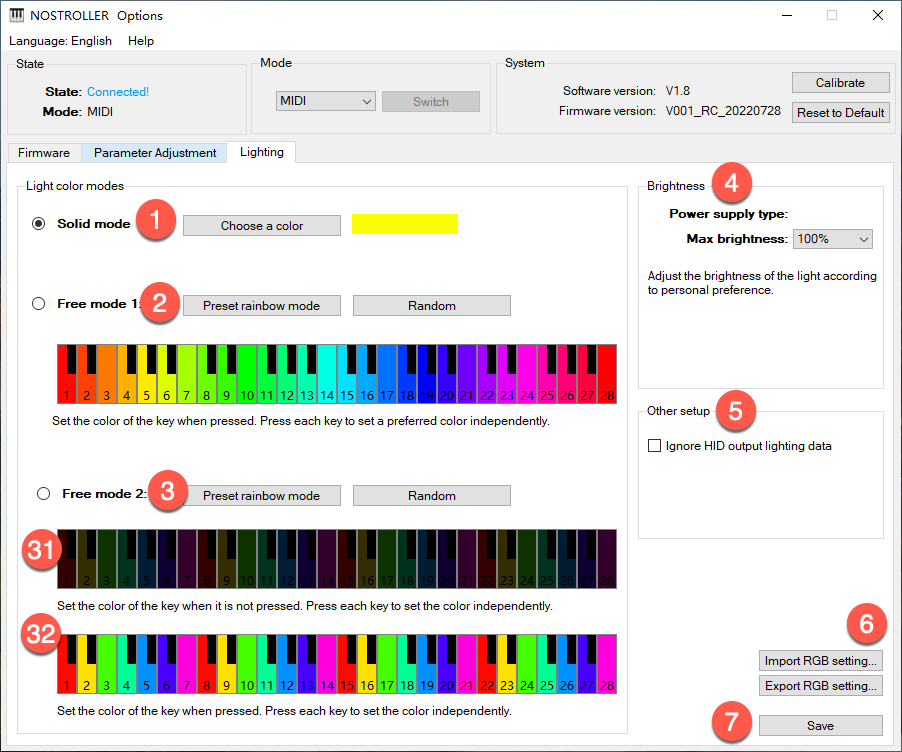
- All keys use the same color: When a key is pressed, the light turns on with the corresponding color
- Each key can be set to one color independently: When a key is pressed, the light turns on with the corresponding color
- Each key can be set to two colors independently: 31 is the light color when key is not pressed, 32 is the light color when key is pressed
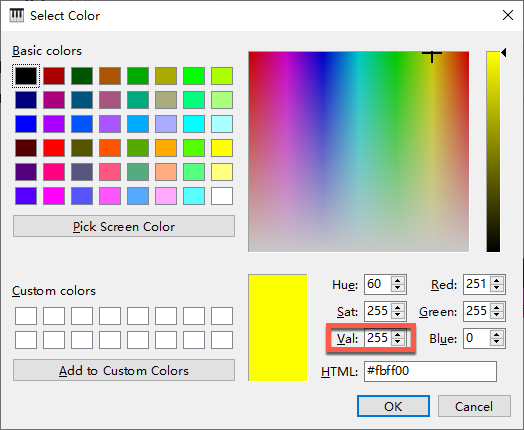
The brightness depends on V in HSV. Higher V value means brighter, lower V value means dimmer.
-
Brightness recommendations:
- ype-C is connected to a 5V 500mA+ power supply, recommend max brightness 50-60%
- If connected to a 5V 2A+ power supply, no need to adjust max brightness
- If the light is too bright, you can lower the max brightness
-
This setting only works in HID mode and when using Specietxxls
-
Any setting must be saved to take effect
-
Exported light data includes ①②③ light data, not including ④ and ⑤. Export format is PNG image, which can be modified directly in PNG using drawing software. Single color blocks in the image do not support gradients, only solid colors
3. How to Adjust Force/Velocity?
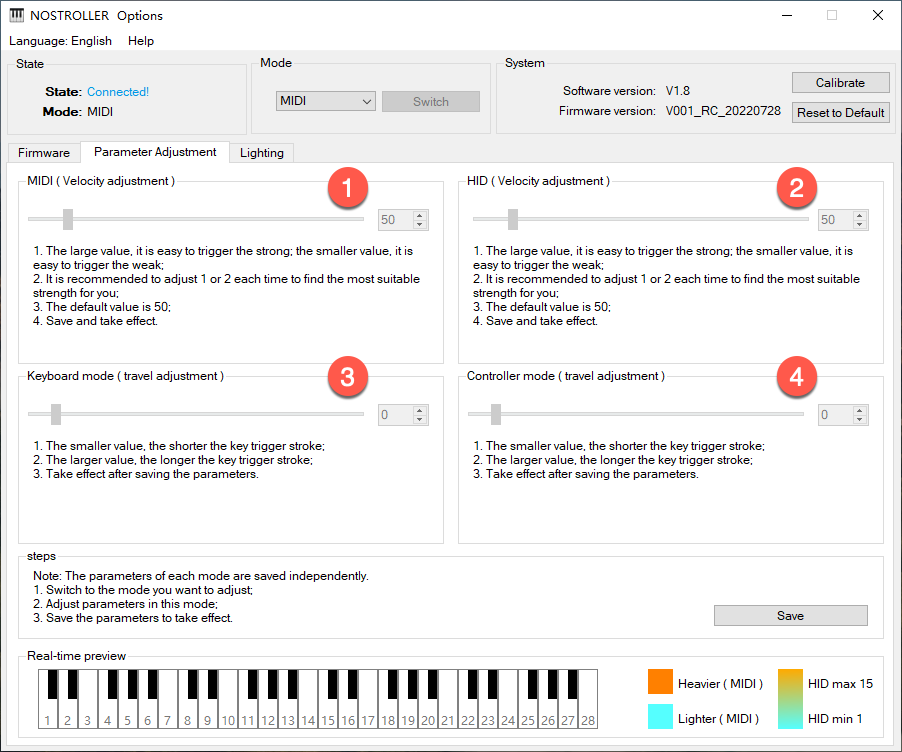
Usage Notes
- In any mode, you can adjust the force for all modes
- After adjusting parameters, you must save for them to take effect
- Switch to MIDI or HID mode to see real-time effects
Parameter Recommendations
- MIDI adjustment: Recommended range 30-80
- HID adjustment: Recommended range 30-80
- Keyboard adjustment: If value is too high, keys may not output when bottomed out
- Controller adjustment: If value is too high, keys may not output when bottomed out
4. How to Calibrate?
Preparation
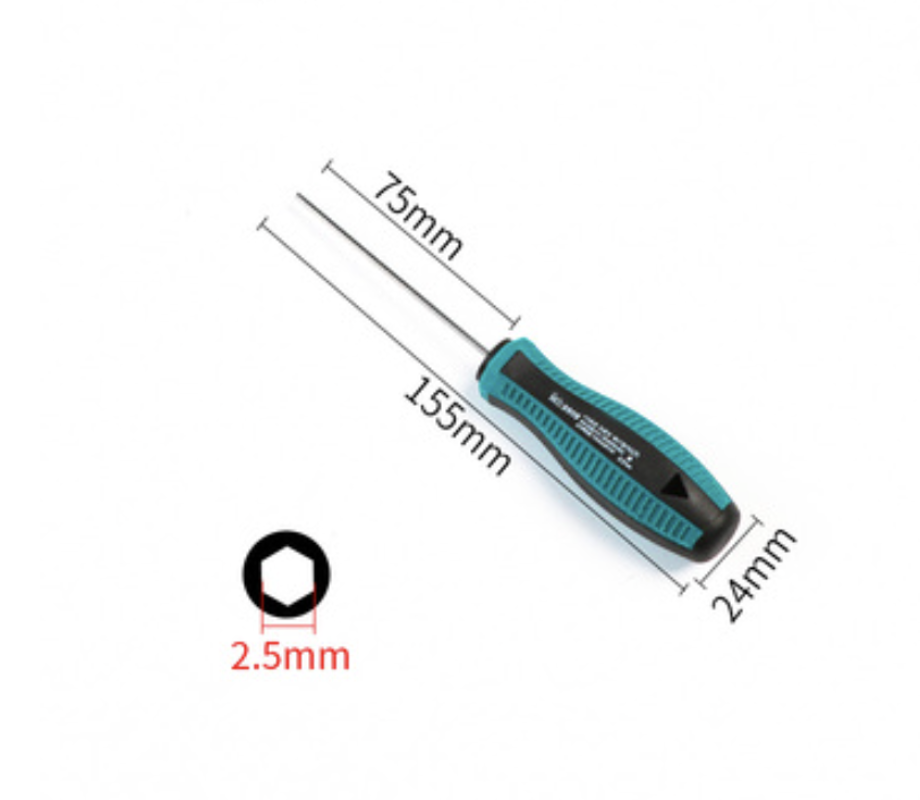
Prepare tools
You need an Allen screwdriver, model H2.5.
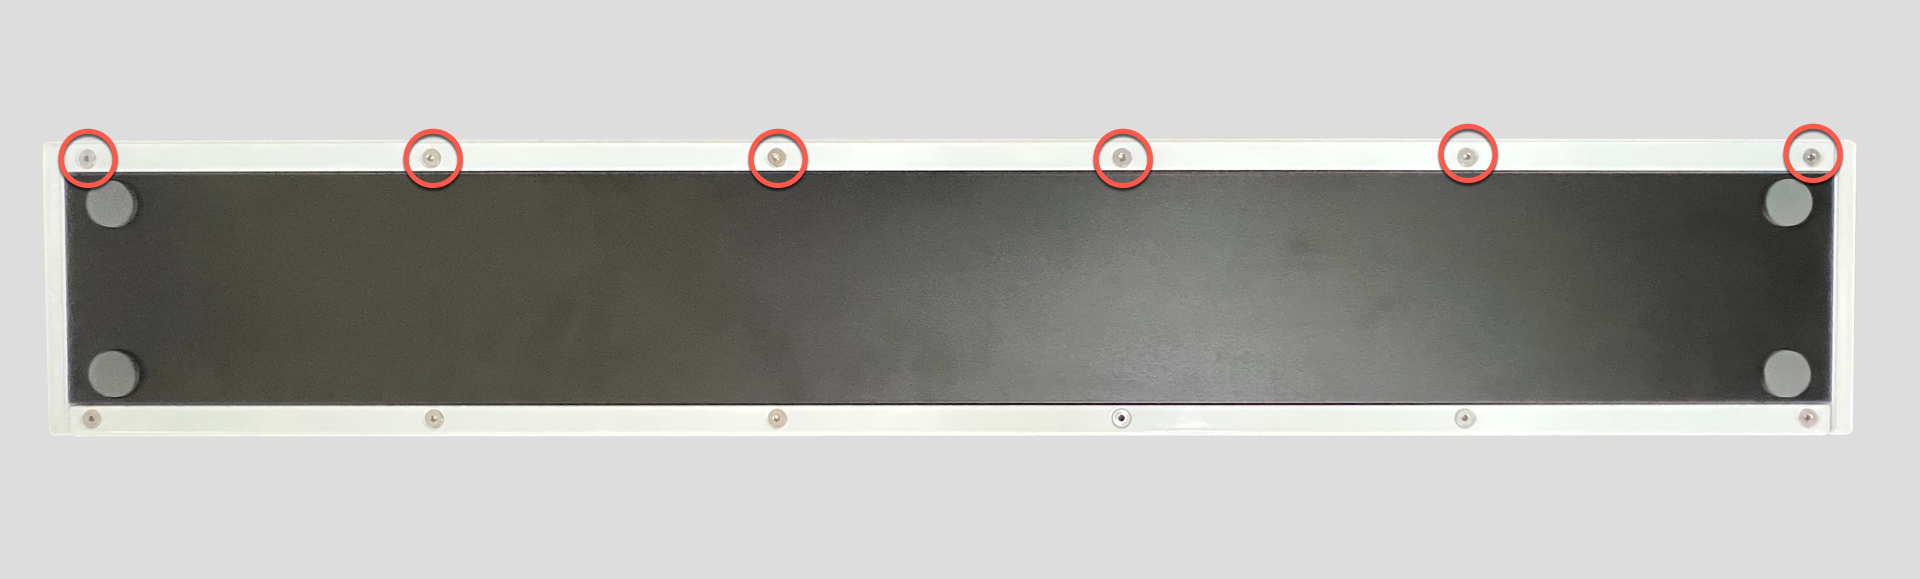
Remove bottom screws
Turn NOSTROLLER over and remove the screws as shown.
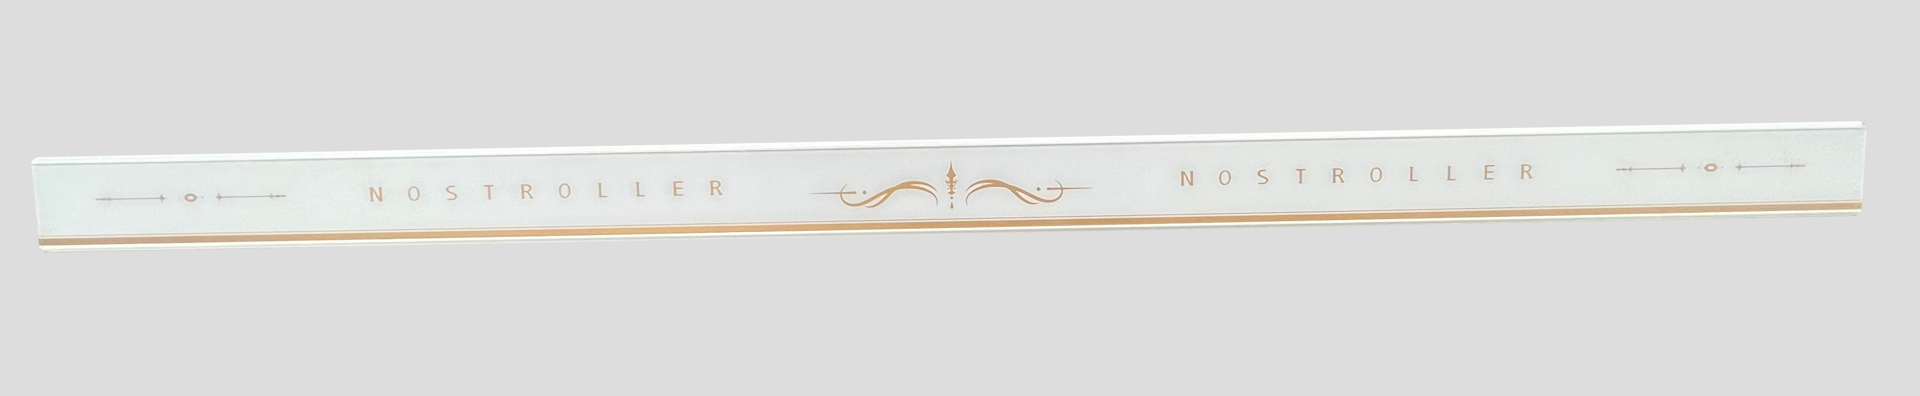
Remove metal bar
Remove the metal bar from NOSTROLLER and set aside.
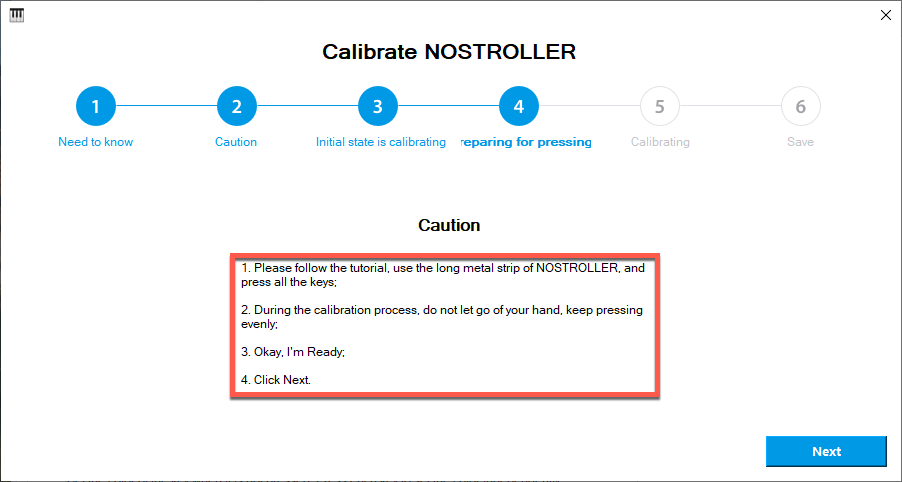
Calibration Steps
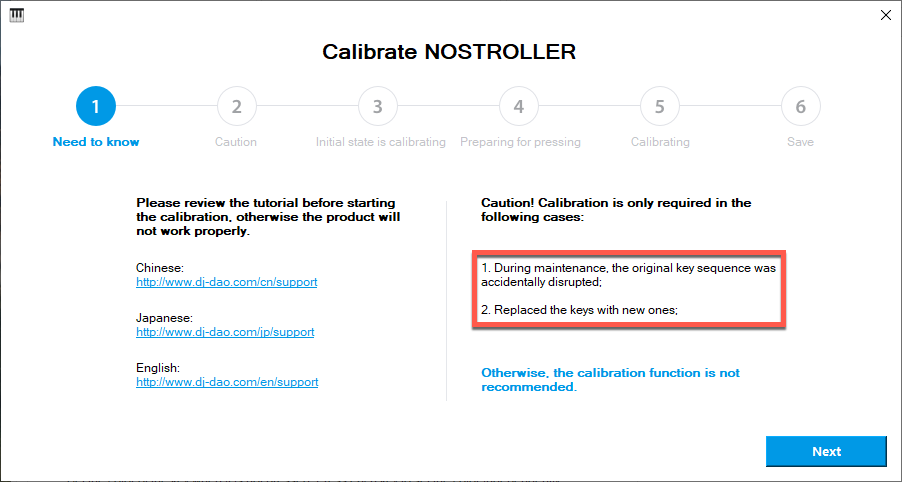
Start calibration
No calibration needed under normal circumstances. Only calibrate in the following situations. If conditions are met, click Next button.
Continue
Click Next.
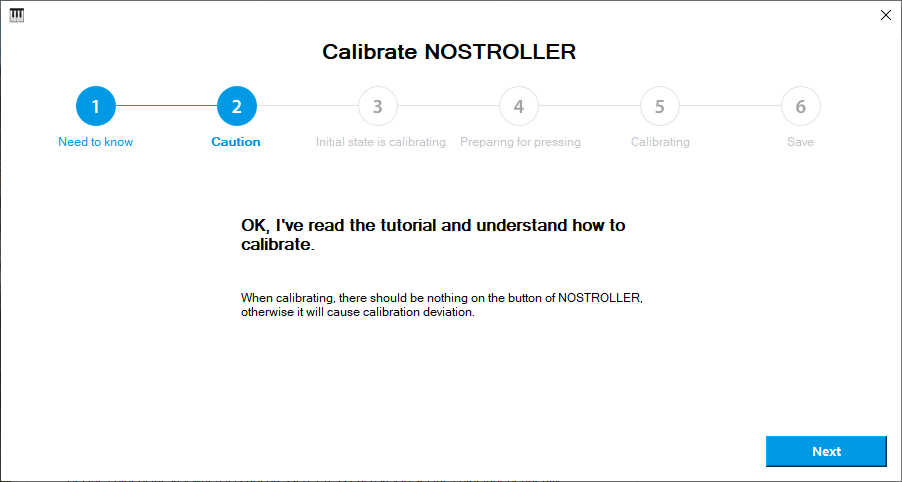
Do not touch keys
During calibration, do not touch any keys.
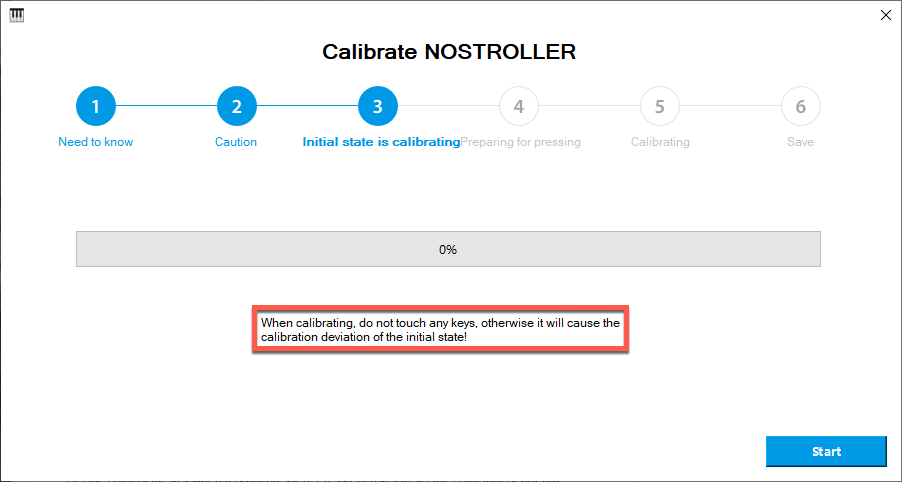
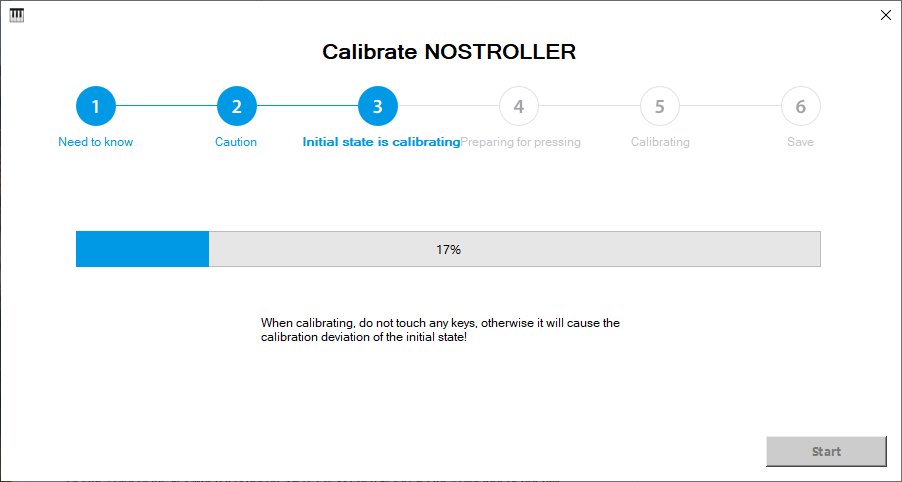
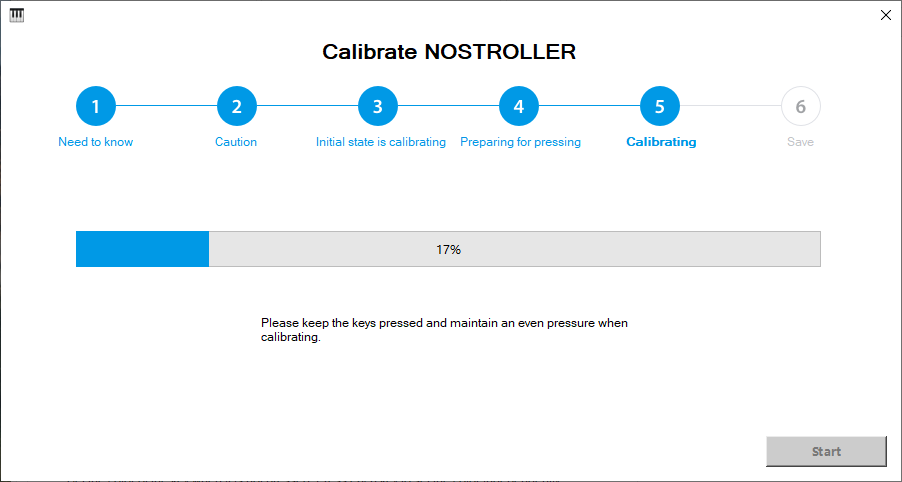
Calibration process
Wait for calibration process to complete.
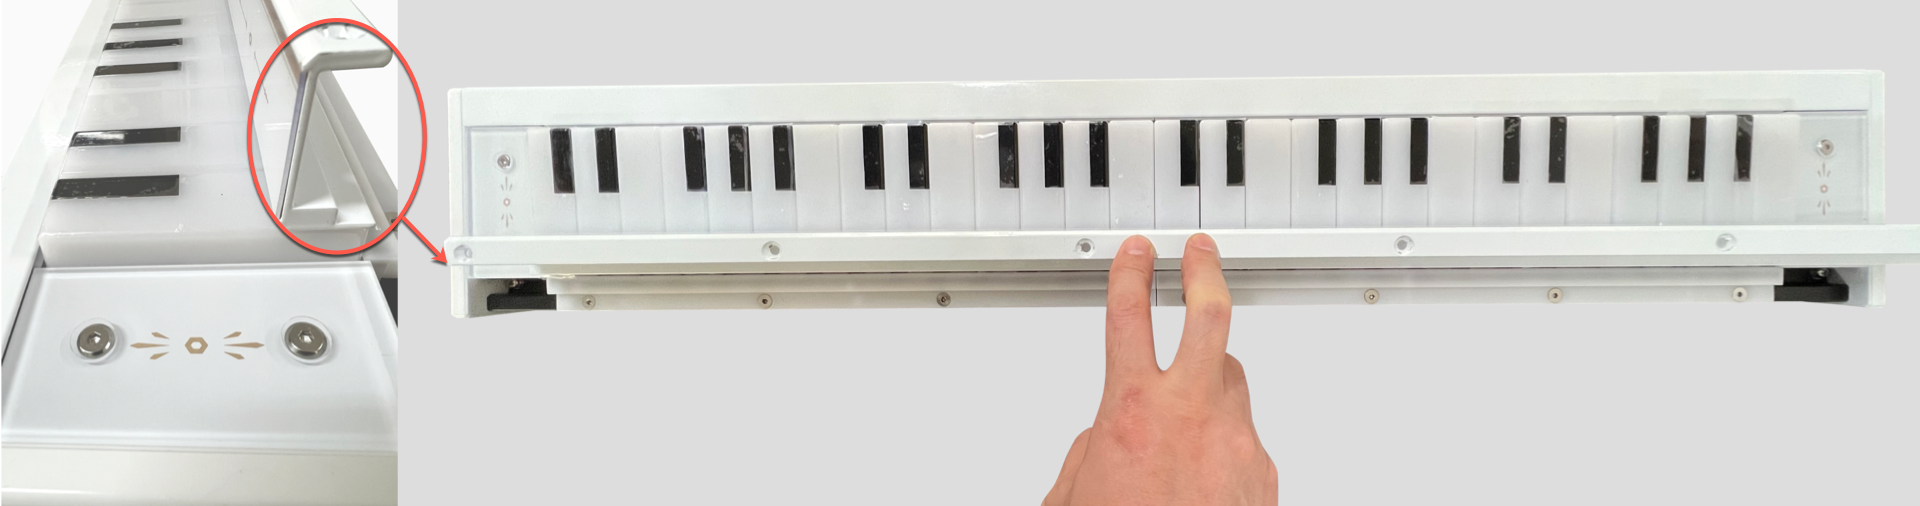
Press metal bar
Press the metal bar removed from NOSTROLLER onto the keys.
- Press position: Keep same as shown in image
- Press force: Not too much force needed, press with one hand in the middle of the metal bar, let all keys bottom out
Continue calibration
Click Next.
Confirm pressing action
Ensure your pressing action is correct, click Next.
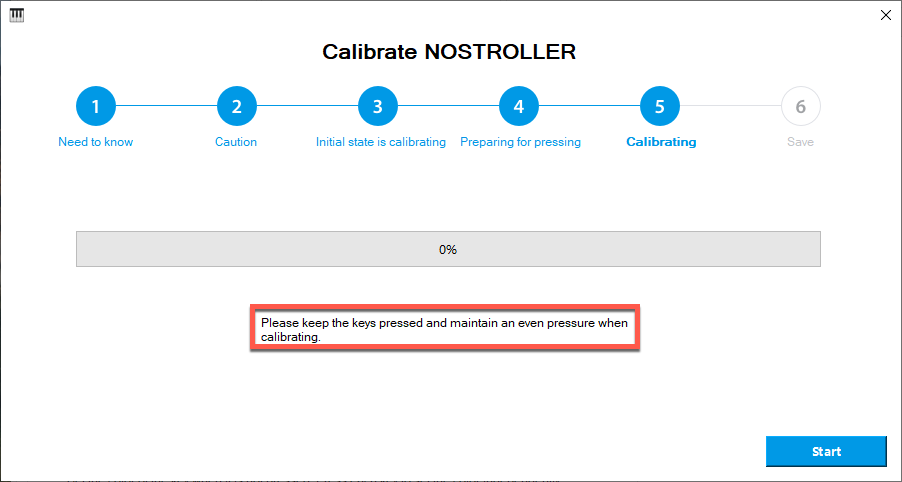
Wait for completion
Wait patiently for the progress bar to complete.
Calibration complete
You can now release the metal bar, click Finish.
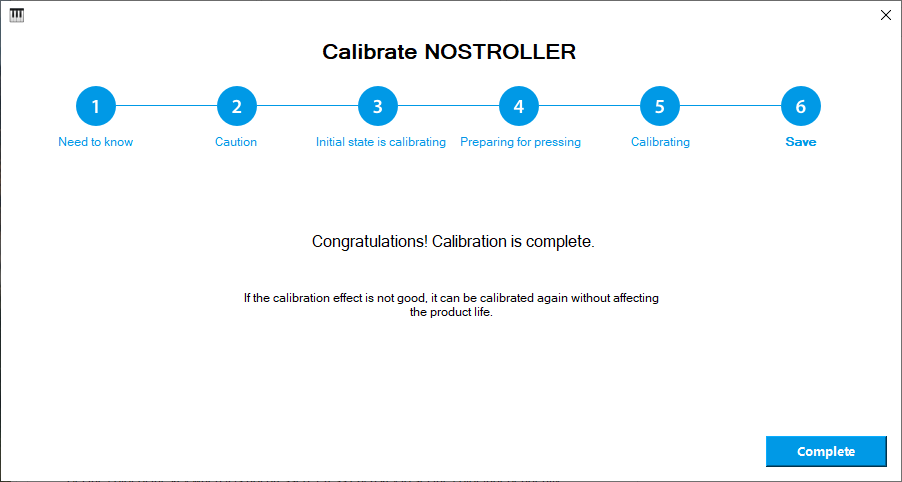
Reinstall metal bar
You can reinstall the metal bar back to NOSTROLLER.
If you have any questions, please contact us for technical support.