TAIKOLLER Disassembly Guide
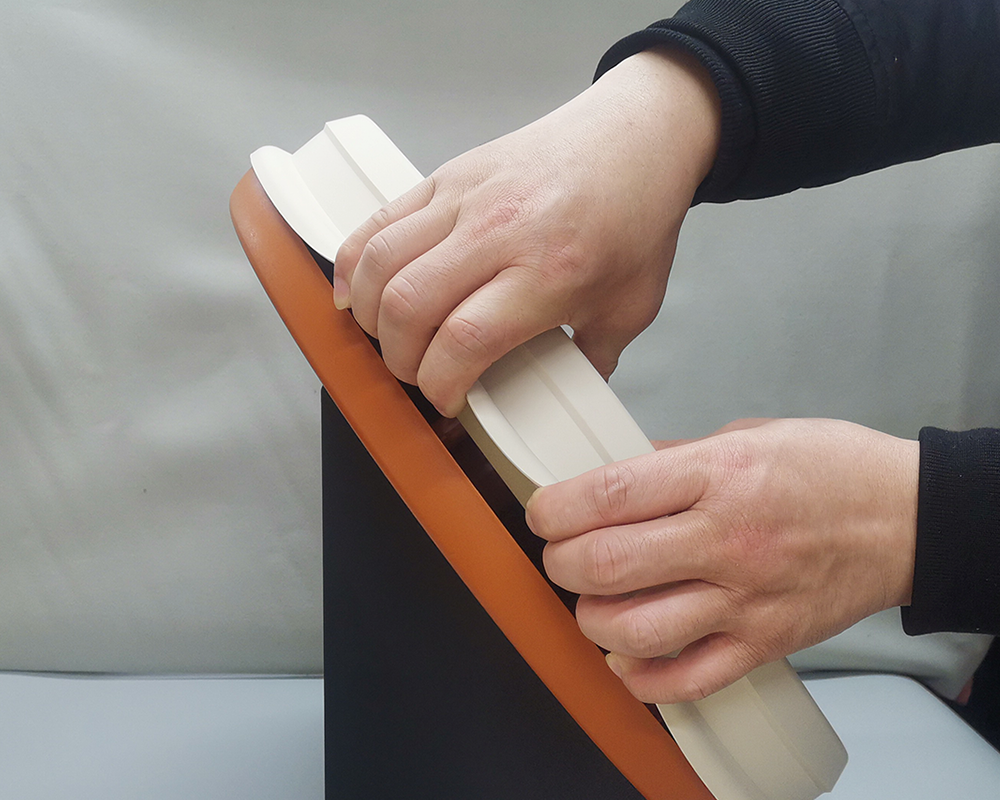
Remove the drumhead
Please follow the technique shown in the diagram, take the whole drumhead out of the buckle and then remove it as a whole.
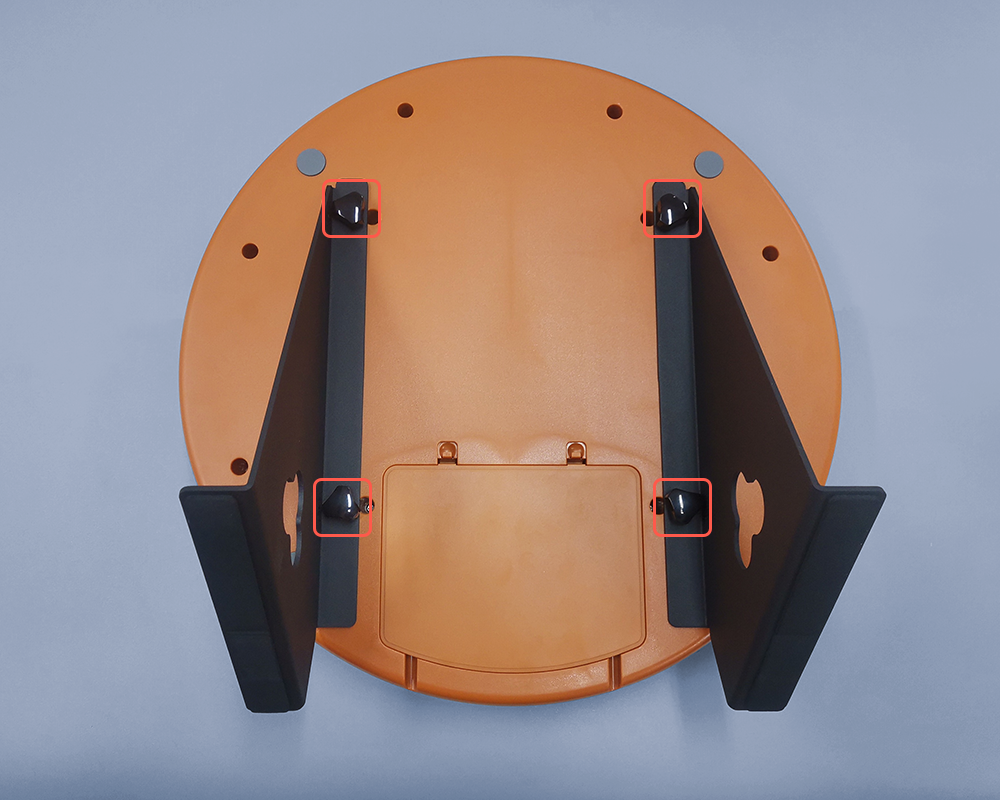
Remove the drum stand
Place the drum face down and remove the drum stand by rotating the hand screw counterclockwise.
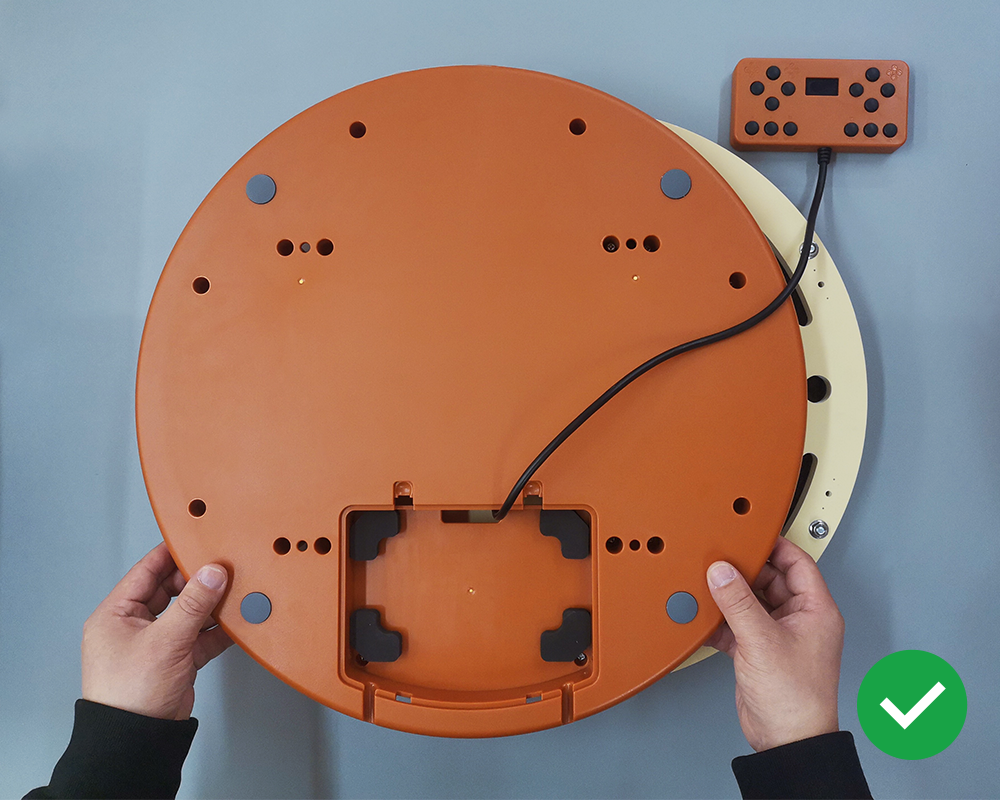
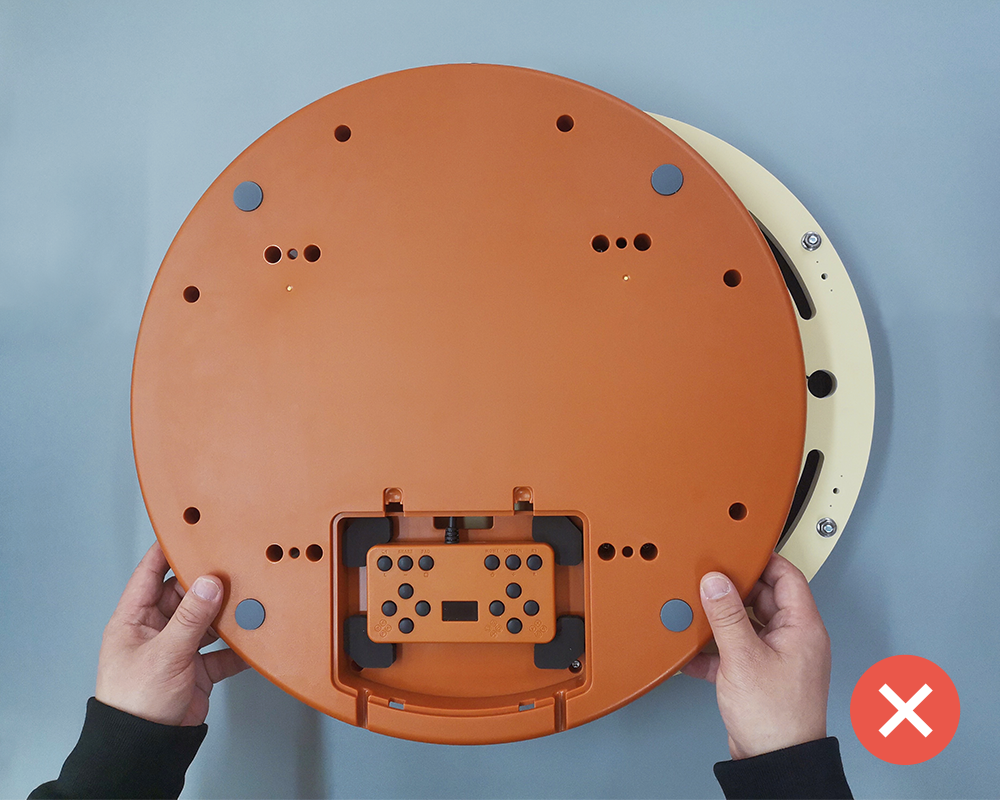
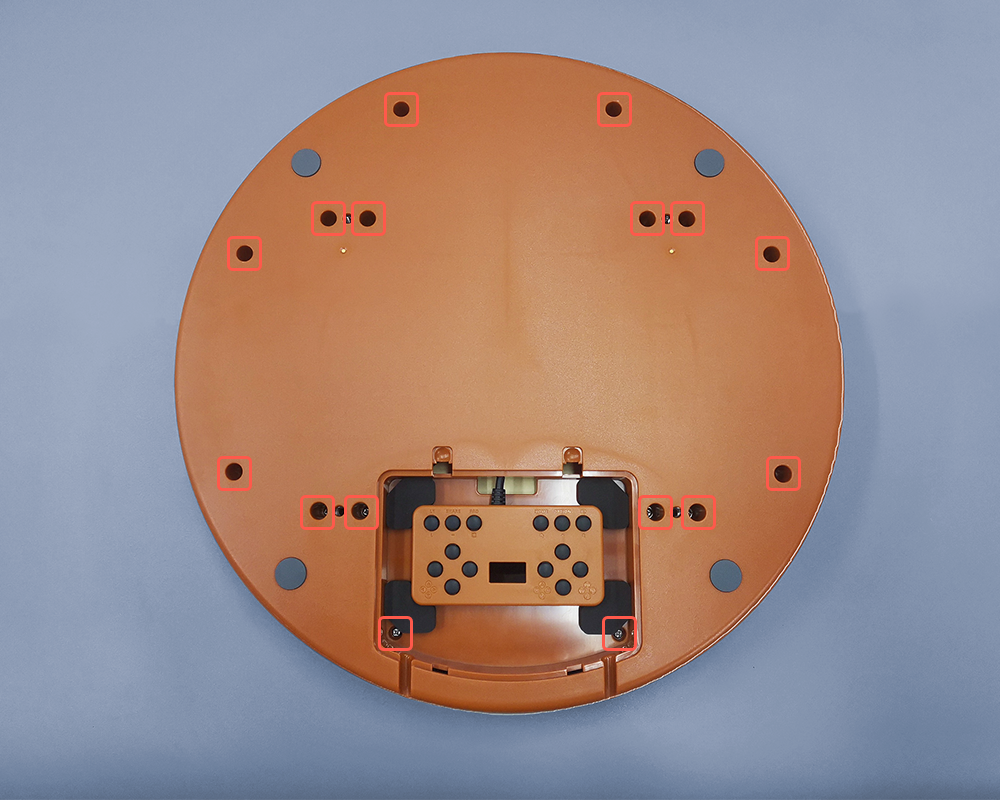
Remove the back screws
Open the control box door, use the supplied screwdriver to remove all the screws on the back.
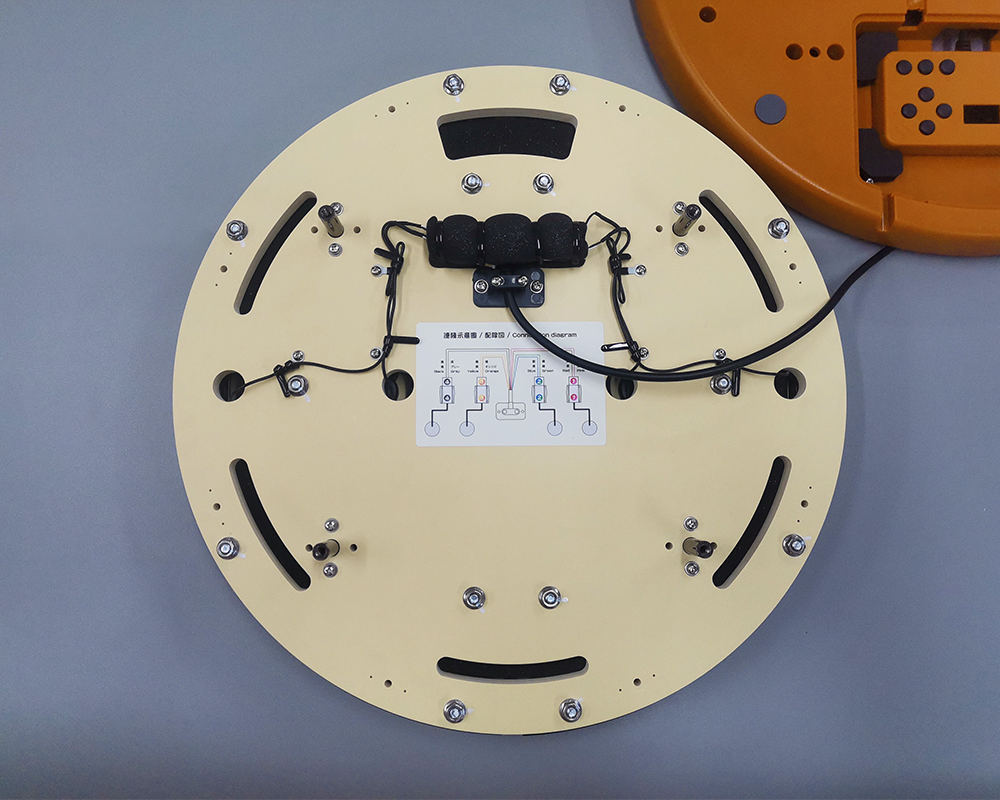
Open the housing
Take away the shell and place it on the side, then open the tie that holds the cushion foam of the connector.
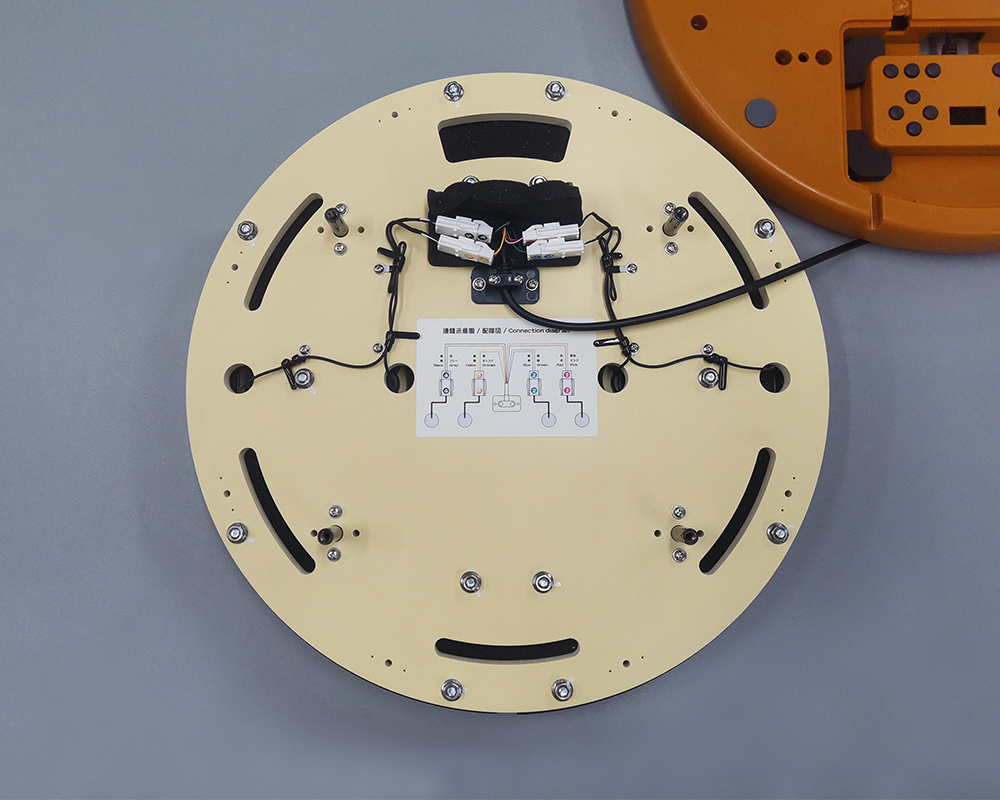
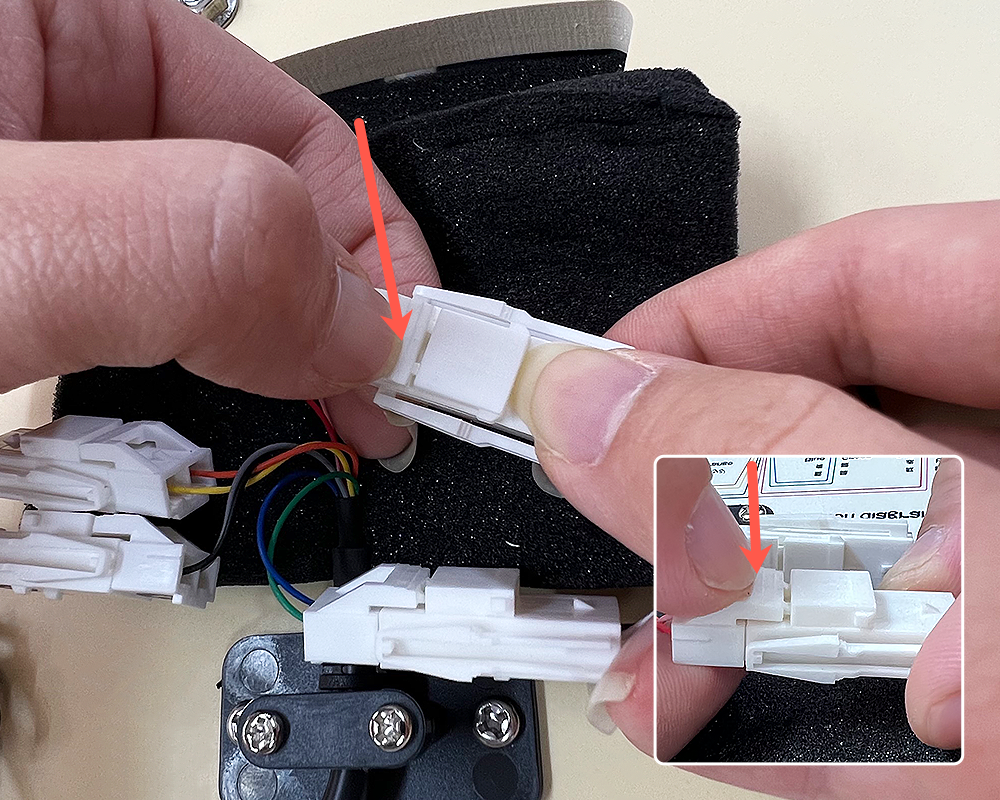
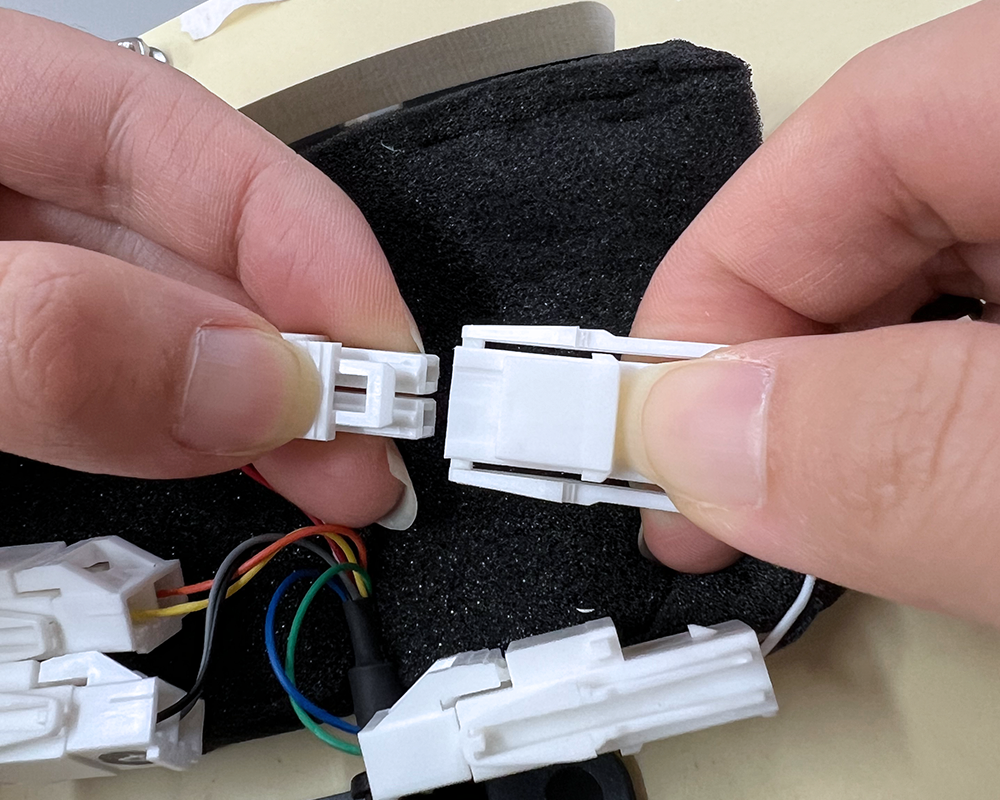
Unplug the sensor connectors
Unplug the connectors of the 4 sets of sensors.
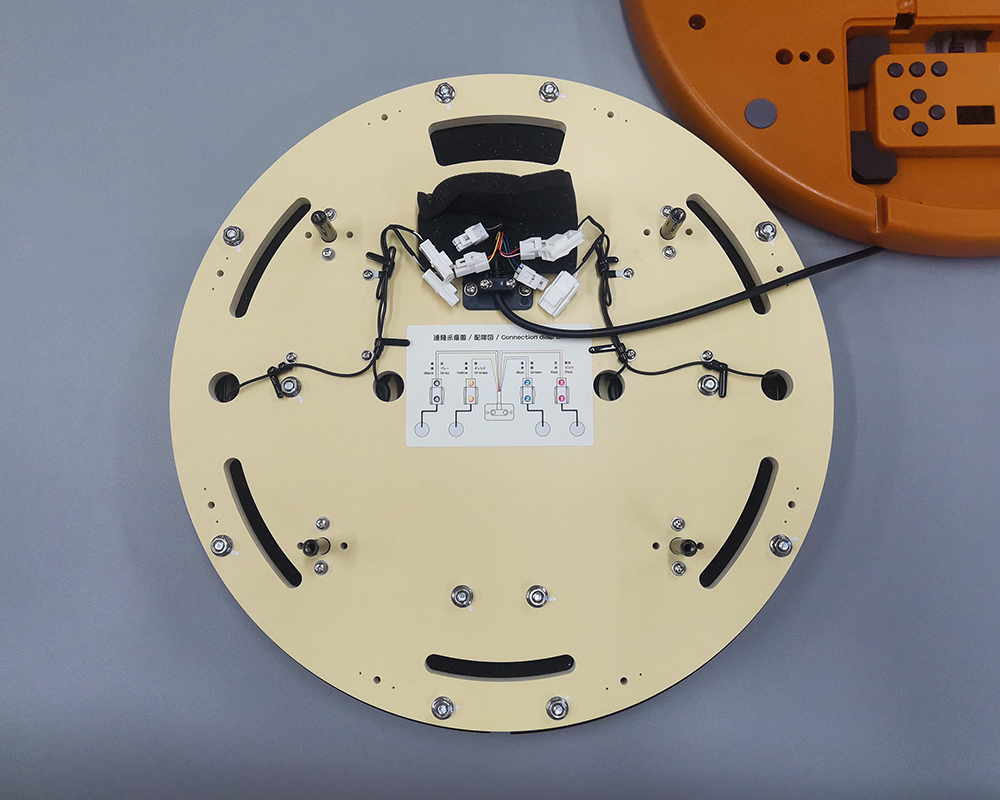
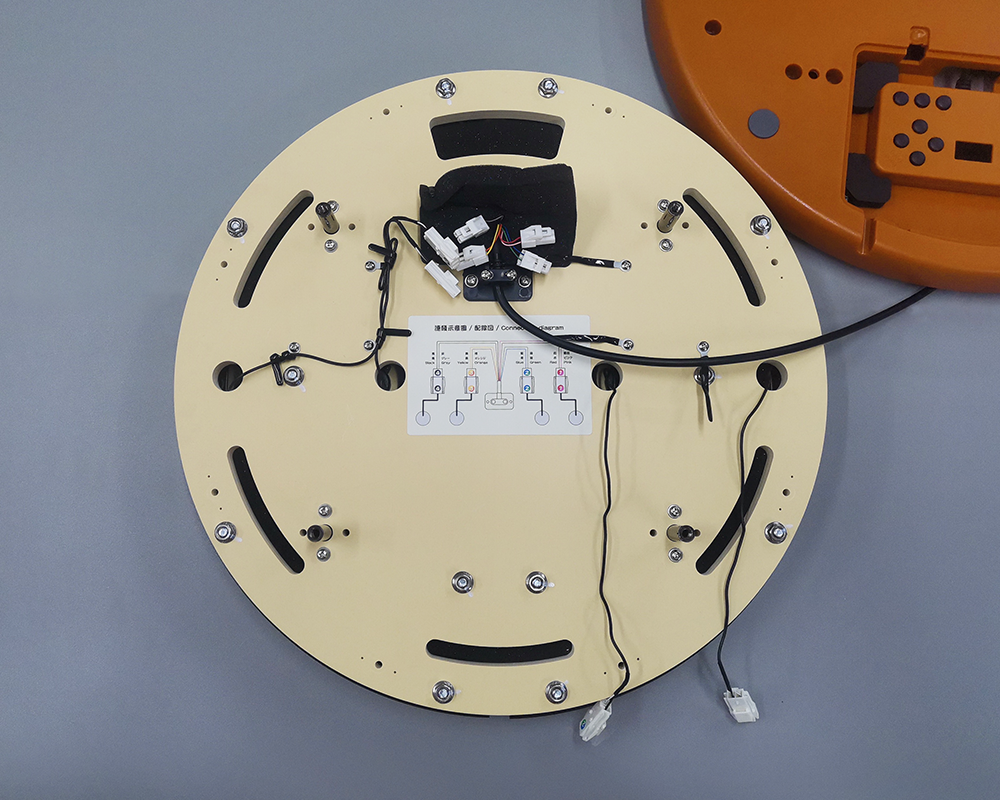
Remove the cable ties
Disassemble the 3 wire ties, remove the wires from the ties and place them neatly.
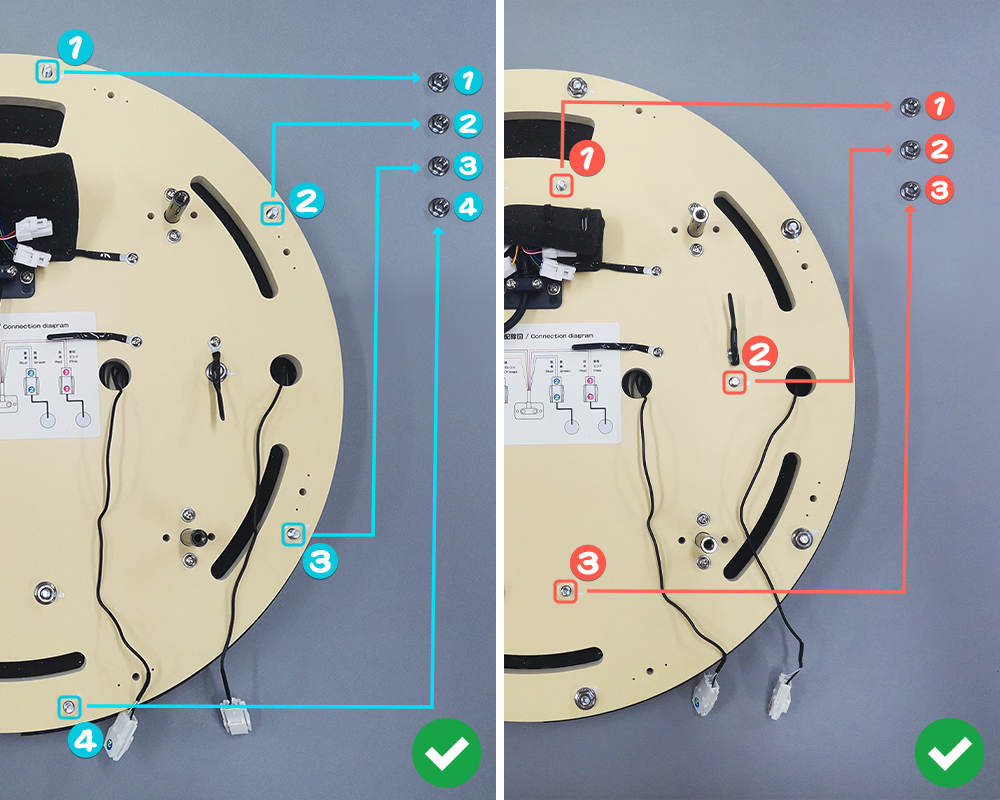
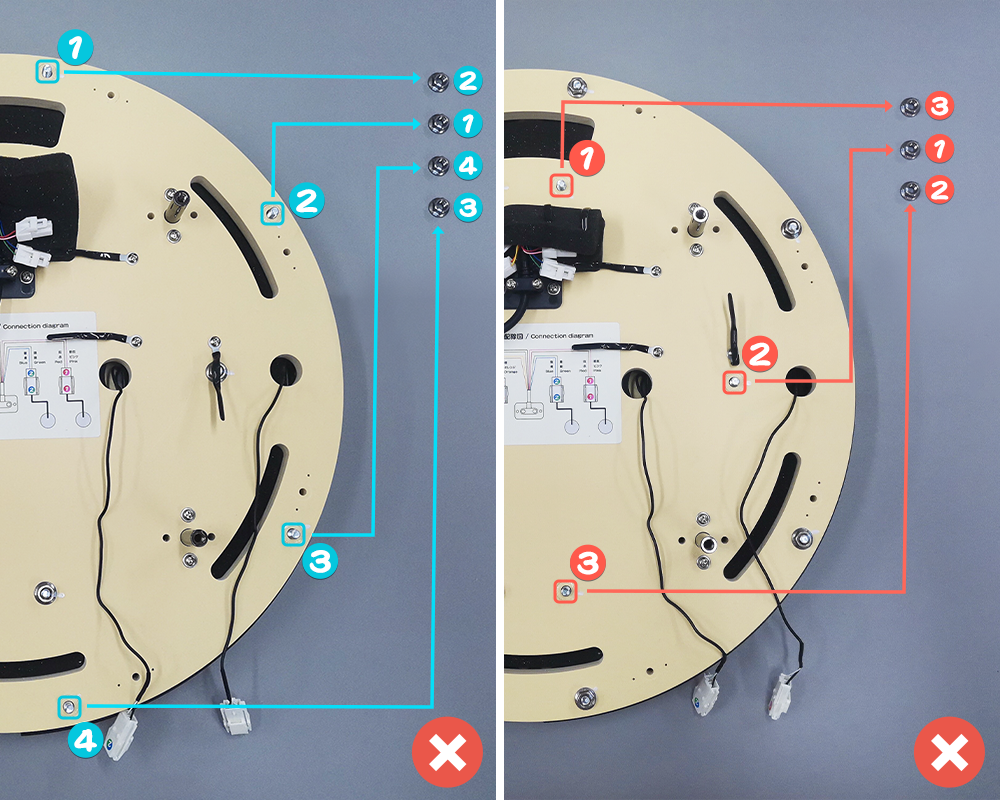
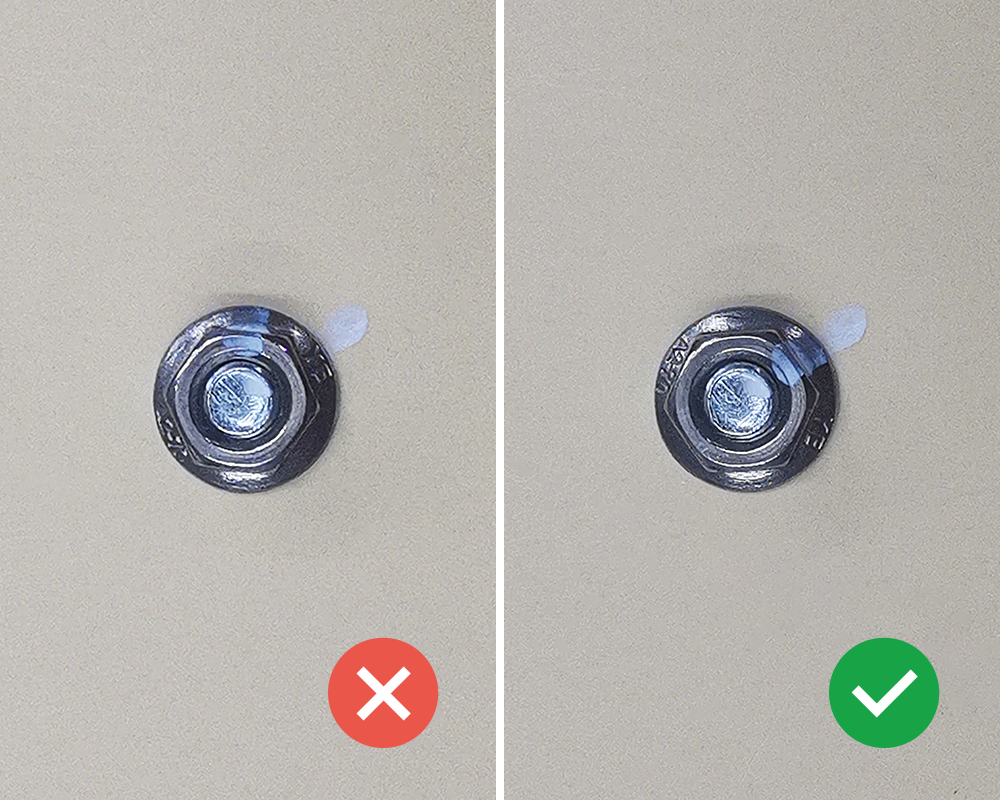
Remove the back nuts
Use an M6 (H10) wrench to remove the nuts on the back.
ImportantPlace the nuts on a safe area of the table according to their layout orientation to ensure they will not be confused. When reinstalling, the nuts must be installed in numerical order!!
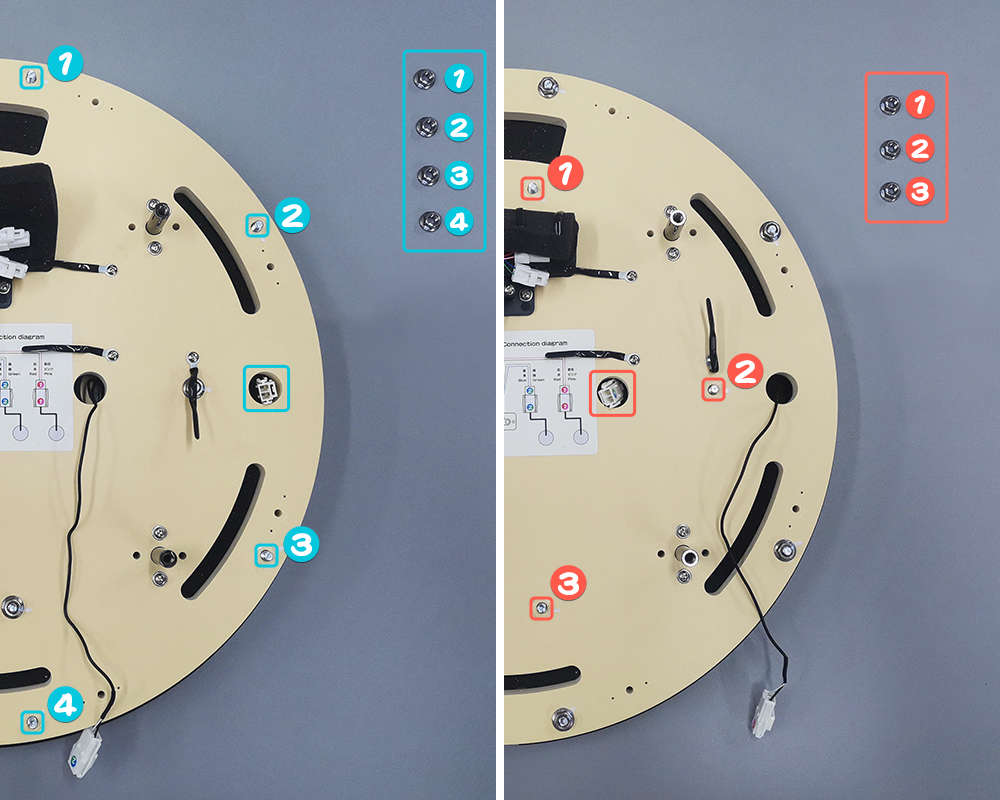
Remove the panels
Insert the connector of the panel into the corresponding hole, then take out the corresponding panel. Be careful not to forcefully pull the sensor wire.
Caution- It is recommended not to remove more than one panel at a time to avoid installation difficulties.
- When removing the panel, be careful not to touch the nuts to ensure their sorting position will not be confused!!

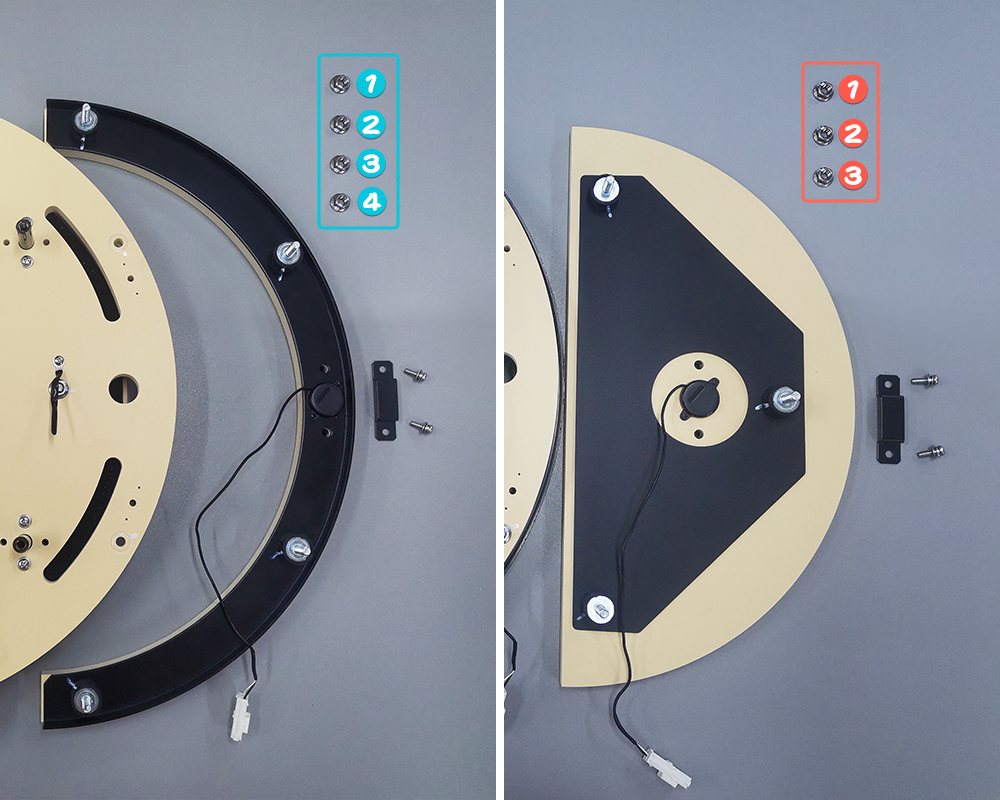
Remove the sensors
Use a screwdriver to unscrew the corresponding screws and remove the parts holding the sensor in place, then remove the sensor positioning screws.
CautionBe careful not to confuse the nut sorting position!!
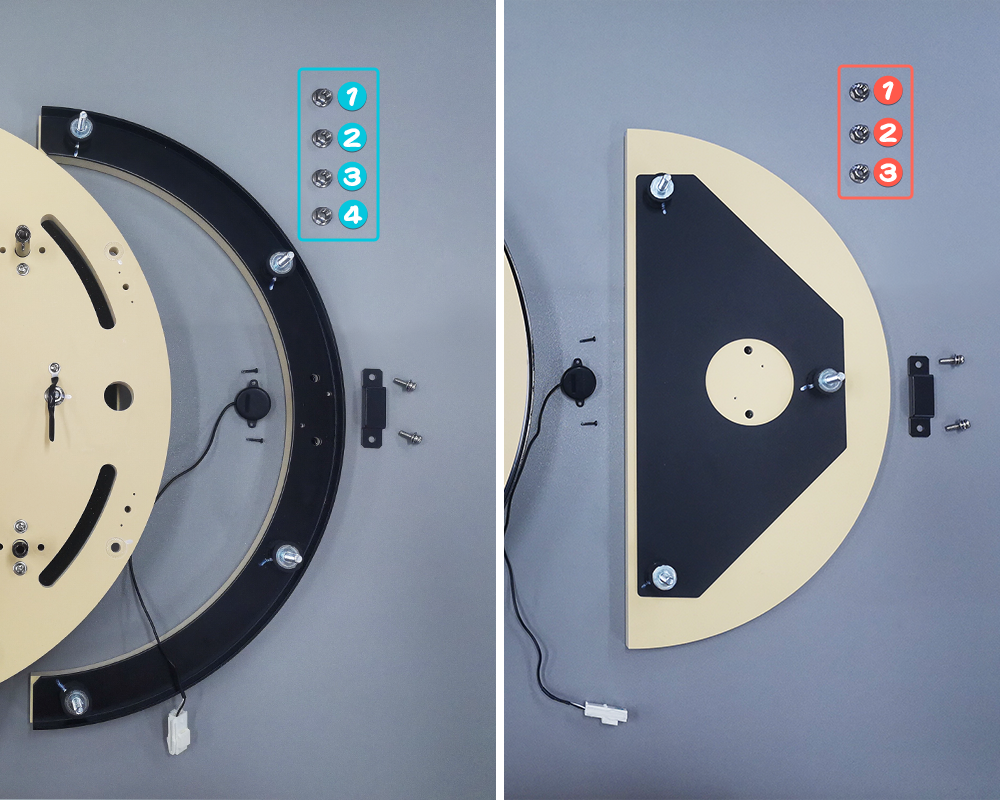
Install the nuts
Take care to tighten the nuts in place when installing them.
Install the housing
When installing the housing, pull out the control box wire first to avoid the wire being stuck inside the housing.