How to Install ONTROLLER
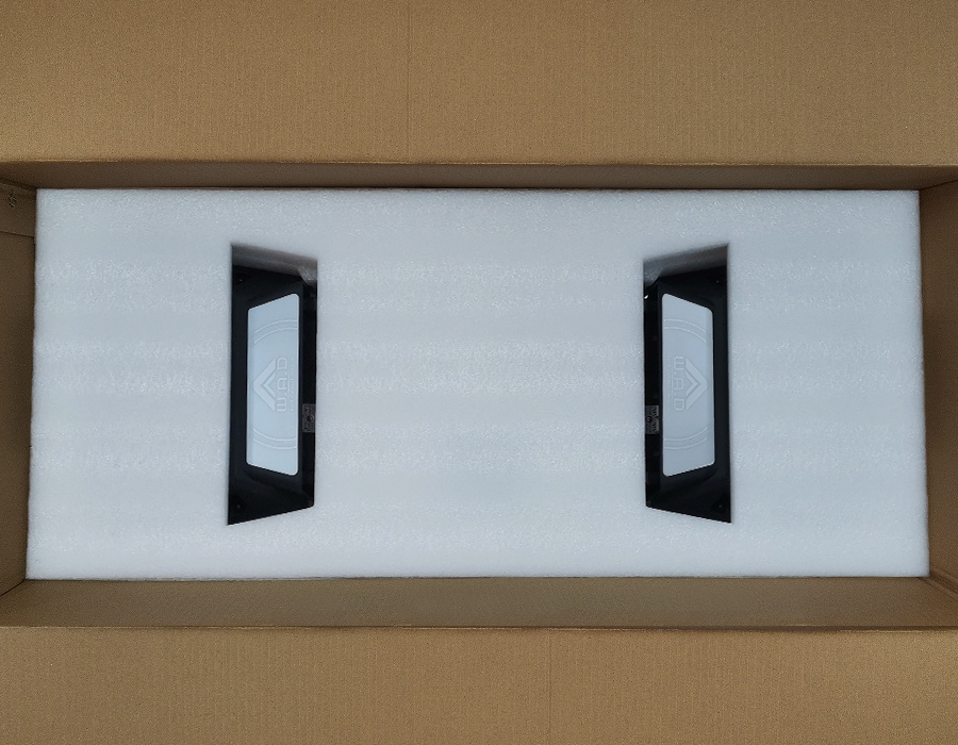
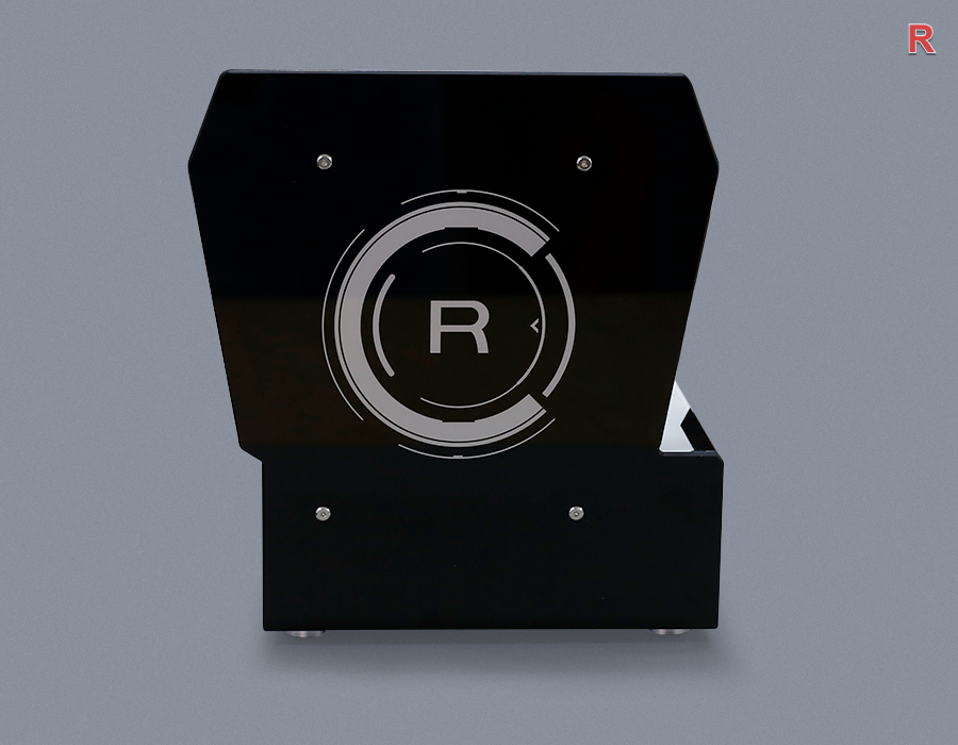
Unboxing
Unboxing, the picture shows the front.
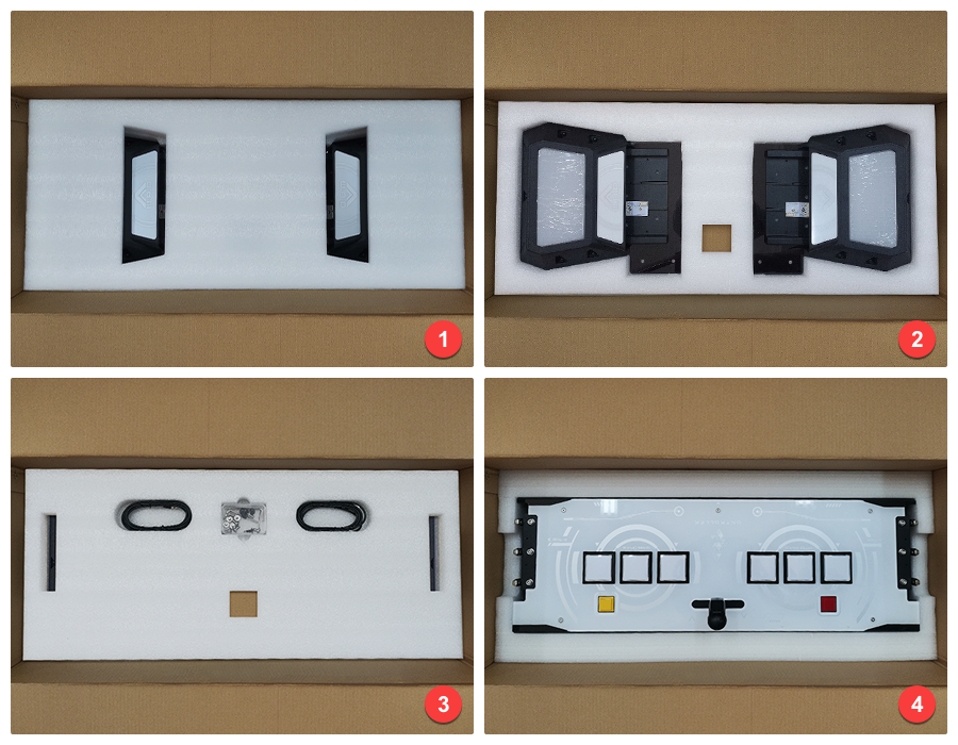
Remove Cushioning Material
Remove the cushioning material in the order shown.
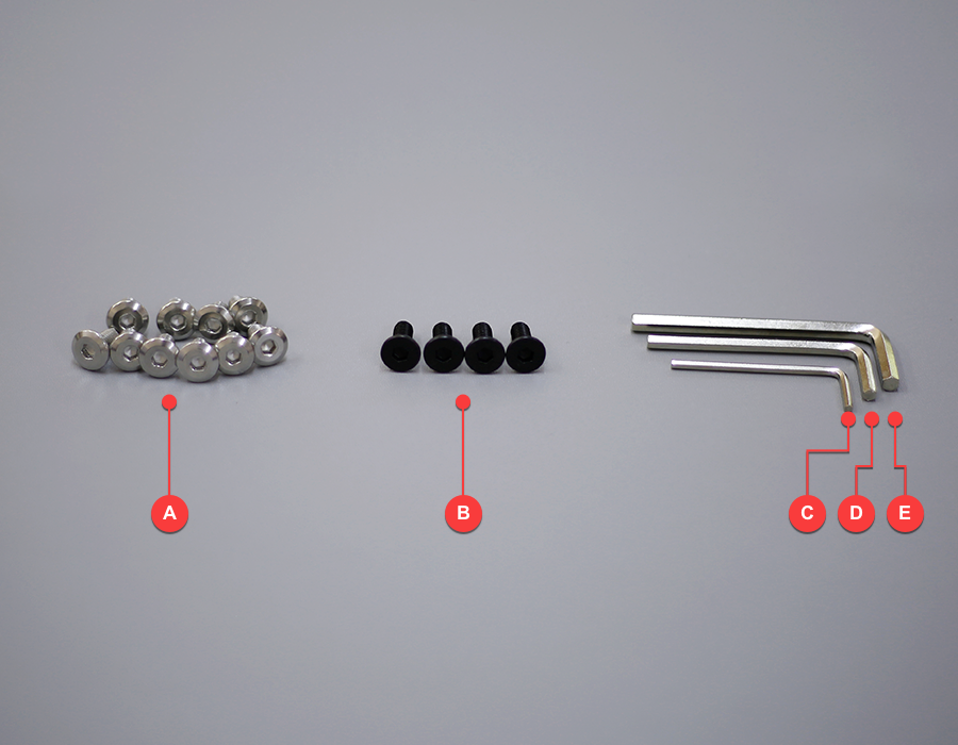
Prepare Installation Tools
Prepare installation tools.

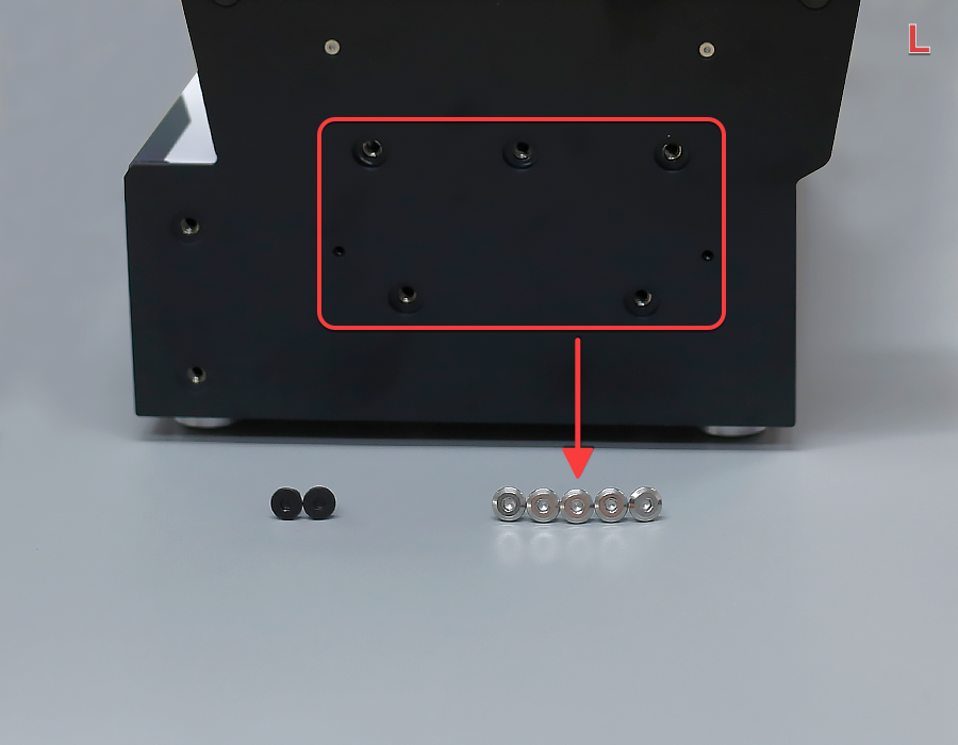
Remove Side Button Panels
Use tool C (2.5mm) to remove the outer decorative panels of the L and R side buttons.
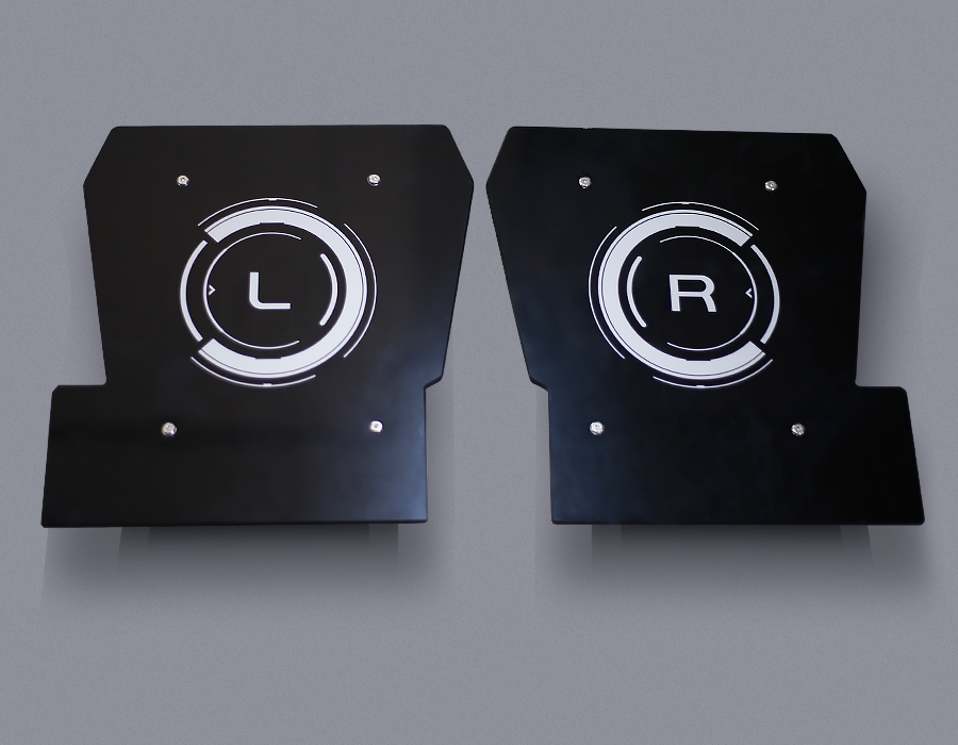
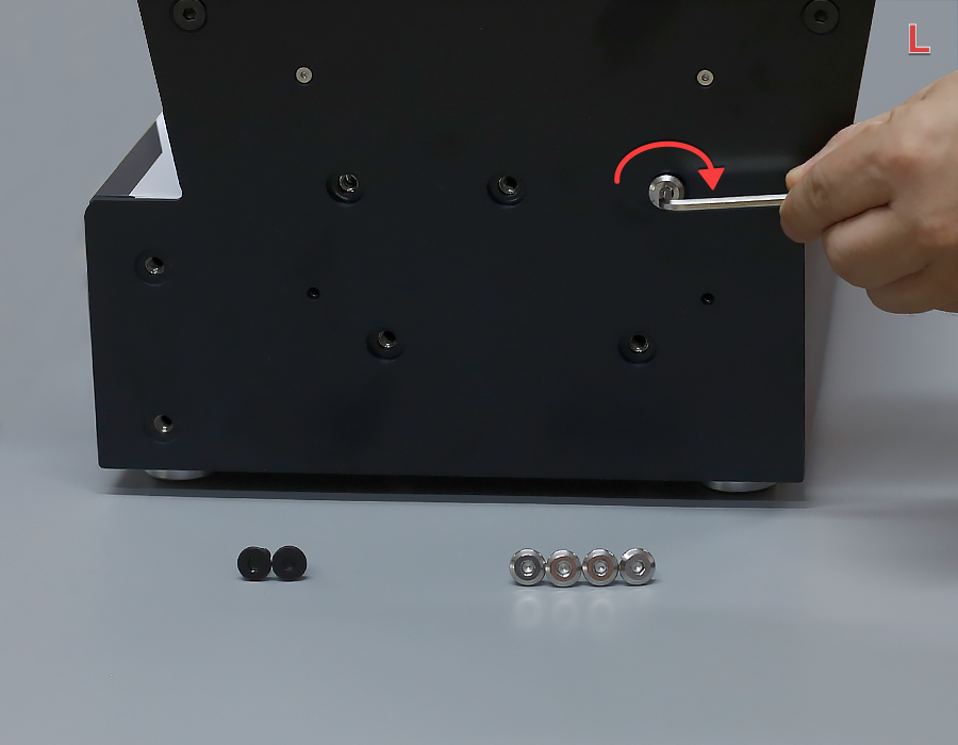
Unscrew and Remove Panels
Turn the hex wrench in the direction shown, unscrew the screws (keep them in the tool box), and remove the panels.

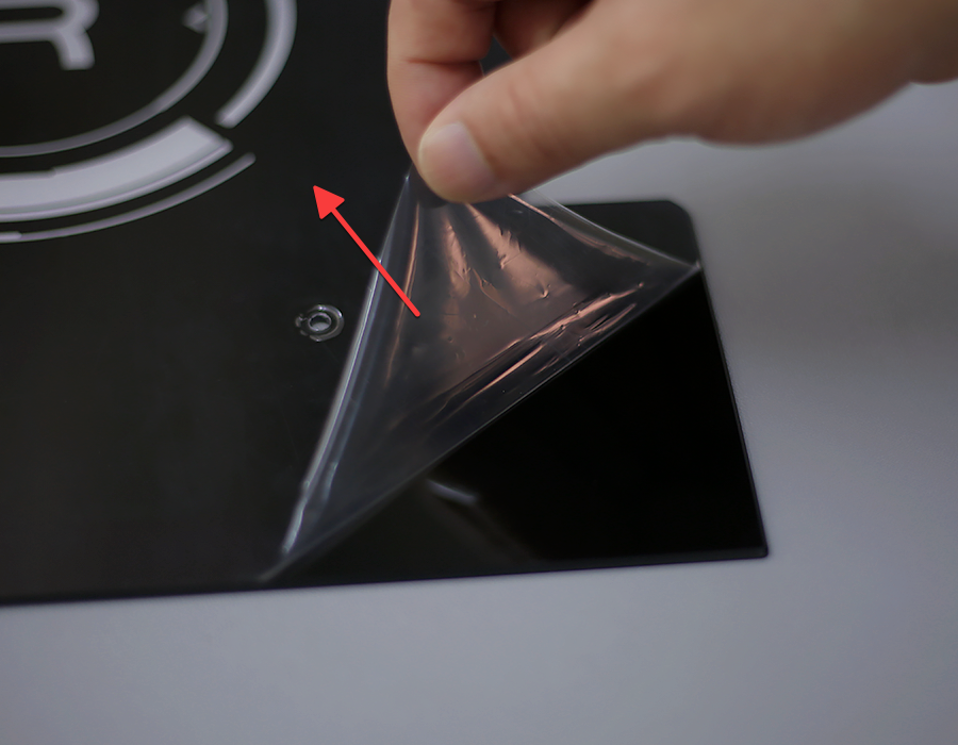
Remove Protective Film
Tear off the protective film of the L and R panels and place the panels in a safe place.
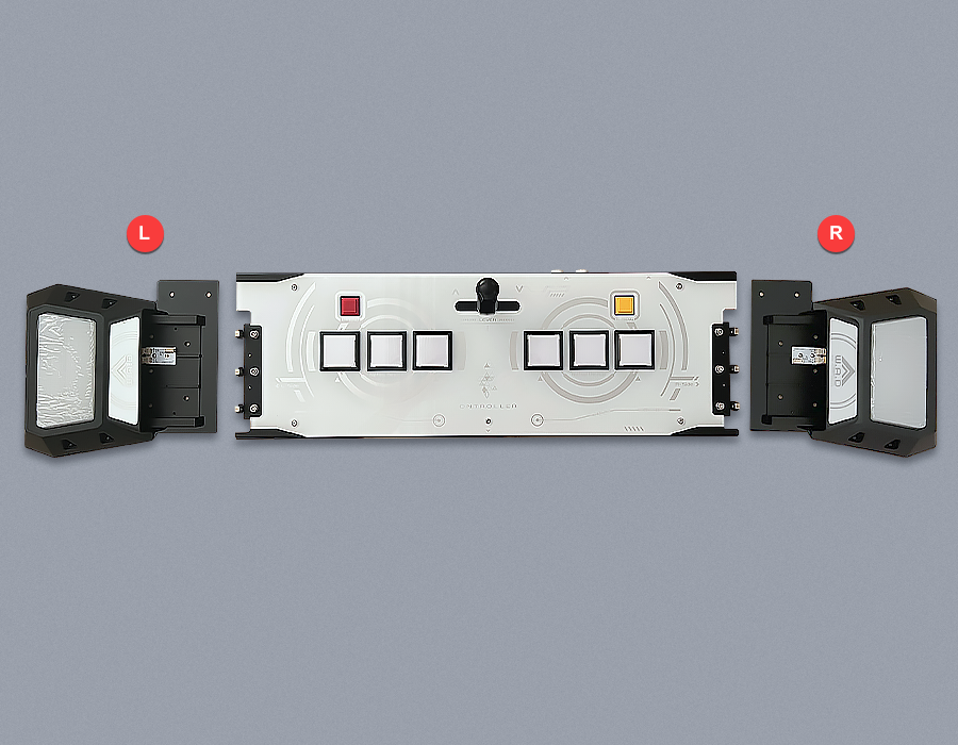
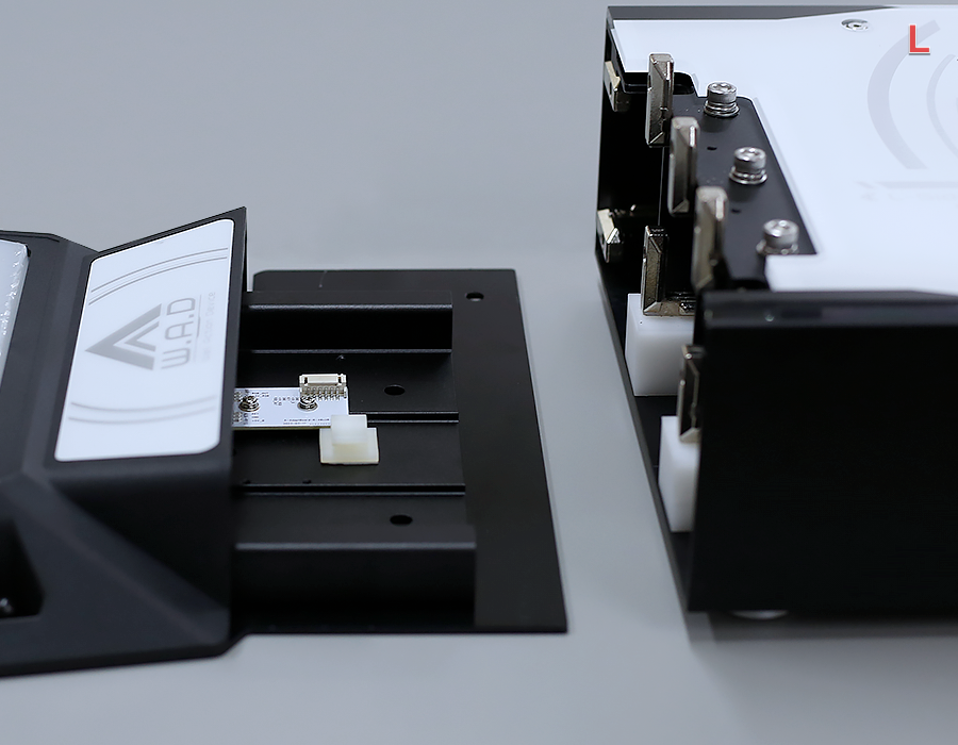
Take Out the Main Unit
Take out the main unit, place it in a convenient place for operation, and place the L and R side buttons on the corresponding sides.
Assemble R Side Button
Assemble the R side button.
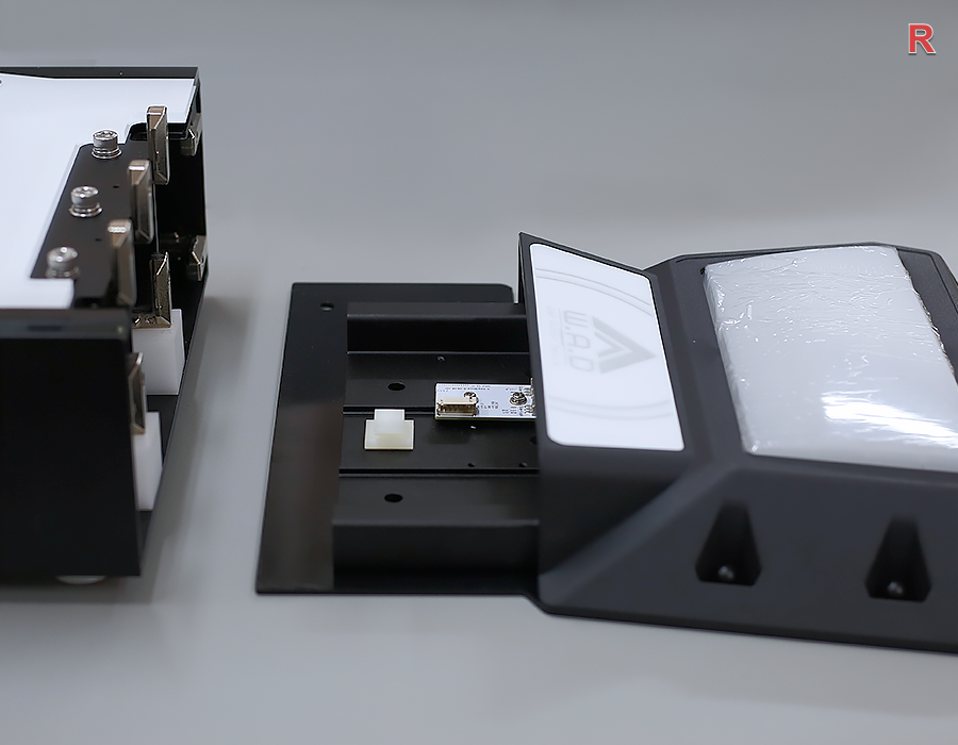
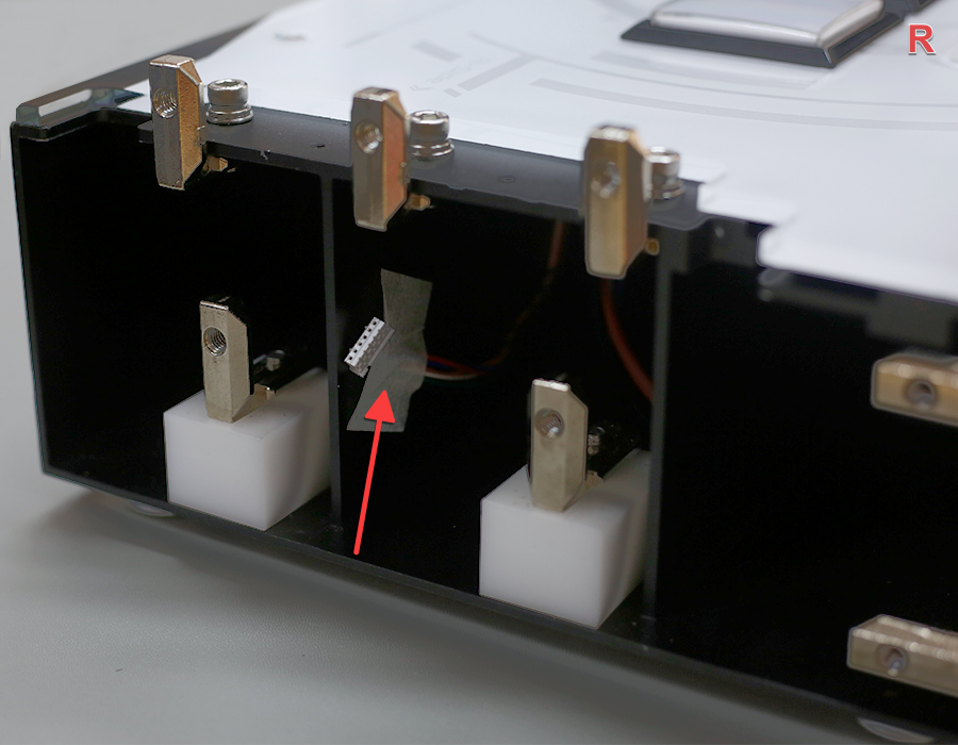
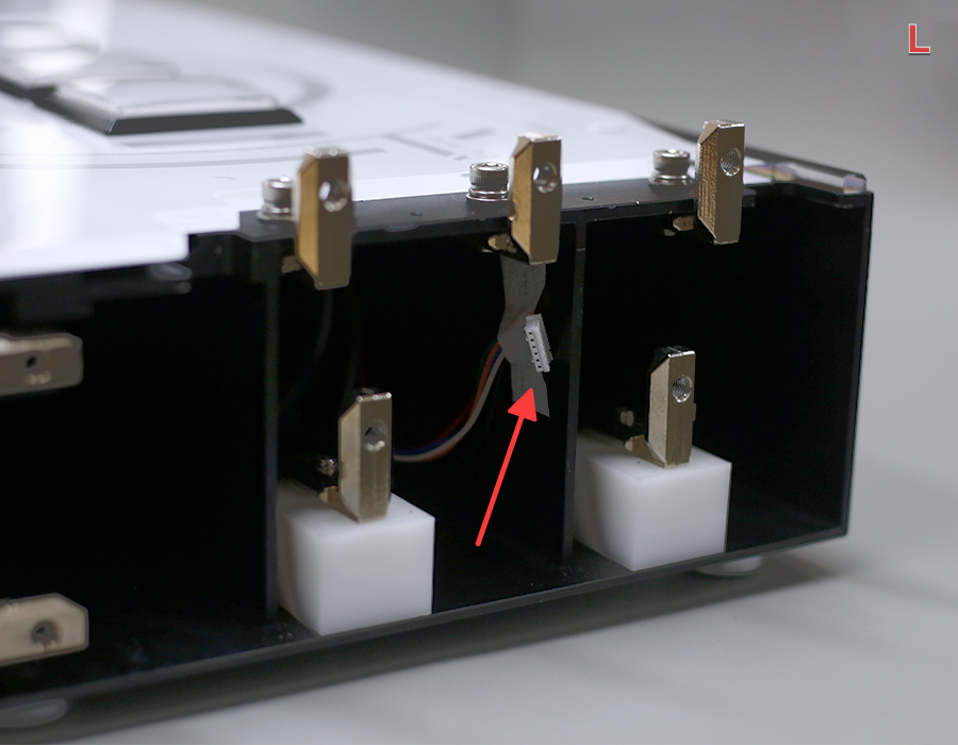
Locate Right Connector
From the side, you can see that the right plug is pasted with paper tape on the side of the main body.
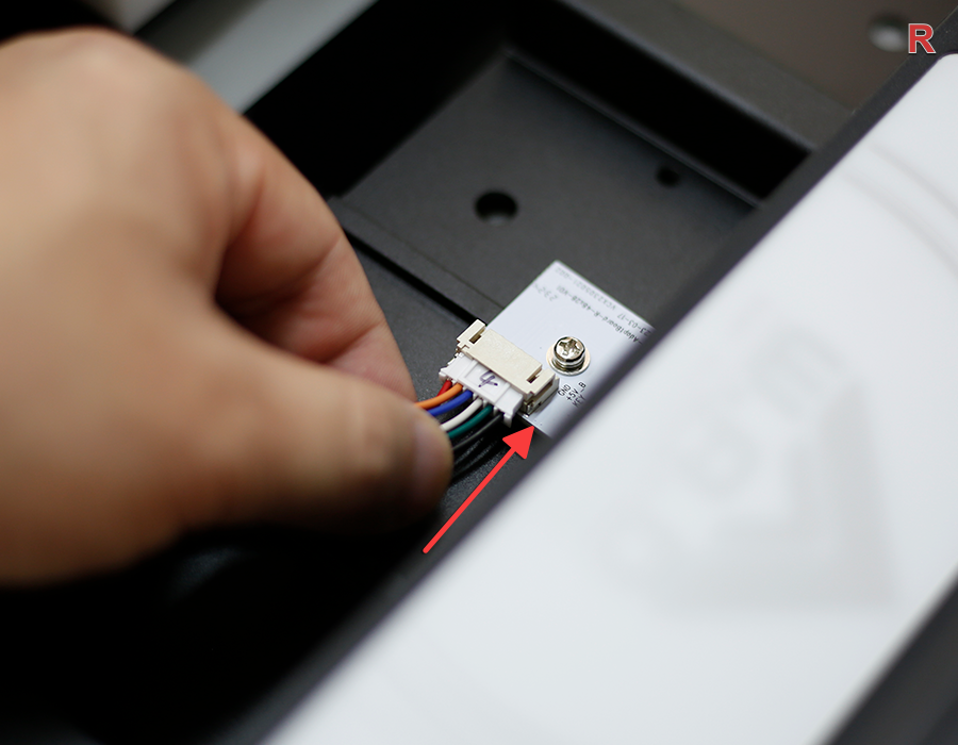
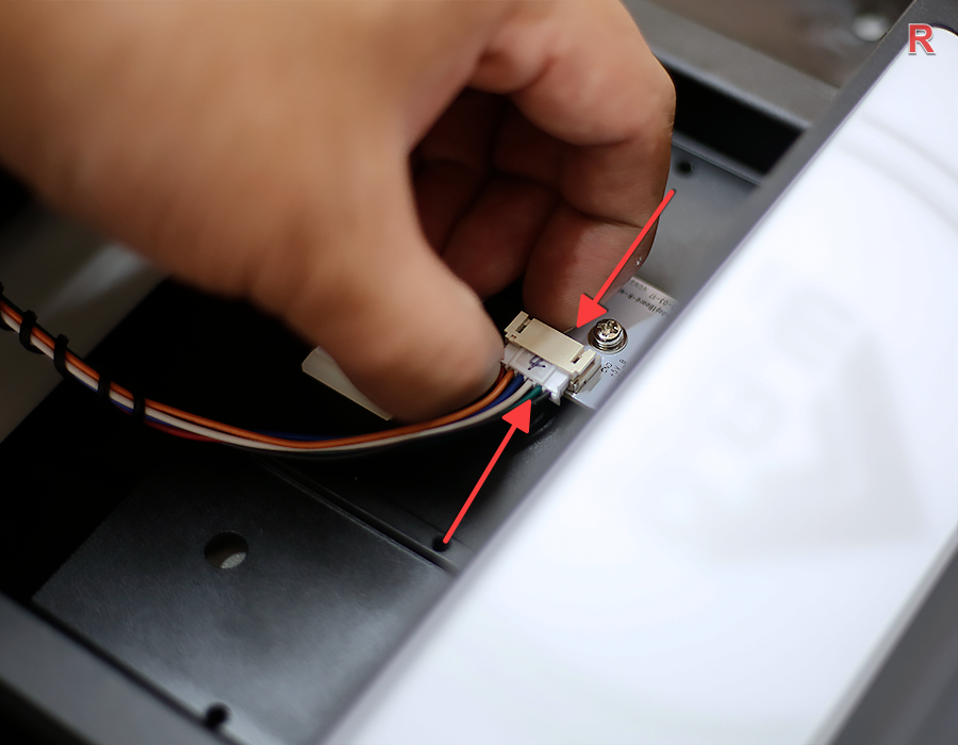
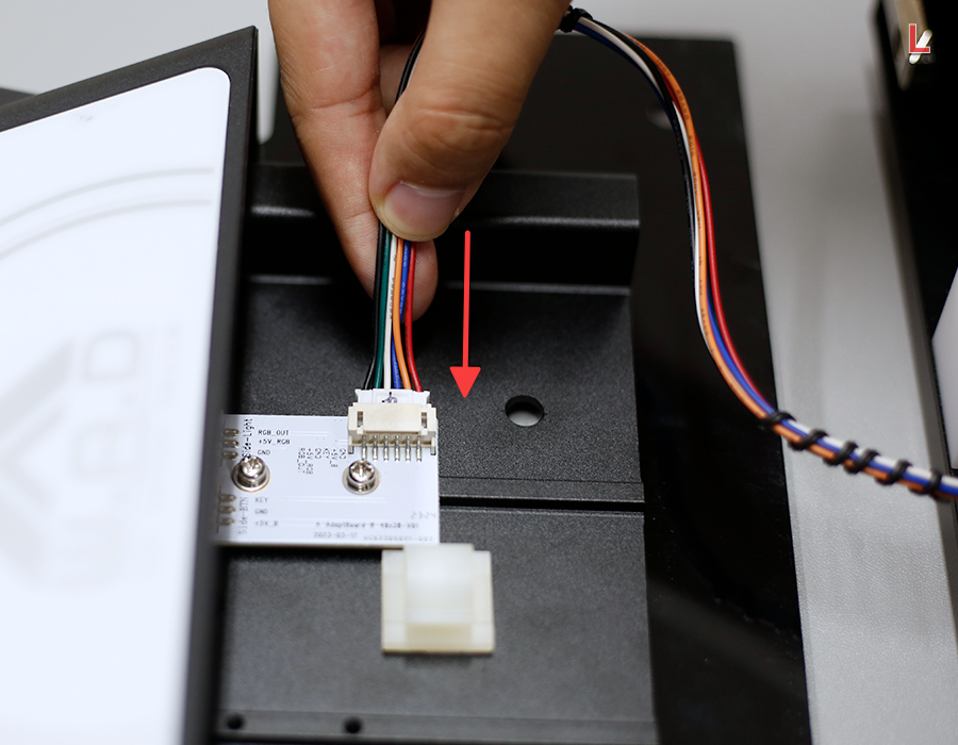
Connect Right Cable
Tear off the tape, gently pull the connector (remember not to pull with force), and insert the plug (the plug has a correct orientation — do not force it in).
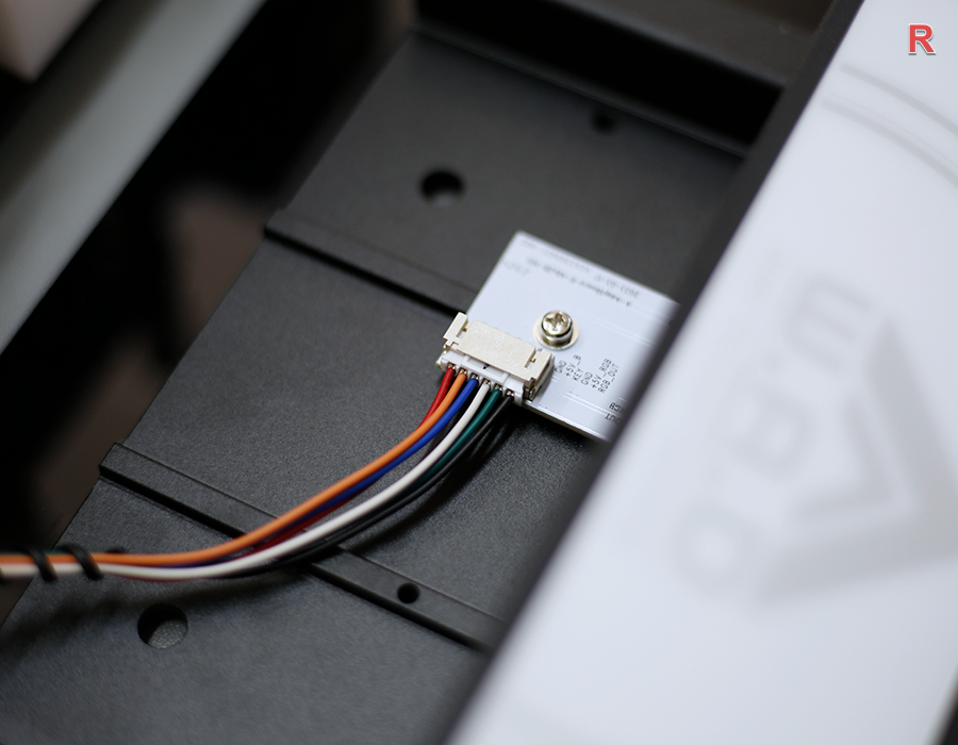
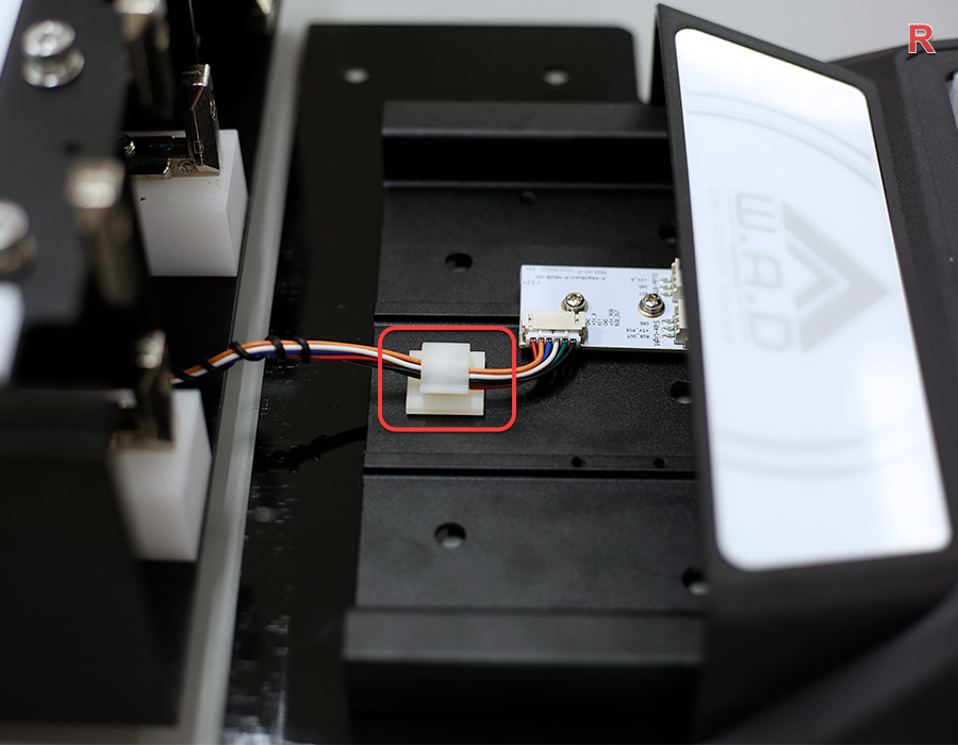
Confirm Connection
The wire is plugged in as shown in the picture.
Secure the Cable
Secure the wire in the clamp as shown.
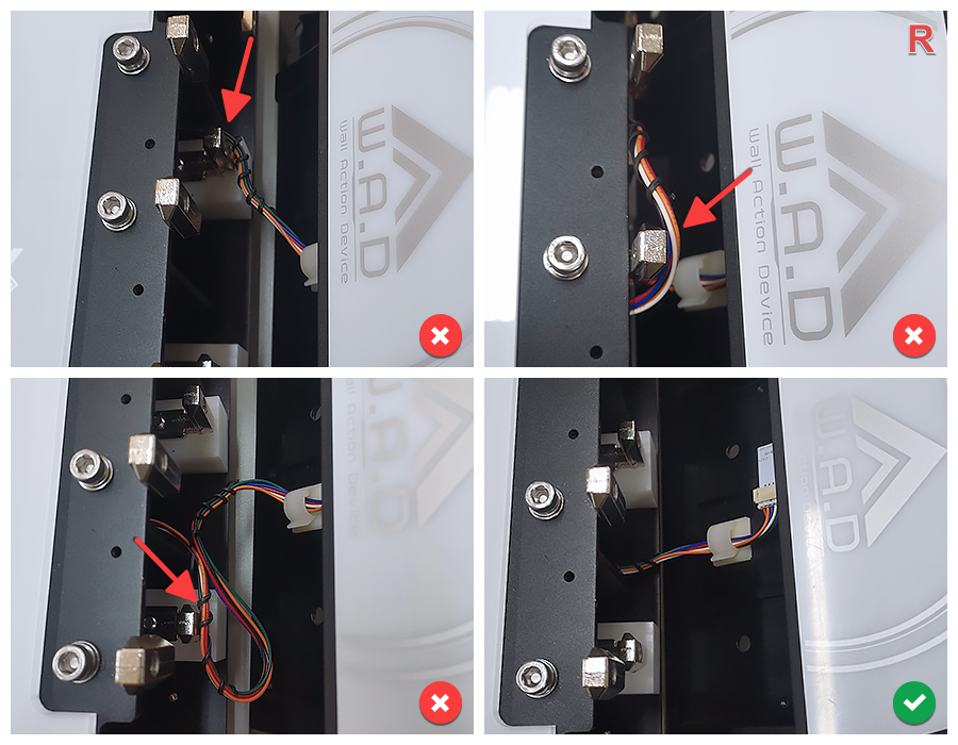
Close R Side Button
Assemble the R side button.
ImportantDuring the closing process, do not press the wire to the iron position. If you find it difficult to install smoothly, check the wire routing.
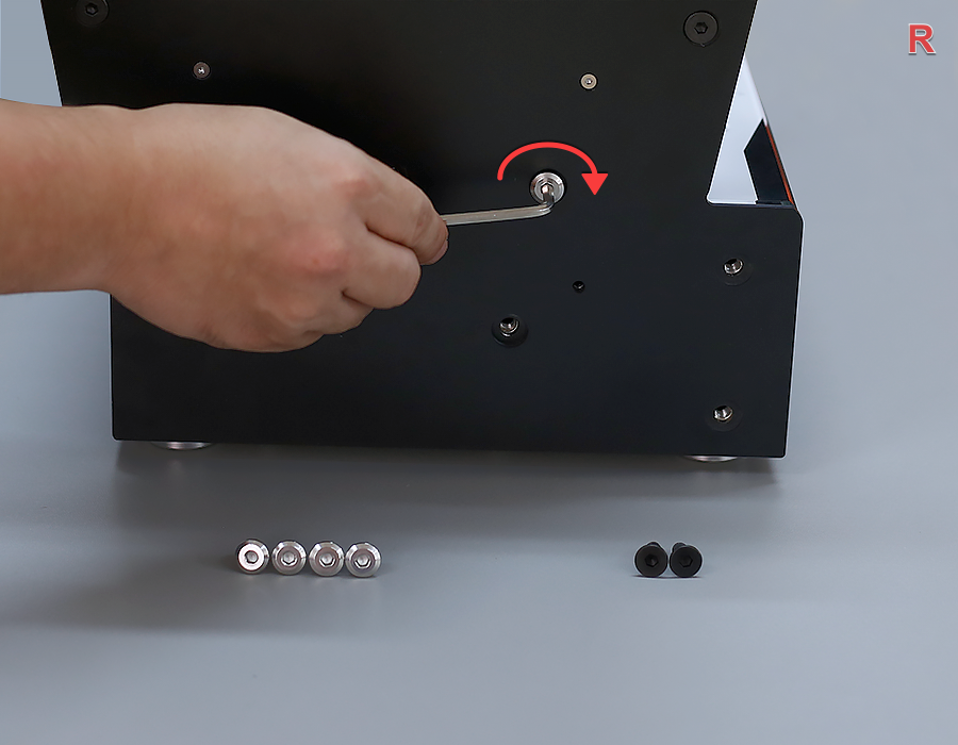
Fix R Side Outer Screw
Use tool D (4mm) to fix the screw on the R side.
warningThere is a risk of tipping if the screws are not fastened!
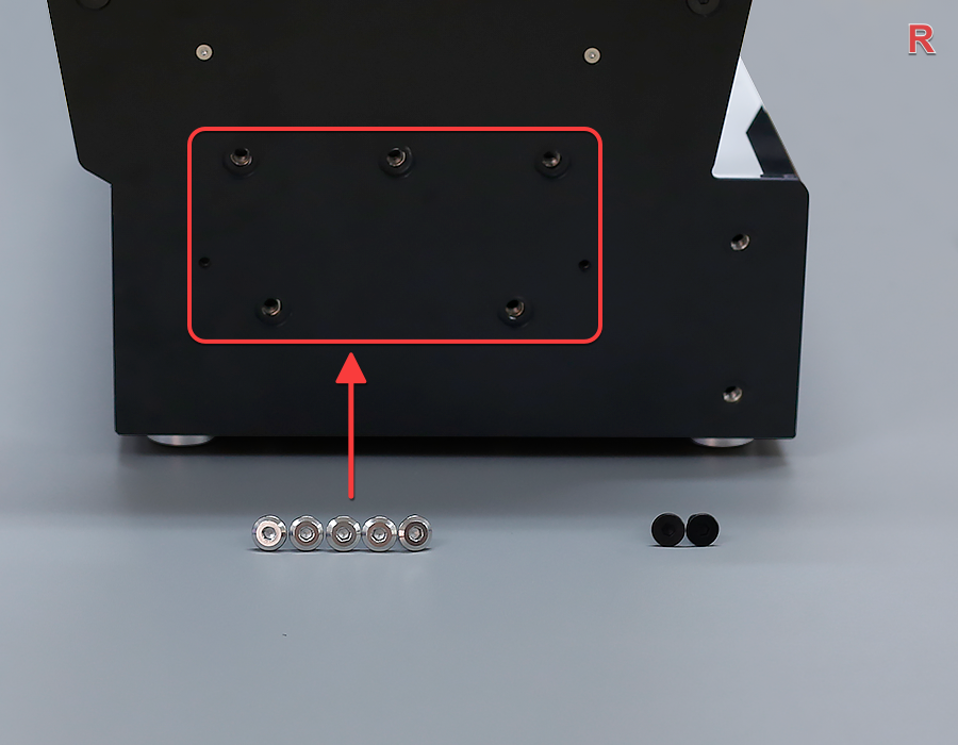
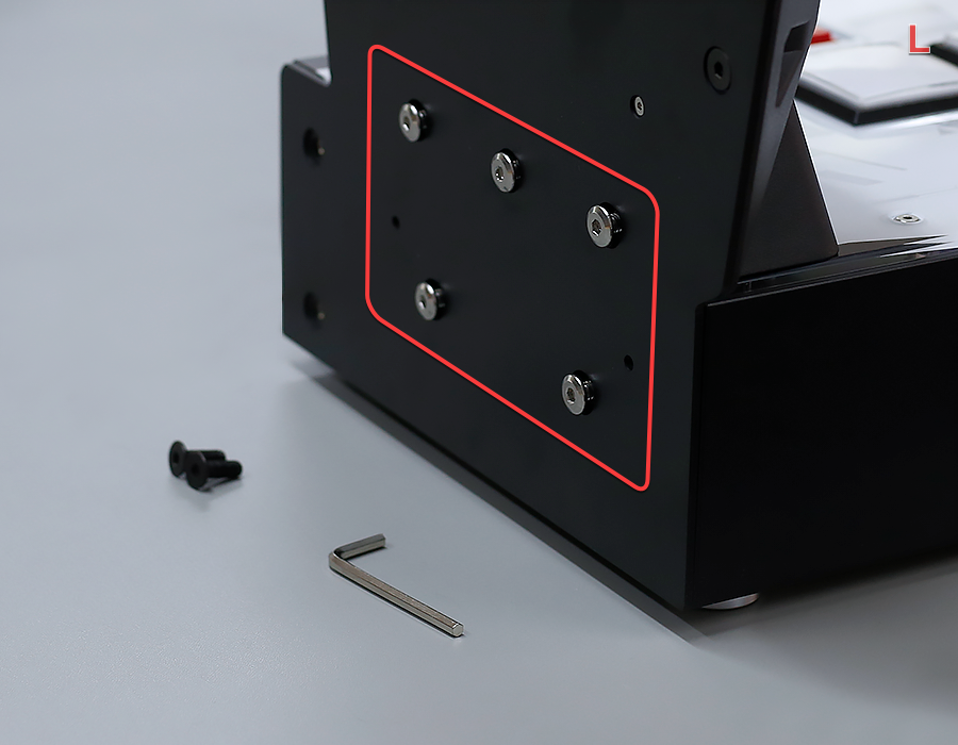
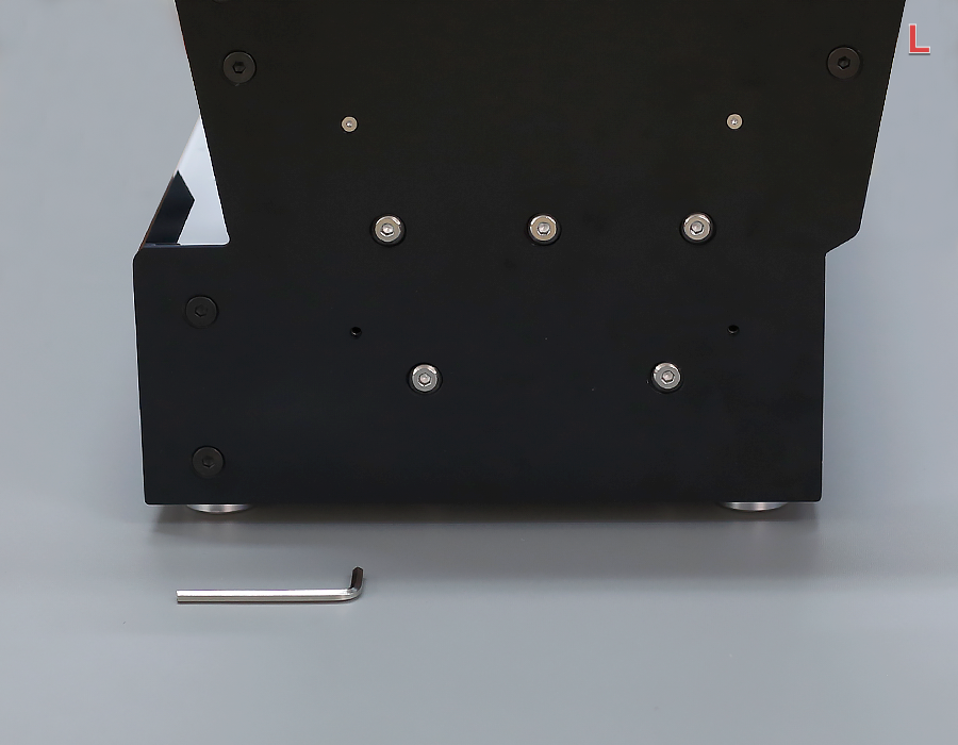
Pre-tighten 5 Silver A Screws
First, pre-tighten the 5 silver A screws. Do not tighten them completely to ensure that the side buttons can still move.
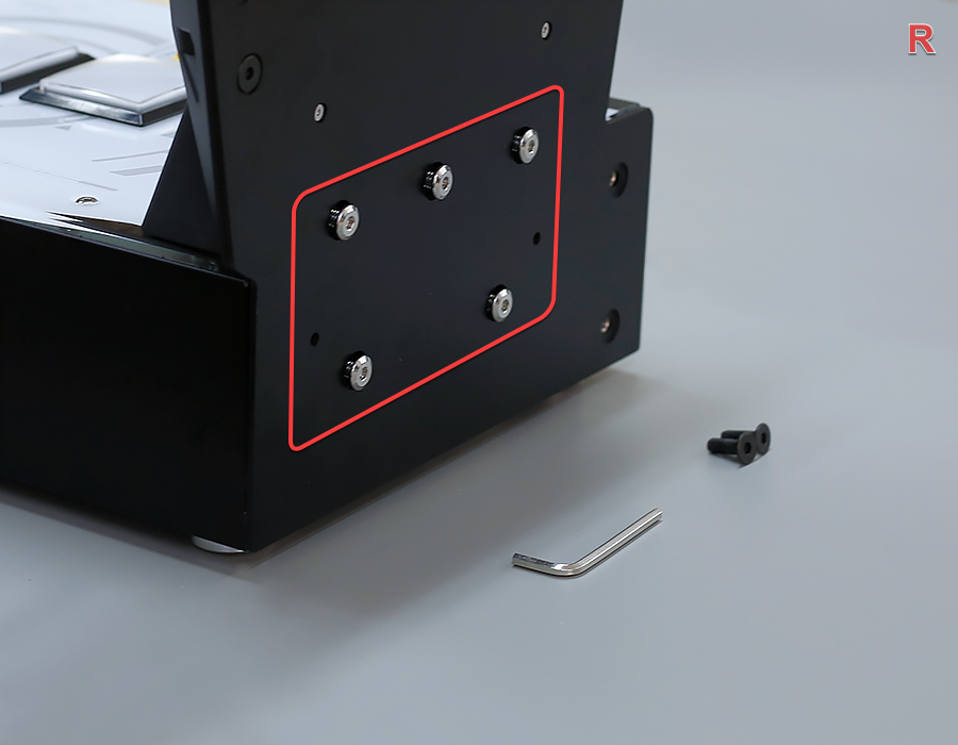
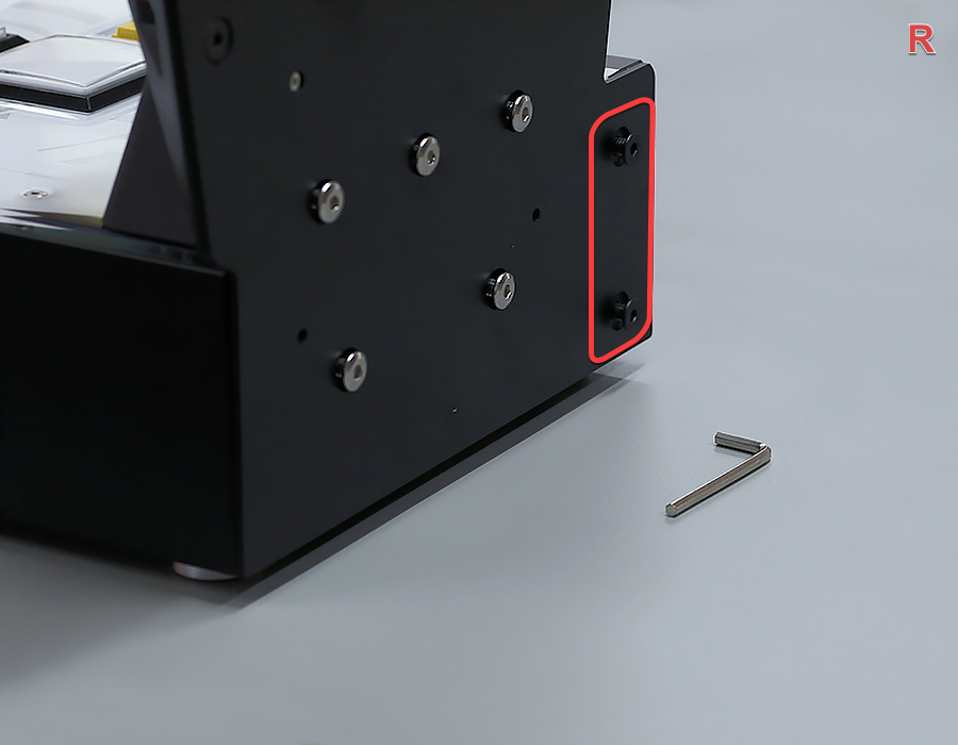
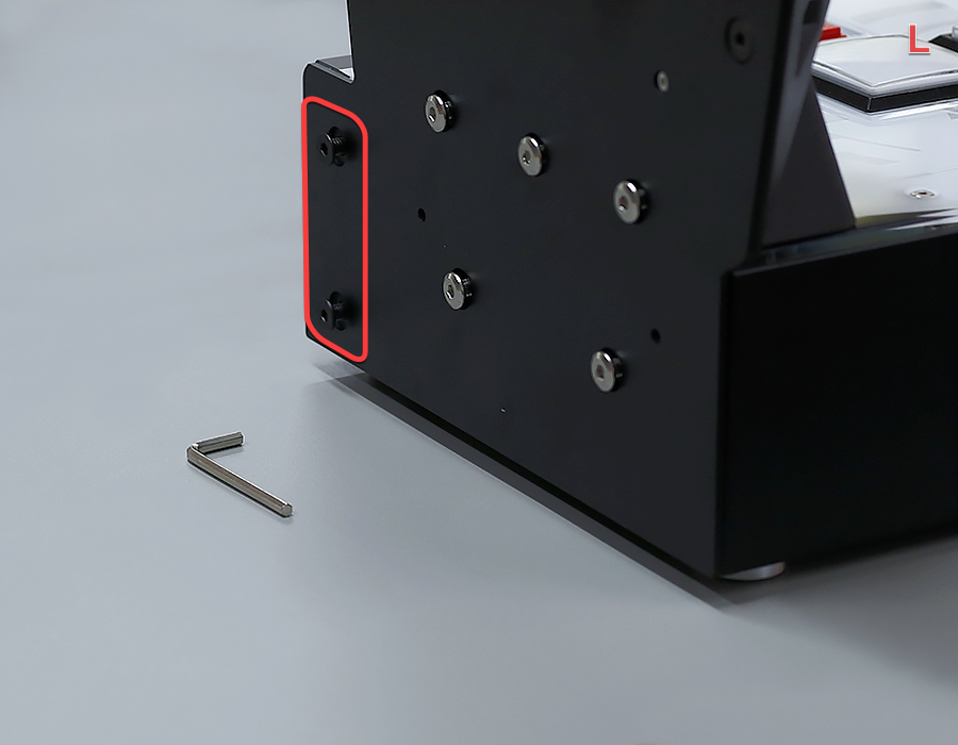
Pre-tighten 2 Black B Screws
Then, pre-tighten the 2 black B screws. Do not tighten them completely to ensure that the side buttons can still move.
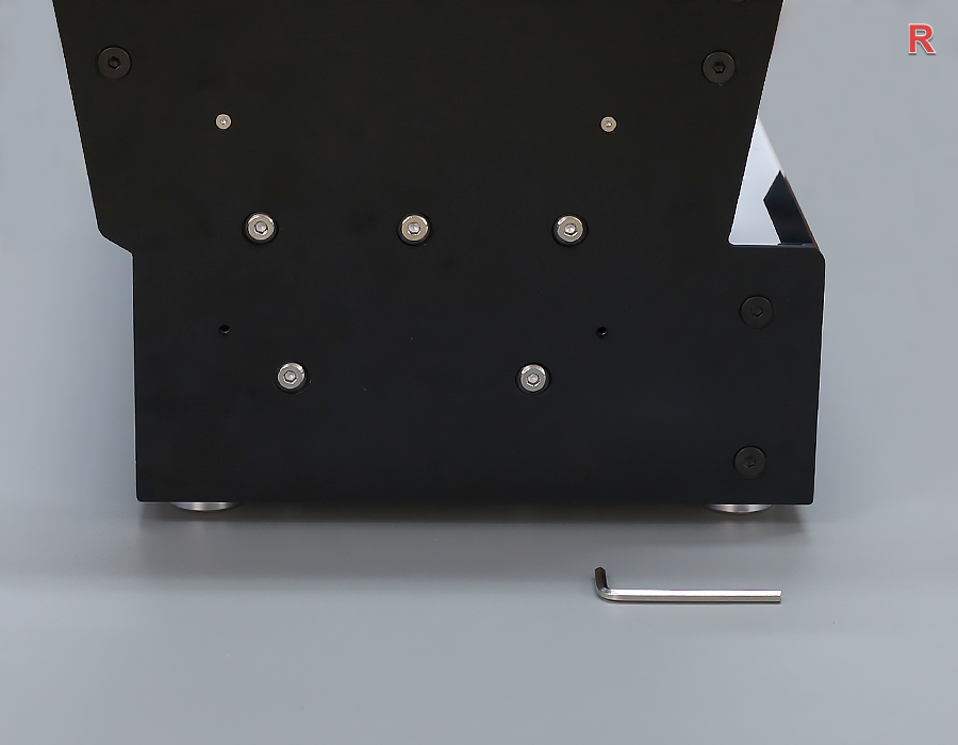
Fully Tighten 7 Screws
Then, completely tighten the 7 screws as shown in the picture.
Attach R Panel (Pre-tighten)
Cover the R side panel, use tool C (2.5mm) to fix the screws, first pre-tighten 4 screws, do not tighten them completely.
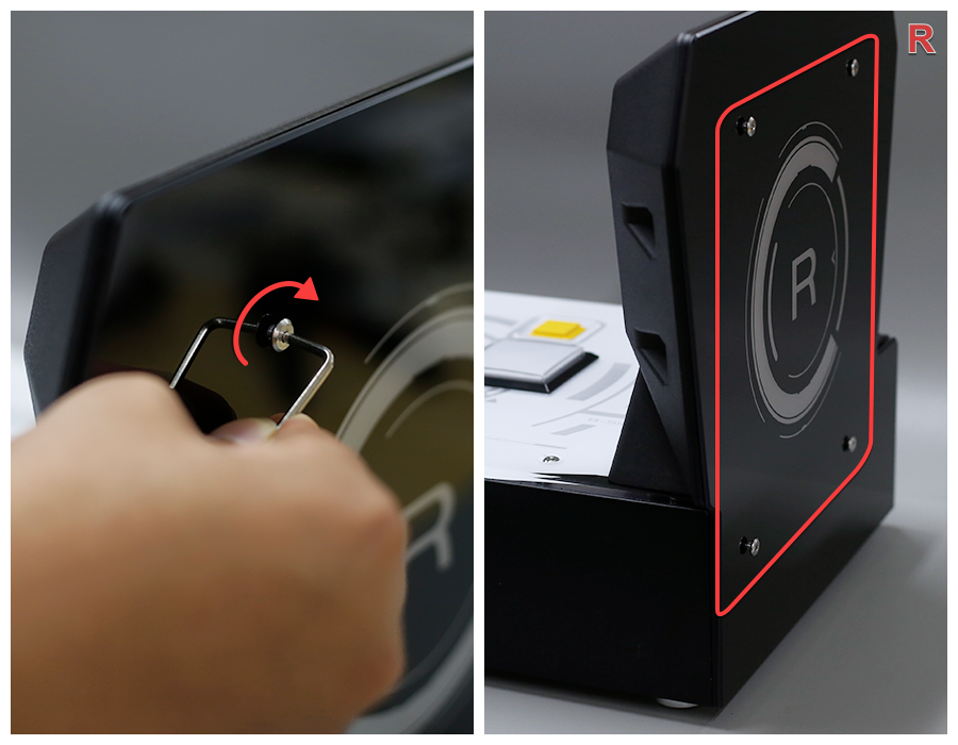
Fully Tighten R Panel Screws
Then, tighten the 4 screws as shown.
Assemble L Side Button
Assemble the L side button.
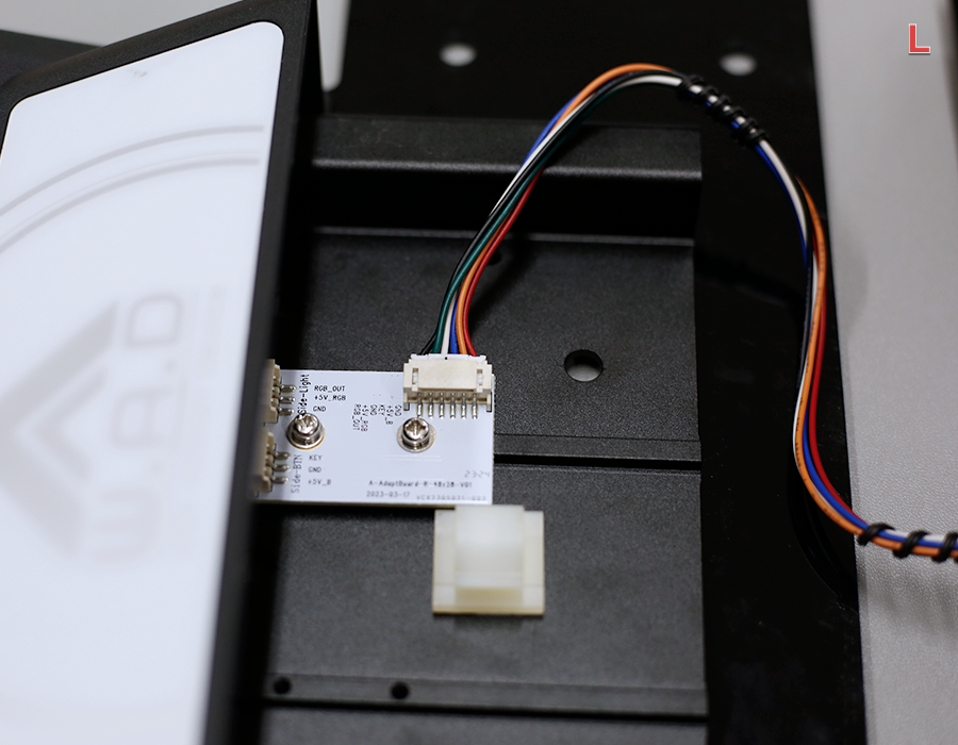
Locate Left Connector
From the side, you can see that the left plug is pasted with paper tape on the side of the main body.
Connect Left Cable
Tear off the tape, gently pull the connector (remember not to pull with force), and insert the plug (the plug has a correct orientation — do not force it in).
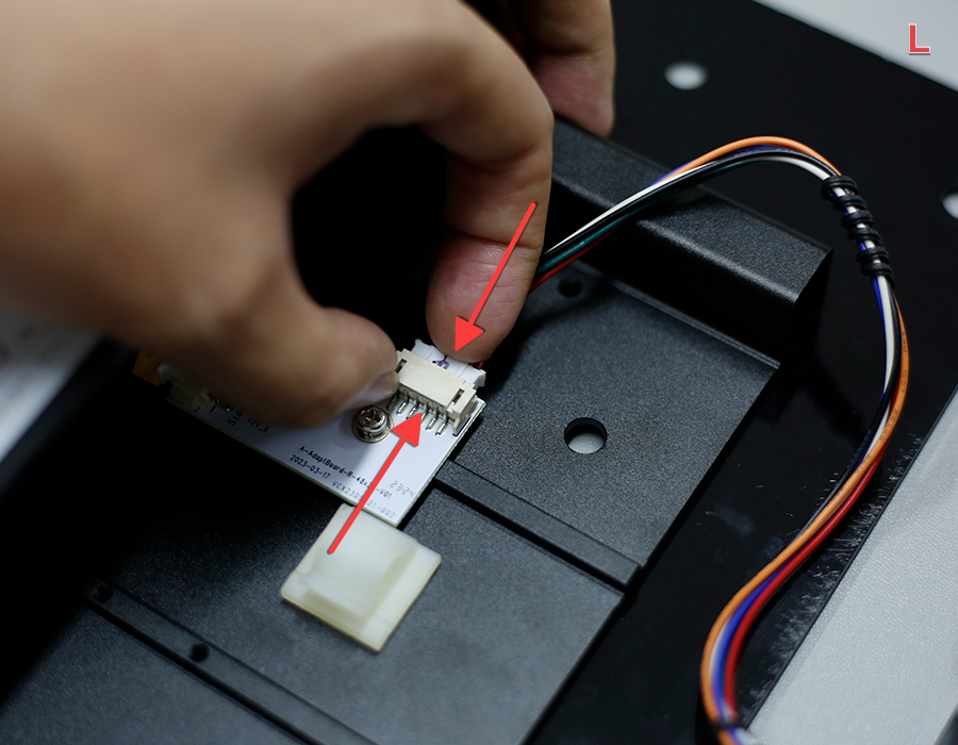
Confirm Left Connection
The wire is plugged in as shown in the picture.
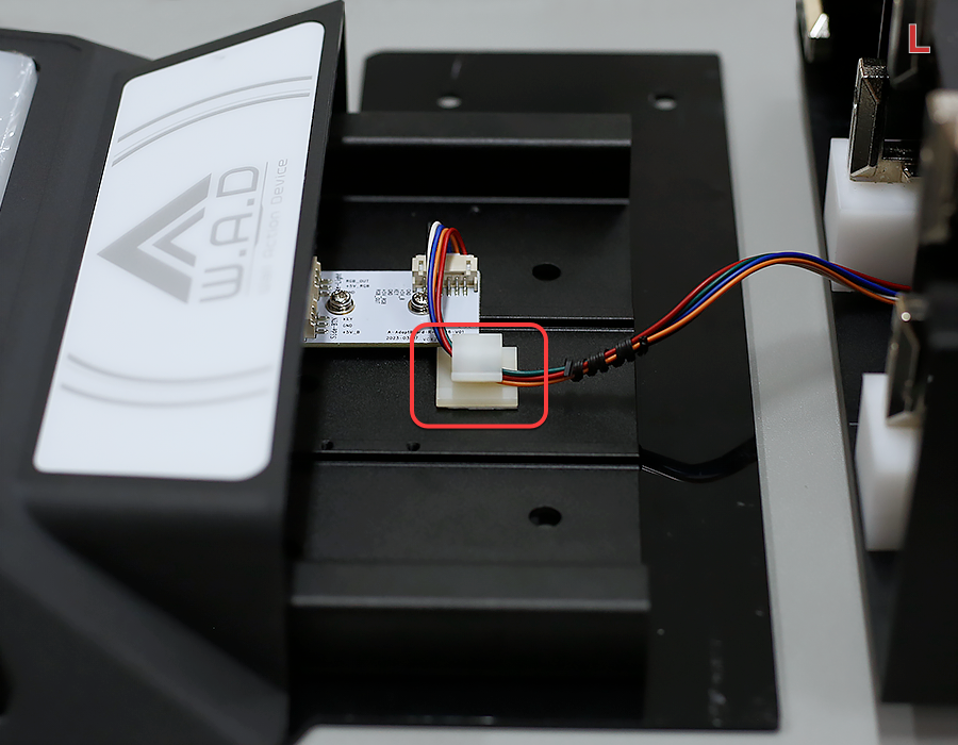
Secure the Left Cable
Secure the wire in the clamp as shown.
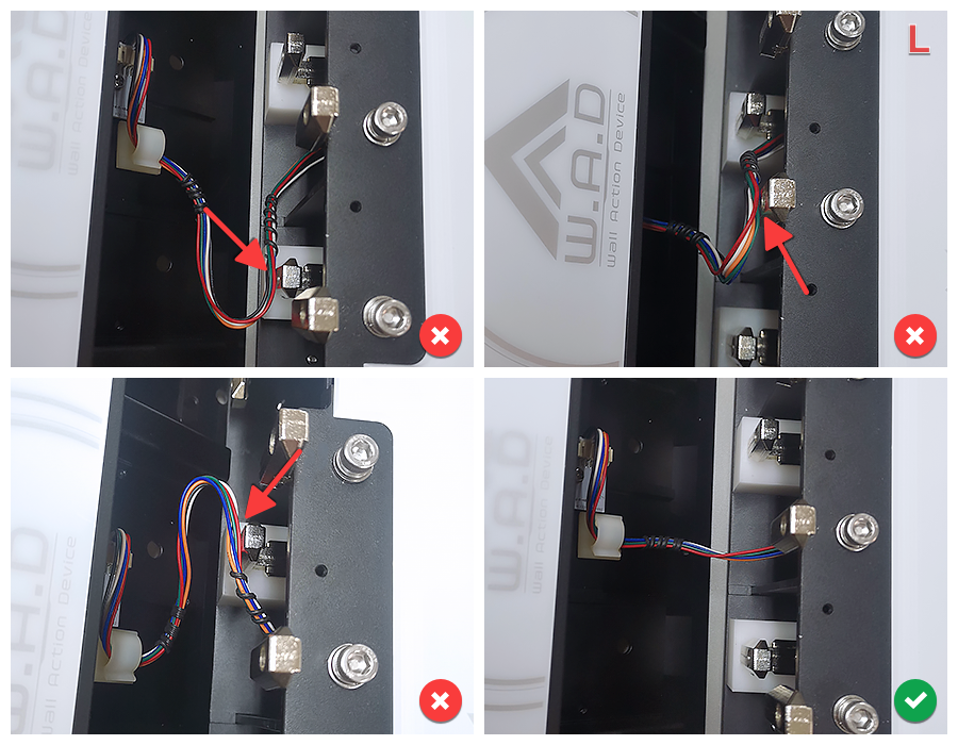
Close L Side Button
Assemble the L side button.
ImportantDuring the closing process, do not press the wire to the iron position. If you find it difficult to install smoothly, check the wire routing.
Fix L Side Outer Screw
Use tool D (4mm) to fix the screw on the L side.
warningThere is a risk of tipping if the screws are not fastened!
Pre-tighten Left 5 A Screws
First, pre-tighten the 5 silver A screws. Do not tighten them completely to ensure that the side buttons can still move.
Pre-tighten Left 2 B Screws
Then, pre-tighten the 2 black B screws. Do not tighten them completely to ensure that the side buttons can still move.
Fully Tighten Left 7 Screws
Then, completely tighten the 7 screws as shown in the picture.
Attach L Panel (Pre-tighten)
Cover the L side panel, use tool C (2.5mm) to fix the screws, first pre-tighten 4 screws, do not tighten them completely.
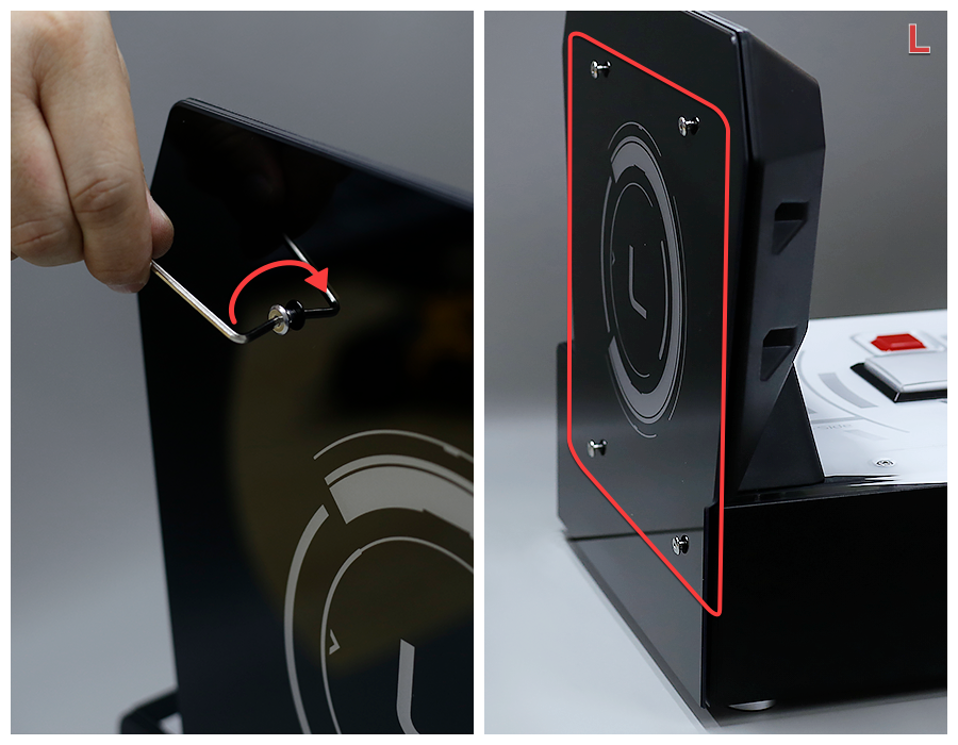
Fully Tighten L Panel Screws
Then, tighten the 4 screws as shown.
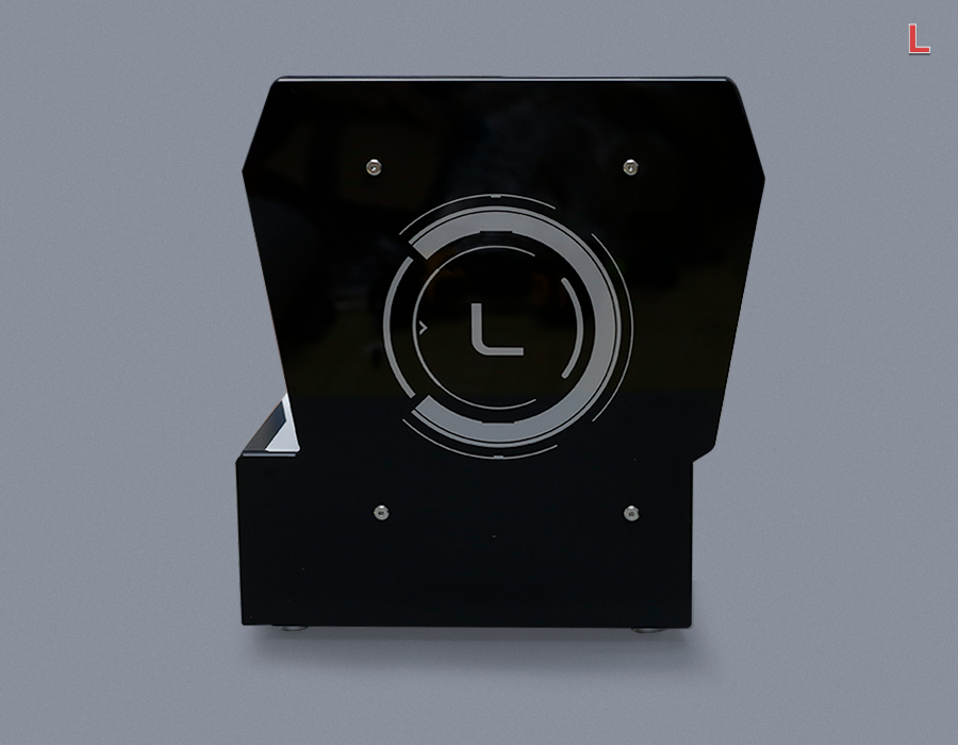
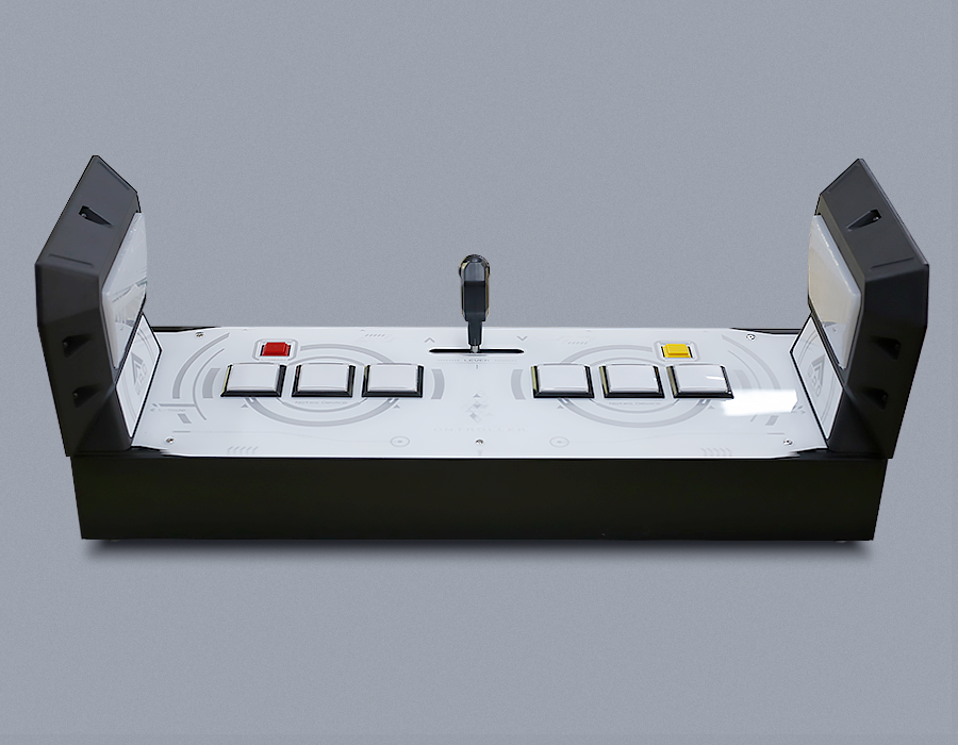
Assembly Complete
The assembly is complete and the finished product is as shown in the picture.